
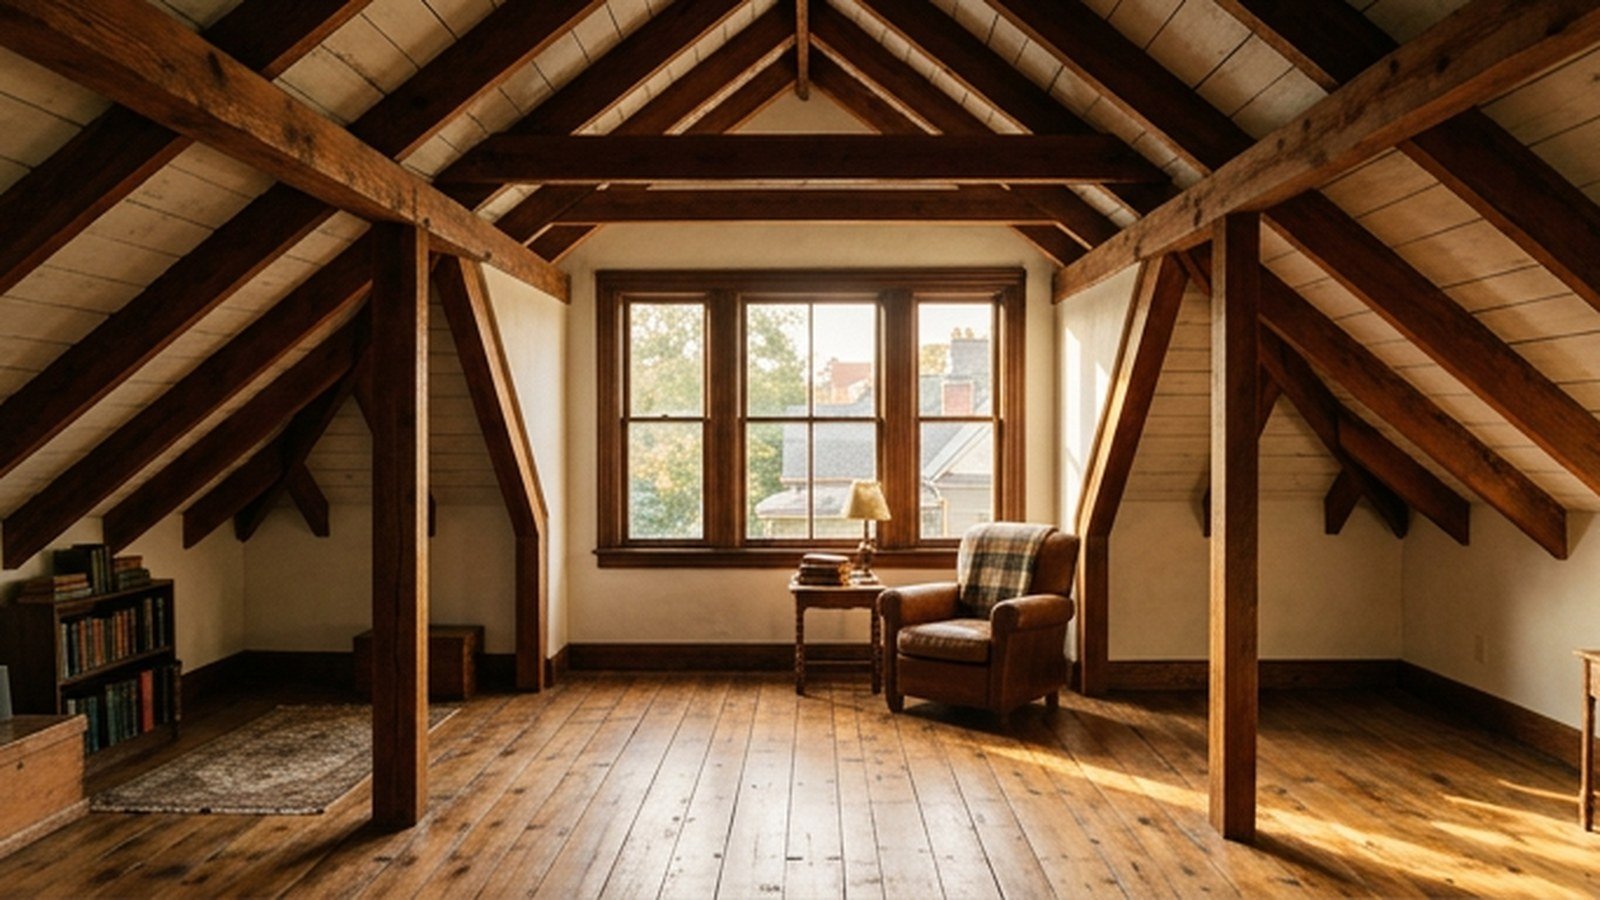
Historic preservation ideas for renovating a Victorian attic focus on retaining original architectural details, exposed beams, dormer windows, and period trim, while quietly upgrading insulation, wiring, and structural support to make the space genuinely usable today. This balance between preserving character and improving function is what separates a respectful renovation from one that strips a Victorian home of its historic identity. Fifteen concepts below cover the structural, aesthetic, and practical choices that guide this kind of renovation.
I worked through my own Victorian attic renovation over eighteen months, and the single biggest lesson was that preservation and modernization are not opposing goals, they simply require sequencing the work correctly so structural and mechanical upgrades happen before any cosmetic restoration begins. Rushing into restoring original plaster or trim before addressing insulation or wiring often means redoing that cosmetic work later once the mechanical systems get addressed properly.
Below you will find fifteen numbered concepts covering structural preservation, period details, and modern upgrades, plus a cost comparison table and a rundown of the mistakes that compromise a Victorian attic’s historic character. Each idea includes a sub-angle on cost, permitting, or what commonly goes wrong so you can plan the renovation with a realistic budget. By the end you should know exactly which original features are worth preserving and which upgrades genuinely improve the space without undermining its history.
Why Historic Preservation Matters In A Victorian Attic Renovation
Victorian attics often contain original architectural details, exposed hand-hewn beams, decorative dormer windows, or period-appropriate trim, that cannot be replicated authentically once removed, making preservation a genuinely irreversible decision in many cases. This irreversibility is part of why preservation-minded renovation approaches this space more cautiously than a typical attic conversion in a newer home. Most historic preservation specialists consider the attic one of the more overlooked spaces in terms of its potential historic value.
Preserving these original elements also often adds genuine resale value in markets where buyers specifically seek authentic period homes, distinguishing a well-preserved Victorian attic from a generic finished space that could exist in any era of home. This market distinction is a practical, not purely sentimental, reason to prioritize preservation throughout the renovation process. Understanding this value proposition helps justify the additional care and cost preservation-minded work typically requires.
| Renovation Approach | Historic Value Retained | Typical Cost Difference |
|---|---|---|
| Full preservation renovation | High | 20 to 40 percent more |
| Partial preservation | Moderate | 10 to 20 percent more |
| Full modern conversion | Low | Baseline cost |
A complete historic preservation renovation of a Victorian attic, covering structural, insulation, and cosmetic restoration work, typically costs $15,000 to $60,000 depending on the attic’s size and how much original detail requires restoration versus replacement. This range reflects the genuinely wide variation in Victorian attic conditions, since some homes retain excellent original material while others require considerably more extensive restoration work. Understanding this helps set realistic budget expectations before beginning any planning.
Planning Your Attic Renovation To Protect Historic Elements
Planning starts with a thorough assessment of the attic’s existing original features, conducted ideally by a historic preservation specialist rather than a general contractor unfamiliar with period-appropriate restoration techniques. This assessment identifies which elements are structurally sound and worth preserving versus which have deteriorated beyond reasonable restoration and may require careful, period-appropriate replacement.
Sequencing the work correctly, structural and mechanical upgrades first, then cosmetic restoration, protects the investment in period details from being damaged or needing rework during later construction phases. This sequencing principle, discussed in the introduction, is worth treating as a firm rule rather than a loose guideline throughout the entire project. Most experienced preservation contractors follow this sequence as standard practice specifically to avoid this costly rework.
The biggest planning mistake is assuming all original materials are worth preserving regardless of condition, when some genuinely deteriorated elements, particularly water-damaged wood or severely compromised plaster, may pose safety risks that outweigh their historic value. Consulting with a structural engineer alongside a preservation specialist helps distinguish between elements worth restoring and those requiring careful, documented replacement.
Working With Local Historic Preservation Regulations
Many Victorian homes, particularly those in designated historic districts, fall under local preservation ordinances that regulate what changes can be made to visible exterior or sometimes interior elements, including attic dormers and windows. Researching your specific property’s historic designation status and any applicable regulations before beginning design work avoids costly redesigns forced by a preservation board’s rejection later in the process.
Working with a contractor experienced specifically in historic preservation projects, rather than general renovation work, considerably smooths the permitting and approval process in jurisdictions with active preservation oversight. This specialized experience often proves worth the potentially higher labor cost given how much smoother the approval process becomes with a contractor who understands the specific documentation and technique requirements.
1. Restoring Original Exposed Beams
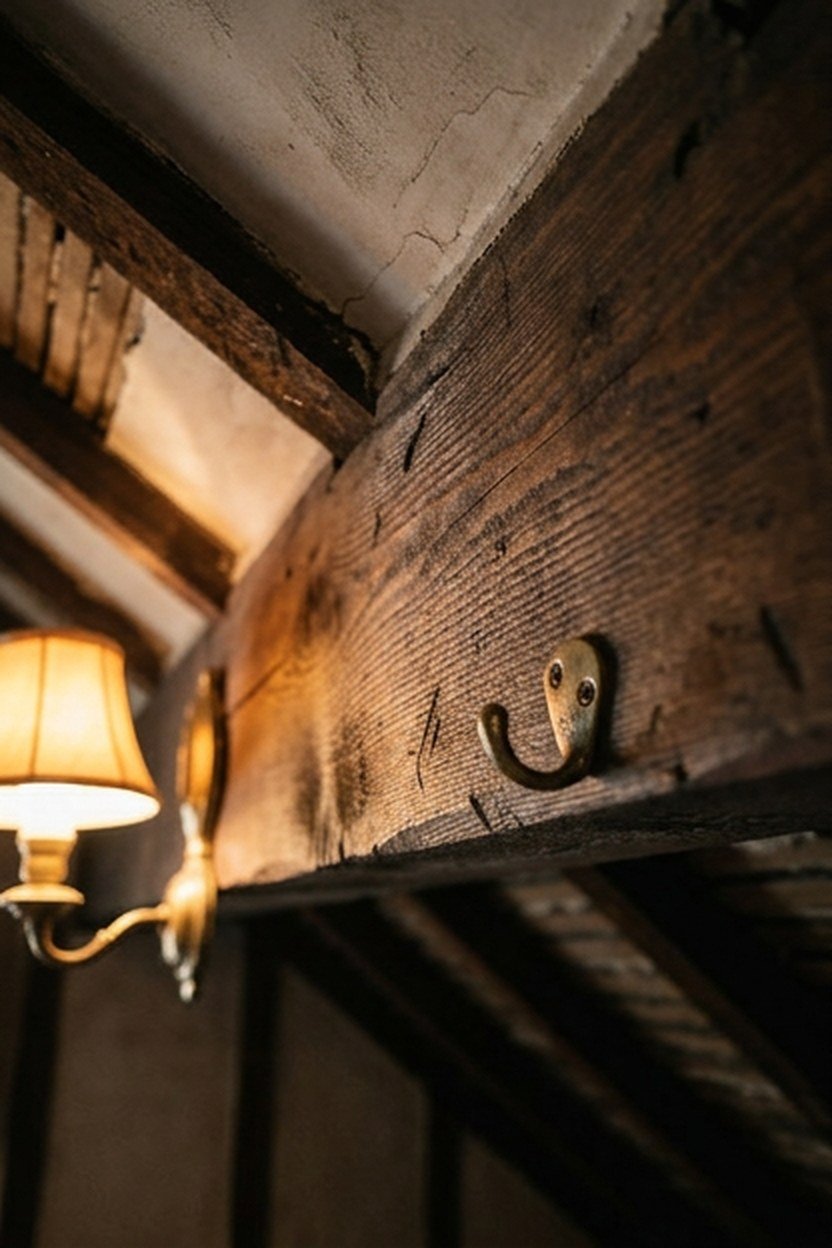
Restoring original exposed structural beams, cleaning, treating, and in some cases reinforcing them rather than covering them with modern drywall, preserves one of the most visually significant architectural features many Victorian attics retain. These beams, often hand-hewn or rough-sawn, carry a texture and character that new lumber cannot replicate even with careful staining or finishing techniques.
Cleaning beams with appropriate methods for their specific wood type and finish, avoiding harsh chemical strippers that can damage the wood’s surface or any remaining historic finish, requires research specific to the beam’s age and material. Consulting with a wood restoration specialist before beginning any cleaning process protects against irreversible damage to material that cannot be replaced authentically.
Reinforcing structurally compromised beams with hidden steel supports, rather than fully replacing them, preserves the original material’s visible presence while still achieving the structural integrity a modern renovation requires. This reinforcement technique, common in preservation work, allows genuinely damaged beams to remain functional and visible rather than requiring full replacement.
Cost And Restoration Guidance
Restoring original exposed beams typically costs $2,000 to $8,000 depending on the beam count, condition, and whether structural reinforcement is required alongside cosmetic cleaning. Hiring a specialist experienced specifically in historic wood restoration, rather than a general contractor, ensures the cleaning and treatment methods used are appropriate for the beam’s specific age and material.
A common mistake is applying a modern polyurethane finish to historic beams, which can trap moisture and cause long-term wood damage compared to a traditional oil-based or wax finish more appropriate for older wood. Consulting with a restoration specialist about the appropriate finish for your specific beam material avoids this well-intentioned but potentially damaging mistake.
2. Preserving And Restoring Dormer Windows
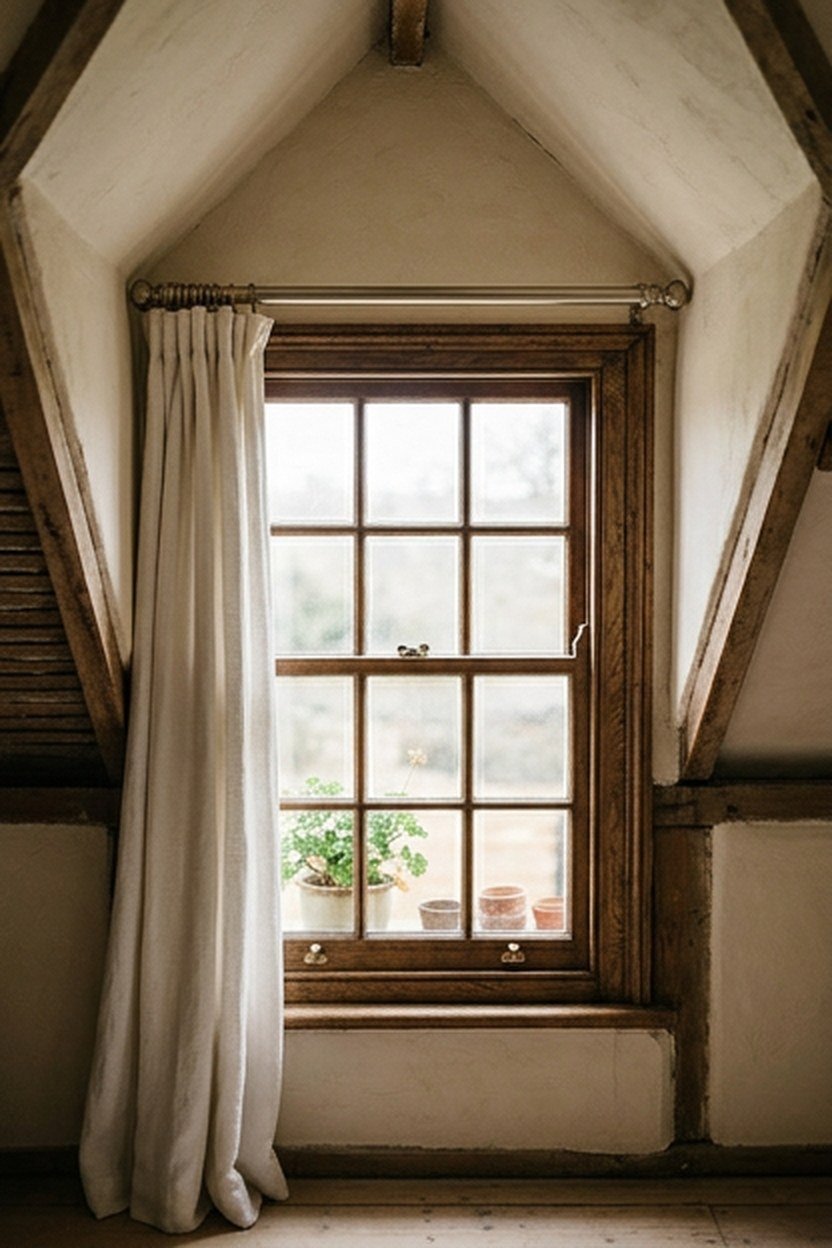
Preserving and restoring original dormer windows, rather than replacing them with modern vinyl alternatives, retains one of the Victorian attic’s most character-defining architectural features while still allowing for improved energy efficiency through careful restoration techniques. Original wood windows, when properly restored, can achieve energy performance comparable to modern replacements through weatherstripping and storm window additions.
Repairing original window glazing and reglazing where needed, rather than replacing entire window units, preserves the original glass, which often contains subtle imperfections and wavy characteristics that modern glass cannot replicate. This glazing restoration requires specific expertise most general contractors lack, making a window restoration specialist a worthwhile investment for this particular element.
Adding interior storm windows, rather than replacing the original exterior windows, provides meaningful energy efficiency improvement without altering the home’s historic exterior appearance. This approach satisfies both preservation goals and modern comfort requirements simultaneously. Most historic preservation boards favor this approach specifically because it protects the exterior historic appearance while still allowing genuine energy improvements.
Cost And Restoration Timeline
Restoring original dormer windows typically costs $500 to $2,000 per window depending on condition and the extent of glazing or frame repair required. Adding interior storm windows for energy efficiency adds a further $200 to $500 per window, a modest additional investment relative to the energy savings and historic preservation benefit provided.
A common mistake is attempting window restoration without proper lead paint precautions, since many Victorian-era windows were originally painted with lead-based paint that requires specific safety protocols during any sanding or scraping work. Hiring a contractor certified in lead-safe renovation practices protects both the workers and the household from genuine health hazards during this restoration process.
3. Adding Blown-In Insulation Without Disturbing Plaster
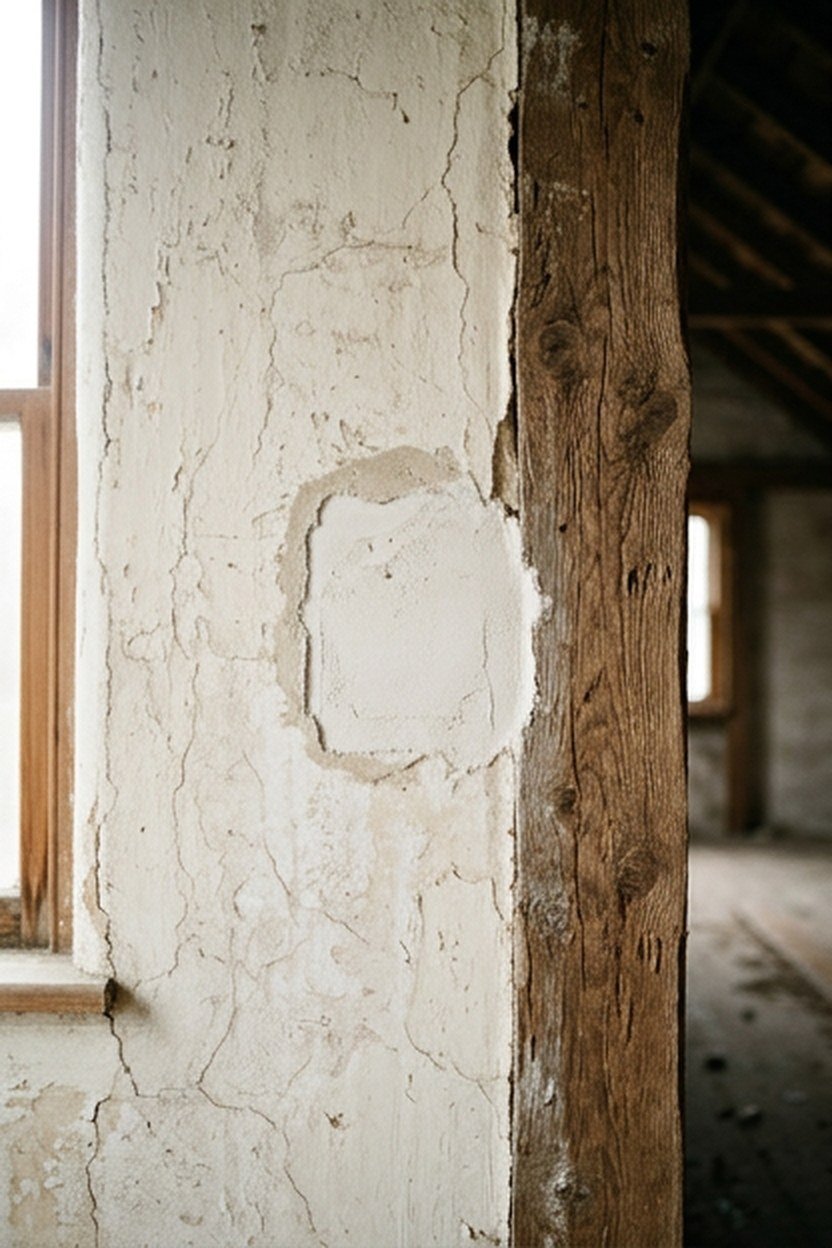
Adding blown-in insulation through small, carefully placed access holes, rather than removing original plaster walls or ceilings to access the wall cavities, dramatically improves the attic’s energy performance while preserving historic plaster surfaces that would be difficult or impossible to replicate authentically. This insulation method suits historic preservation specifically because it minimizes disruption to original finished surfaces.
Choosing an insulation contractor experienced specifically with historic homes, rather than standard new construction insulation work, ensures the access holes are placed thoughtfully and patched in a way that matches the surrounding original plaster texture. This specialized experience matters considerably for achieving a patch job invisible against the original surface.
Confirming the insulation material itself is appropriate for an older home’s wall assembly, since some modern insulation types can trap moisture against original wood framing in ways that cause long-term decay in a building system not originally designed for these materials. Consulting with a building science professional familiar with historic construction helps avoid this moisture-related risk.
Cost And Moisture Guidance
Blown-in insulation for a typical Victorian attic typically costs $1,500 to $4,000 depending on square footage and the insulation material chosen. Choosing a vapor-permeable insulation material, rather than one that fully seals moisture inside wall cavities, respects how older homes were originally designed to breathe and manage moisture differently than modern construction.
A common mistake is choosing the cheapest available insulation contractor without confirming their specific experience with historic homes, resulting in access holes placed carelessly or patched in a way that visibly mismatches the original plaster texture. Requesting examples of previous historic home insulation projects before hiring confirms the contractor’s relevant experience.
4. Preserving Original Wide-Plank Flooring
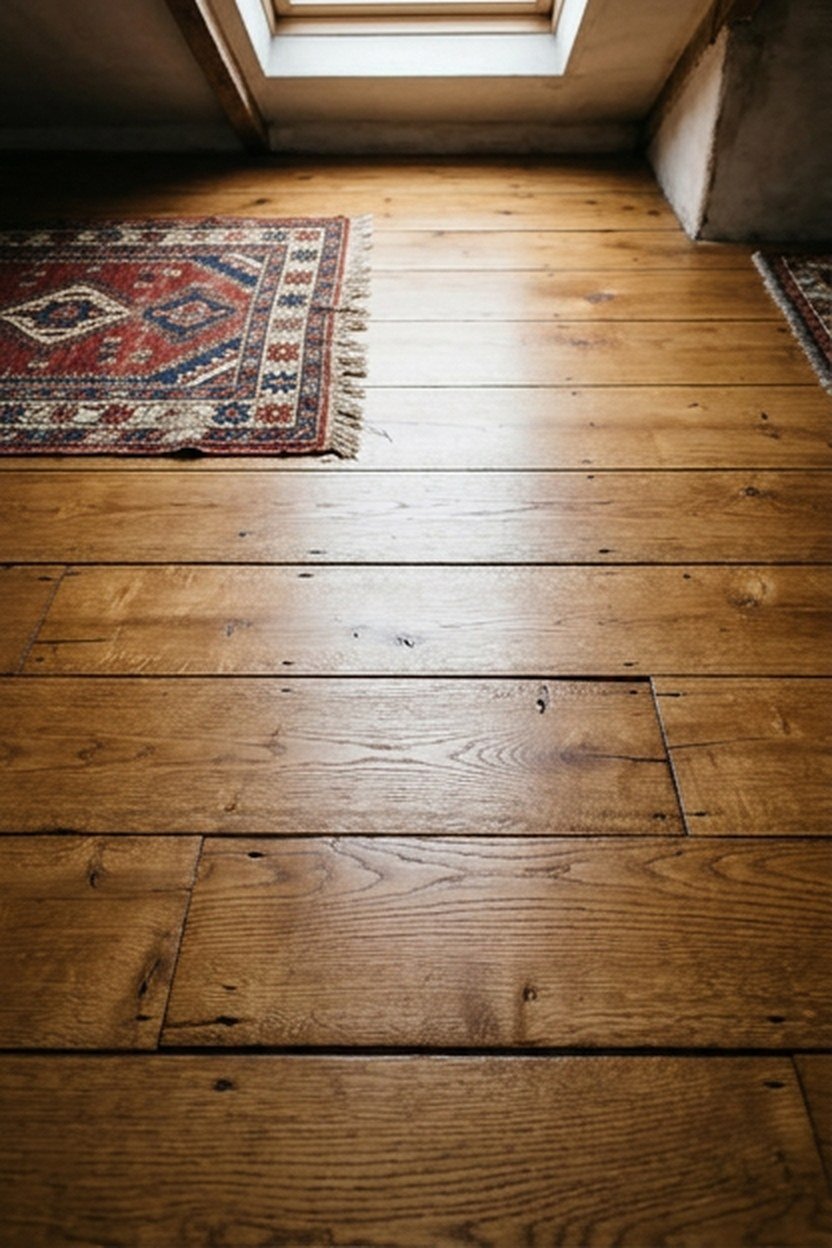
Preserving original wide-plank wood flooring, refinishing rather than replacing it, retains a genuinely irreplaceable material that modern milling techniques cannot easily replicate at the same width and character. This flooring often shows a patina and wear pattern that reflects the home’s actual history, a quality entirely lost with new flooring installation.
Sanding original flooring conservatively, removing only the minimum material necessary to expose fresh wood rather than aggressively sanding away the plank’s remaining thickness, preserves the flooring’s ability to be refinished again in future decades. This conservative approach requires more skill and patience from the flooring contractor than an aggressive, faster sanding job.
Filling gaps between original planks with appropriate traditional materials, rather than a modern caulk or filler that might not match the wood’s expansion and contraction characteristics over time, preserves the flooring’s long-term structural performance. This traditional filling technique requires specific expertise many general flooring contractors may not possess.
Cost And Sanding Guidance
Refinishing original wide-plank flooring typically costs $3 to $8 per square foot depending on condition and the extent of repair required before refinishing. Choosing a conservative sanding approach, even though it may require an additional pass to achieve the desired finish, preserves more of the plank’s original thickness for future refinishing cycles.
A common mistake is sanding original flooring too aggressively in an attempt to remove all visible wear and character in a single pass, resulting in flooring so thin it cannot be refinished again in the future without replacement. Discussing the desired final appearance honestly with your contractor, accepting some visible character and patina as part of the flooring’s authentic history, avoids this irreversible over-sanding mistake.
5. Restoring Original Decorative Millwork And Trim
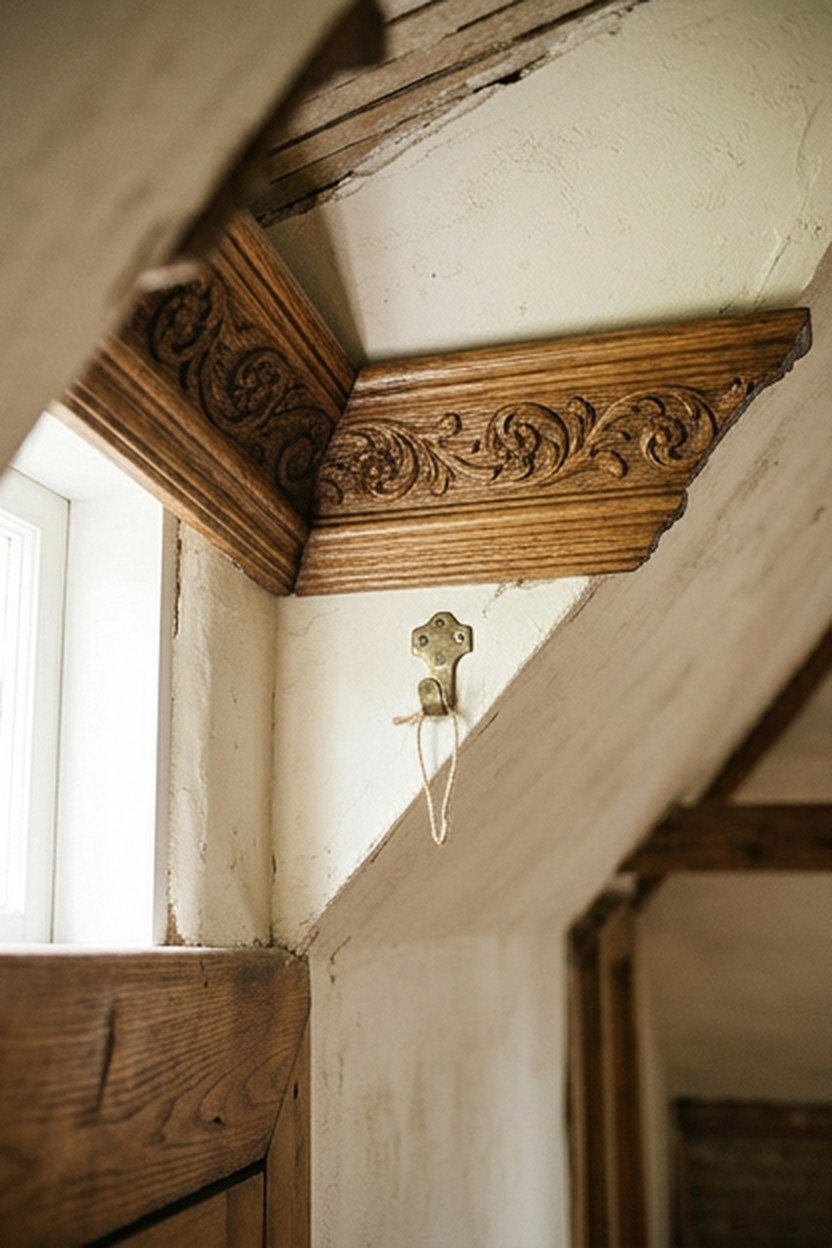
Restoring original decorative millwork, crown molding, baseboards, or window casings, rather than replacing it with modern reproduction trim, preserves details that often reflect specific regional or period craftsmanship techniques difficult to replicate exactly with modern manufacturing methods. This millwork restoration typically involves careful stripping of old paint layers, repair of any damaged sections, and refinishing to preserve the original profile and detail.
Documenting the original millwork profile before any restoration begins, through photographs or a physical template, ensures any necessary repairs or section replacements match the original design precisely. This documentation step is worth doing even for millwork that appears to be in generally good condition, since it protects against inconsistency if partial replacement becomes necessary later in the project.
Sourcing matching reproduction millwork for any sections requiring full replacement, rather than accepting a close but visibly different modern profile, requires working with a specialty millwork supplier experienced in historic reproduction work. This sourcing consideration matters considerably for maintaining visual consistency across the restored and replaced sections.
Cost And Documentation Guidance
Restoring original decorative millwork typically costs $10 to $30 per linear foot depending on the trim’s complexity and condition, with custom reproduction replacement running considerably higher for sections requiring full replacement. Documenting the original profile before restoration begins, a step discussed above, is worth doing regardless of the millwork’s apparent condition. This documentation protects against inconsistency throughout the entire restoration process.
A common mistake is stripping paint from historic millwork without proper lead paint safety precautions, similar to the window restoration concern discussed earlier in this guide. Hiring a lead-safe certified contractor for any millwork stripping work protects against this genuine health hazard.
6. Adding A Period-Appropriate Skylight
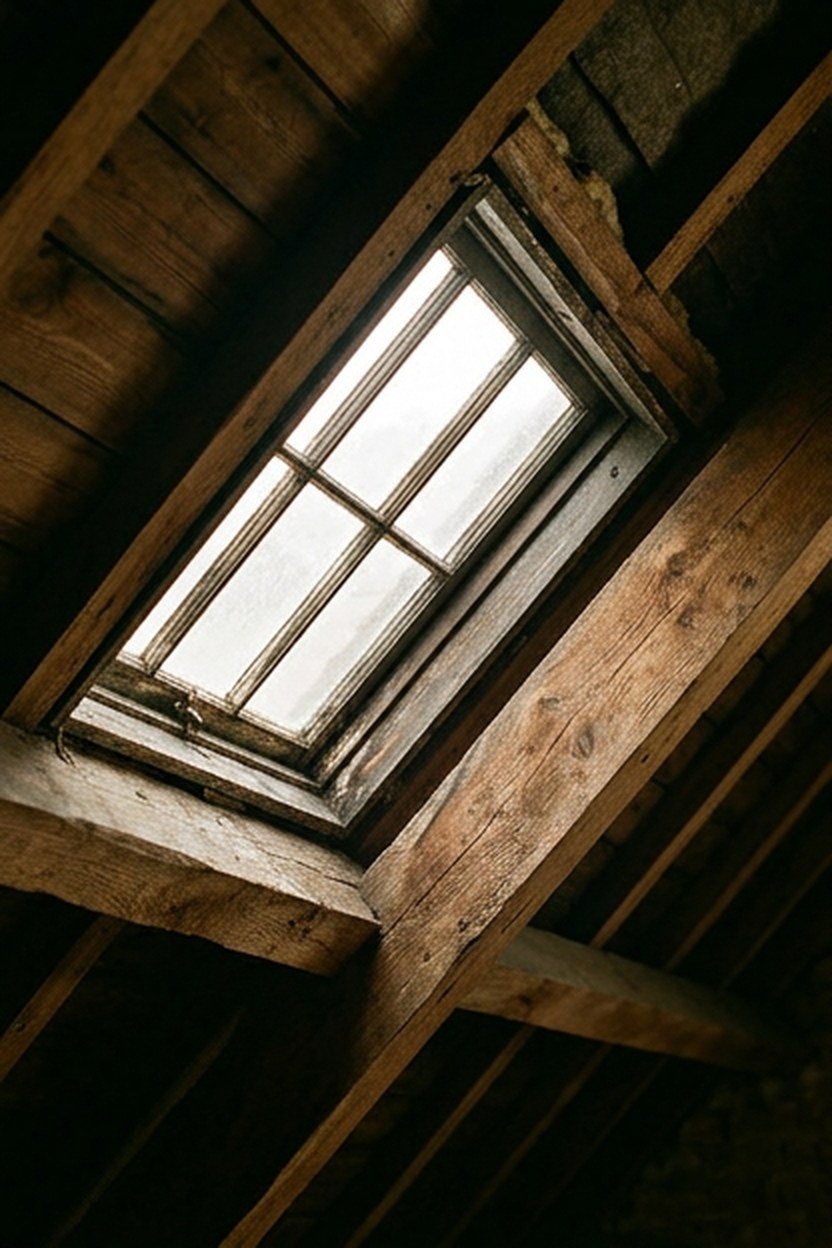
Adding a skylight designed with a period-appropriate profile and materials, rather than a standard modern skylight unit, brings additional natural light into the attic while respecting the home’s historic architectural character. This detail requires more research and often custom fabrication compared to a standard skylight installation, but preserves the visual consistency preservation-minded renovation depends on throughout the entire project. This addition can dramatically improve the attic’s usability as living space.
Choosing a skylight placement that aligns with the roof’s existing structural framing, rather than cutting through structural members unnecessarily, minimizes both cost and structural risk during installation. Consulting with a structural engineer before finalizing skylight placement confirms this alignment and identifies any reinforcement the specific location might require.
Working with a preservation-experienced architect or designer to specify a skylight profile and frame material consistent with the home’s historic period, rather than a standard contemporary unit, maintains the visual cohesion this renovation approach depends on. This specification process typically adds modest additional design cost but meaningfully affects how well the new element integrates with the historic structure.
Cost And Structural Guidance
A period-appropriate skylight installation typically costs $2,000 to $6,000 depending on size, custom fabrication requirements, and structural reinforcement needs. Confirming any required permits for this exterior modification, particularly in a designated historic district, before beginning work avoids a costly stop-work order partway through installation.
A common mistake is choosing skylight placement based purely on interior lighting needs without considering the roof’s visible exterior appearance from the street, a consideration historic preservation boards specifically scrutinize in designated districts. Consulting renderings or mockups showing the exterior impact before finalizing placement helps avoid a design rejected during the permitting process.
7. Preserving Original Plaster Ceiling Medallions
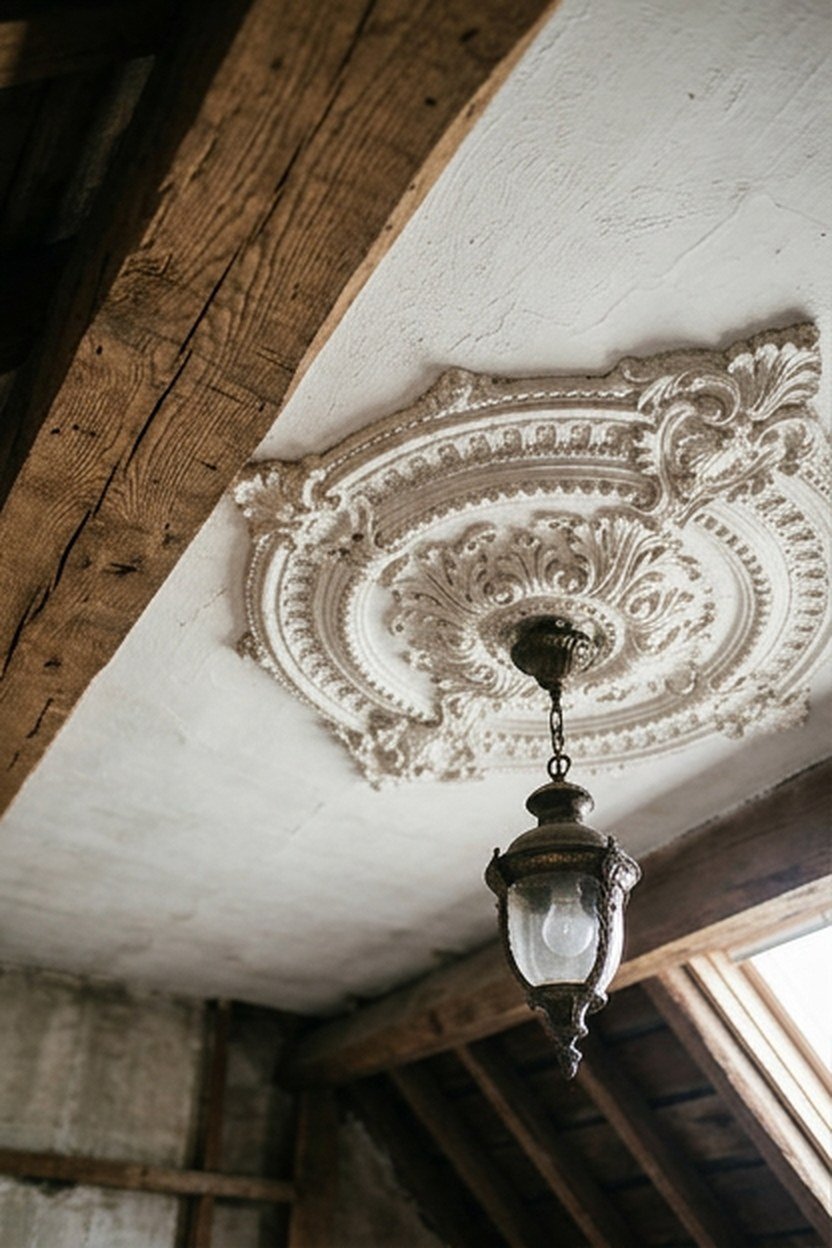
Preserving original plaster ceiling medallions, ornate decorative elements often surrounding a light fixture, retains one of the more elaborate decorative details Victorian homes are specifically known for. These medallions, when original, display a level of hand-crafted detail that modern composite reproductions often fail to fully replicate. This preservation effort focuses on stabilizing and cleaning existing medallions rather than removing them during other ceiling work.
Consulting with a plaster restoration specialist before undertaking any other ceiling work, insulation, wiring, or structural repair, protects these delicate decorative elements from accidental damage during unrelated construction activity. This consultation should happen early in the planning process, before any contractor begins work that might affect the ceiling area containing the medallion.
Cleaning original medallions with gentle, appropriate methods, avoiding aggressive scrubbing or harsh chemicals that can damage the plaster’s decorative detail, requires patience and specific technique knowledge. A plaster conservator experienced in historic decorative elements can advise on appropriate cleaning methods specific to the medallion’s material and condition.
Cost And Protection Guidance
Restoring and stabilizing an original plaster ceiling medallion typically costs $300 to $1,200 depending on size, condition, and the extent of any structural stabilization required. Protecting the medallion during other renovation work, through careful covering and clear communication with every contractor working nearby, is a low-cost precaution relative to the medallion’s replacement value if damaged.
A common mistake is allowing electrical or insulation contractors to work near a medallion without specific protective measures, resulting in accidental cracking or chipping during otherwise unrelated work. Requiring protective covering and careful work practices near any preserved decorative element, communicated clearly in the project’s contractor instructions, prevents this common and preventable damage.
8. Upgrading Electrical Wiring Without Visible Modern Conduit
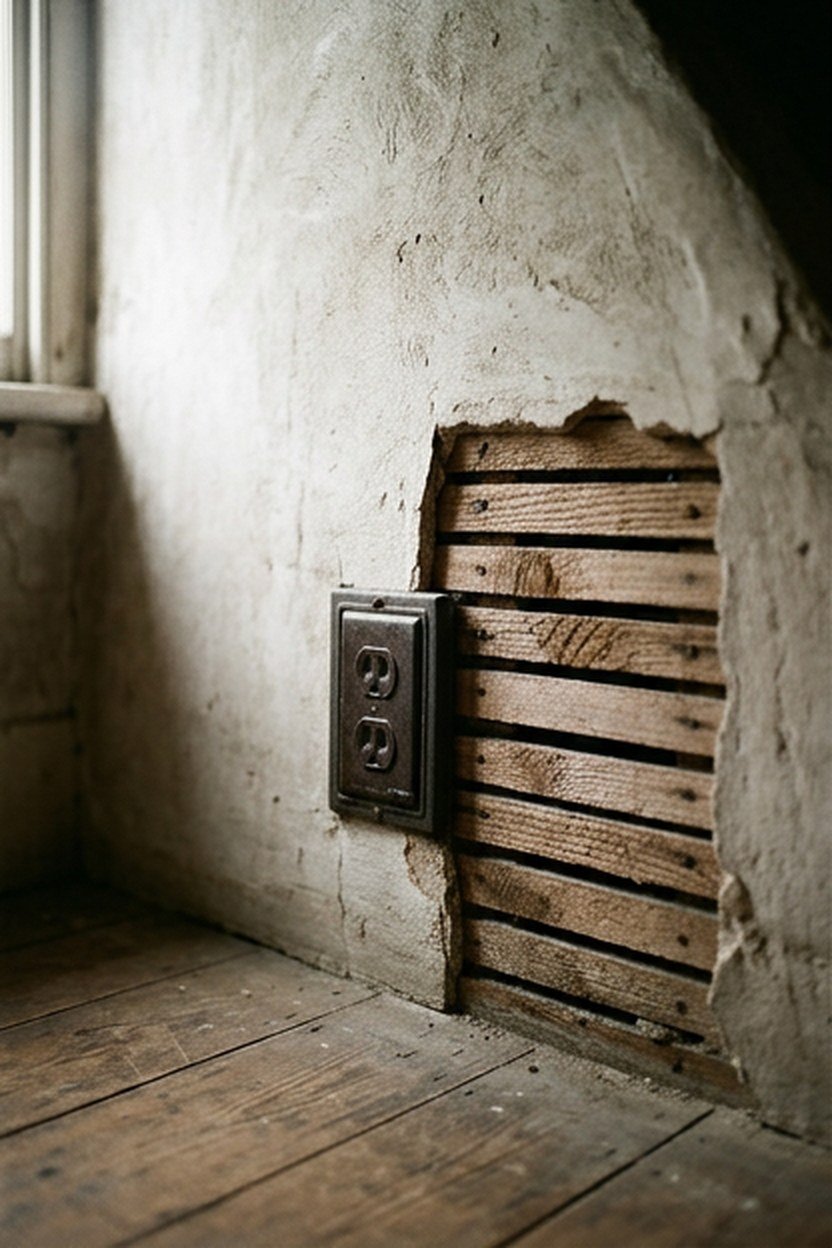
Upgrading electrical wiring throughout the attic while routing new wiring through existing wall and ceiling cavities, rather than running visible modern conduit across historic surfaces, preserves the space’s period appearance while still achieving necessary modern electrical safety and capacity. This approach requires more careful planning and often more labor than a straightforward conduit installation, but avoids visually compromising the preserved historic character.
Working with an electrician experienced specifically in historic home wiring, rather than standard new construction electrical work, ensures the routing plan accounts for the specific challenges older wall and ceiling cavities present, irregular framing, existing plaster, and limited access points. This specialized experience matters considerably for achieving a wiring upgrade that meets modern code without unnecessary visible modification to historic surfaces.
Planning outlet and switch placement thoughtfully, considering both modern functional needs and minimal visual impact on preserved historic surfaces, requires more upfront design consideration than a standard new construction electrical plan. This planning step benefits from involving both the electrician and a preservation-minded designer early in the process.
Cost And Contractor Selection Guidance
Upgrading electrical wiring in a Victorian attic while preserving historic surfaces typically costs $3,000 to $10,000 depending on the attic’s size and the wiring’s current condition and code compliance gaps. Hiring an electrician with specific historic home experience, even at a potentially higher hourly rate, typically proves worthwhile given how much more efficiently they navigate the space’s specific challenges compared to a contractor without this background.
A common mistake is allowing a standard electrical contractor unfamiliar with historic homes to default to visible conduit installation simply because it is faster and easier than routing through existing cavities. Explicitly discussing this preservation priority with any electrical contractor before work begins, and confirming their specific approach in writing, avoids this default toward a faster but visually compromising solution.
9. Restoring Original Attic Hatch Or Stairway Details
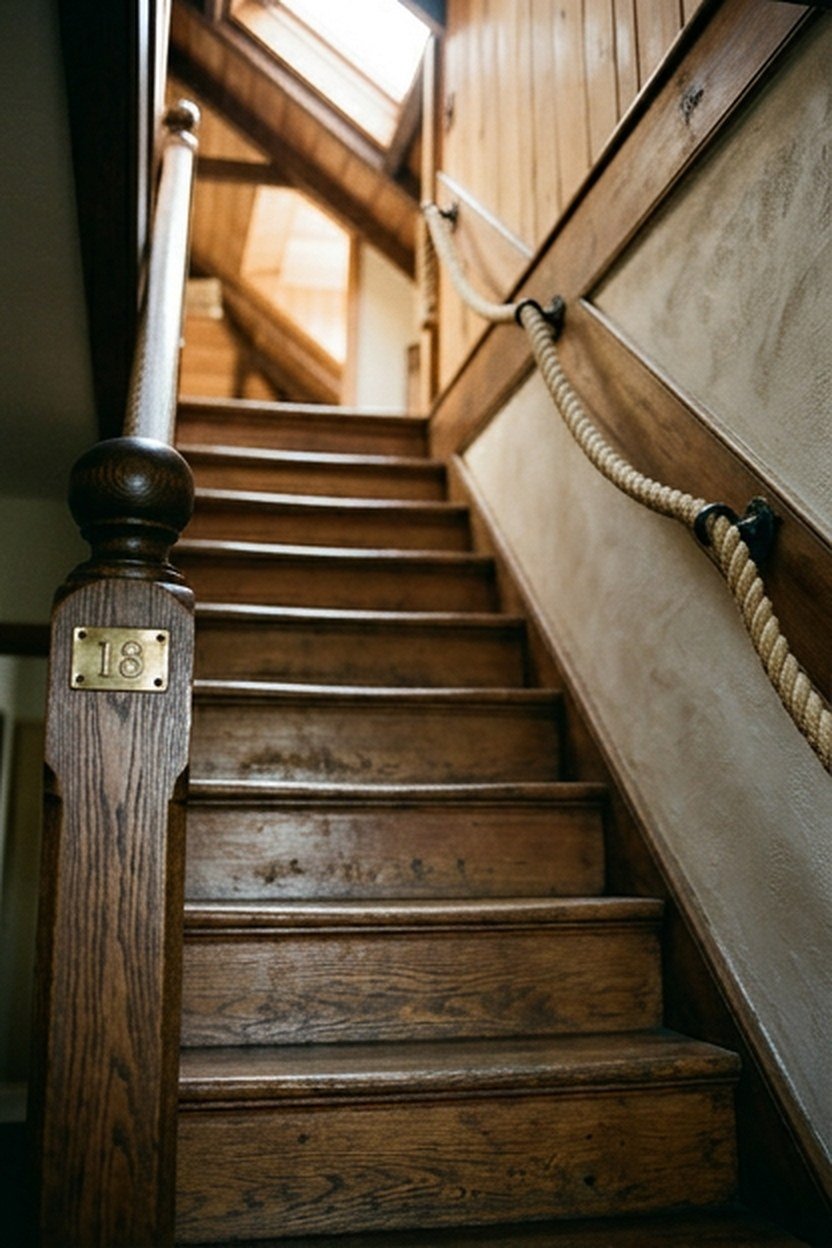
Restoring an original attic hatch, pull-down stairway, or the stairway leading to the attic space, rather than replacing it with a modern standard unit, preserves another often-overlooked architectural detail that contributes to the space’s overall historic character. These original access elements sometimes feature decorative hardware or millwork details that a standard modern replacement would not include.
Repairing rather than replacing original hardware, hinges, latches, or pull mechanisms, on the attic access point preserves details that, while small, often carry genuine period character and craftsmanship. Sourcing appropriate reproduction hardware for any pieces too deteriorated to repair, rather than substituting modern generic hardware, maintains visual consistency with the preserved original pieces.
Ensuring any structural modifications to the stairway or hatch, needed to meet modern safety code requirements around handrail height or tread dimensions, are executed in a way that respects the original design’s proportions and materials as closely as possible. This balance between code compliance and historic preservation often requires creative problem-solving with an experienced contractor.
Cost And Hardware Guidance
Restoring an original attic hatch or stairway, including hardware repair or period-appropriate reproduction sourcing, typically costs $500 to $2,500 depending on the extent of restoration required and any necessary code compliance modifications. Sourcing reproduction hardware from a specialty historic hardware supplier, rather than a standard hardware store, ensures visual consistency with any preserved original pieces.
A common mistake is replacing an entire original stairway or hatch assembly simply because updating it to meet current code requires modification, when often only specific elements, like handrail height, actually require change while the rest of the original structure can be preserved. Consulting with a contractor experienced in historic code compliance solutions before assuming full replacement is necessary avoids this unnecessarily destructive approach.
10. Preserving Original Paint Colors Through Careful Analysis
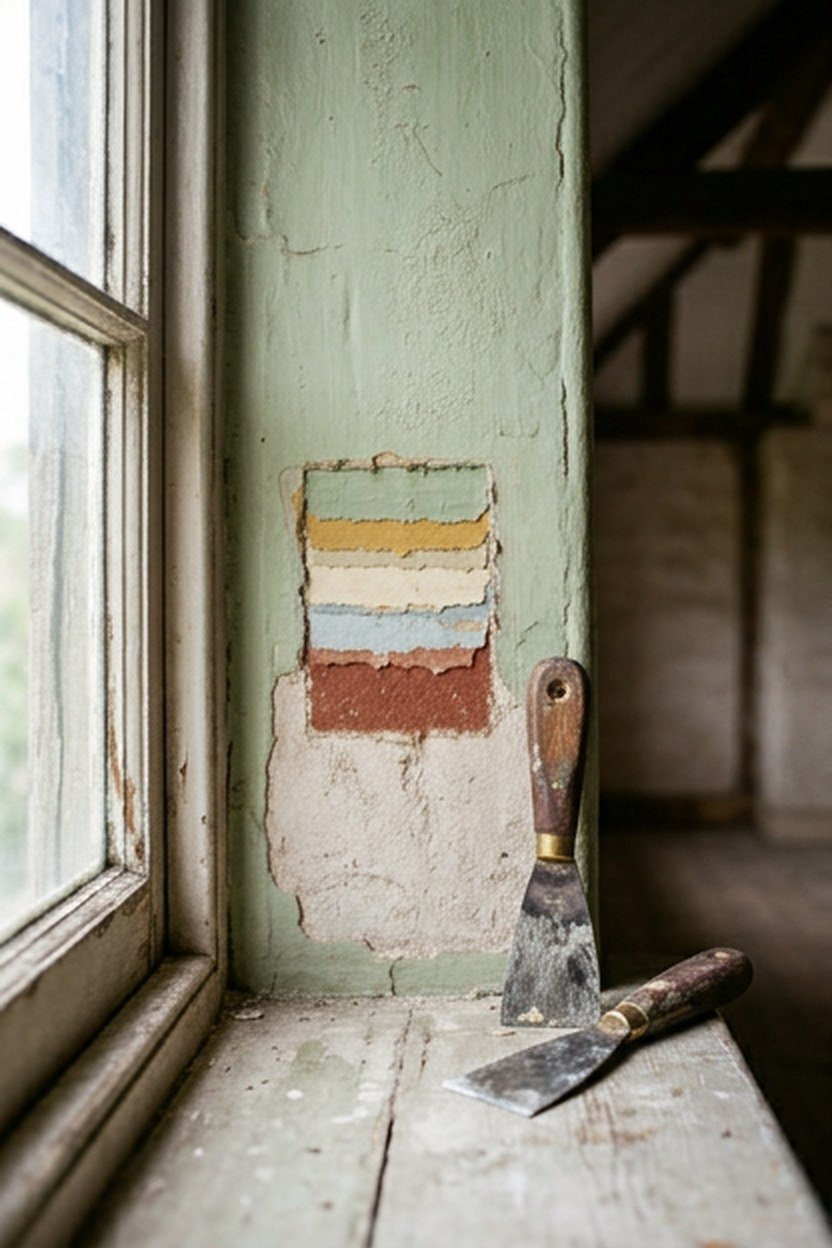
Preserving or accurately recreating a Victorian attic’s original paint colors, determined through professional paint analysis of existing paint layers, restores an authentic period appearance that generic modern color guesses cannot replicate. This paint analysis process, sometimes called paint archaeology, examines cross-sections of existing paint layers to identify the room’s original color scheme from the home’s construction era.
Hiring a paint analysis specialist, rather than attempting to guess original colors from historical color charts alone, provides scientifically grounded color matching specific to your actual home rather than a generic period approximation. This specialized analysis service, while an additional upfront cost, provides considerably more confidence in the color accuracy than guesswork alone.
Choosing paint products with an appropriate sheen and composition for the specific surface and period, matte finishes for plaster ceilings, for instance, rather than a modern high-gloss finish inconsistent with period application methods, maintains authenticity beyond color alone. This finish consideration matters as much as the color match itself for achieving a genuinely period-appropriate appearance.
Cost And Analysis Guidance
Professional paint analysis for a single room typically costs $300 to $800 depending on the number of samples analyzed and the complexity of the paint layer history uncovered. This modest cost relative to the overall renovation budget provides meaningful historical grounding for a decision that significantly affects the room’s final character.
A common mistake is choosing colors based purely on personal preference or generic “Victorian style” color charts without any analysis specific to the actual home, resulting in a color scheme that might be broadly period-appropriate but not accurate to this specific house’s actual history. Investing in the specific paint analysis, rather than relying on general historical color guides, provides considerably more authentic and personally meaningful results.
11. Adding Discreet Modern Climate Control
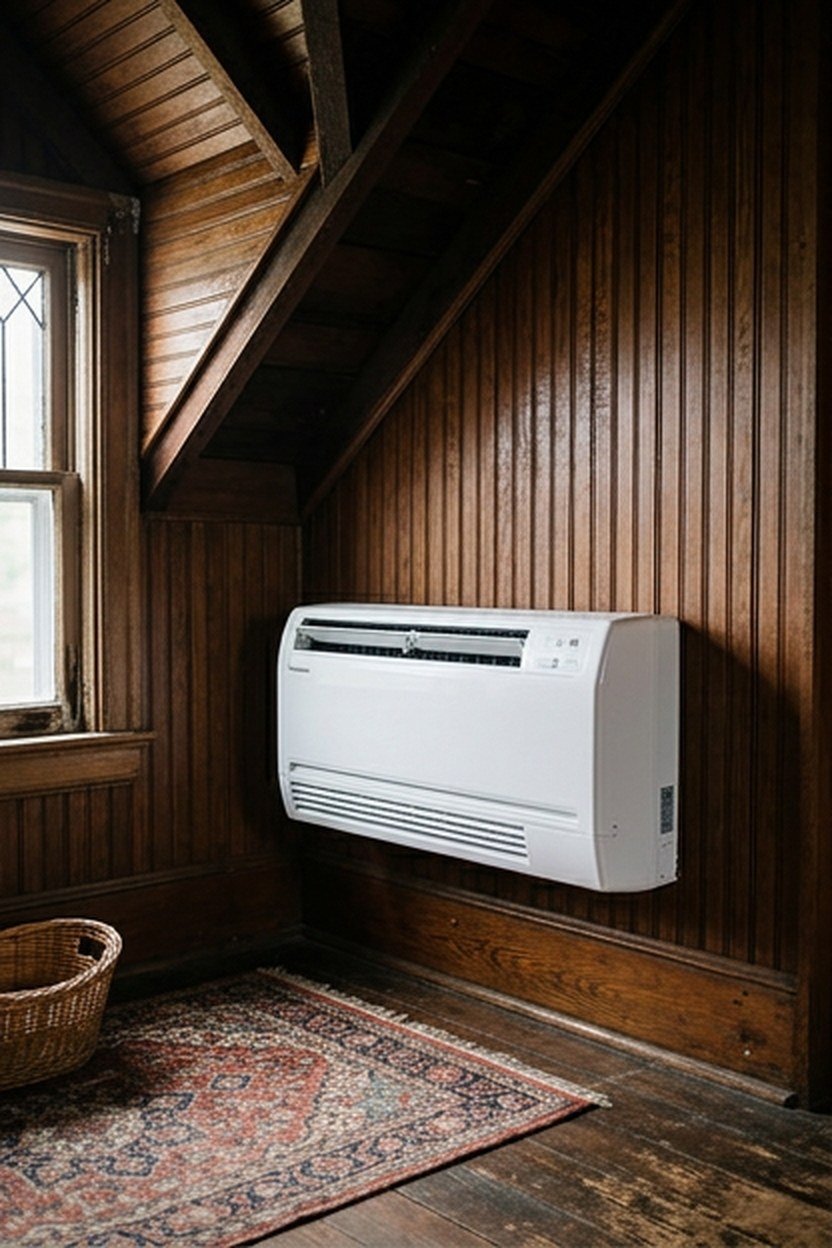
Adding modern climate control, a mini-split system or carefully routed ductwork, in a way that minimizes visible modern equipment and ductwork within the preserved historic space, balances genuine comfort improvement against maintaining the attic’s period visual character. This approach often requires more creative installation planning than a standard, more visible ductwork installation.
Choosing a mini-split system with a compact, low-profile indoor unit, positioned in a less visually prominent location within the room, minimizes the equipment’s visual impact compared to a larger, more obtrusive unit. Working with an HVAC contractor experienced in historic home installations helps identify placement options that balance functional performance against visual discretion.
Routing any necessary ductwork through existing chases, closets, or other concealed pathways, rather than adding new visible soffits or bulkheads that would disrupt the room’s original proportions, requires more careful planning than a standard ductwork installation. This concealed routing consideration is worth discussing extensively with your HVAC contractor and preservation-minded designer before installation begins.
Cost And Placement Guidance
A mini-split climate control system for a Victorian attic typically costs $3,000 to $8,000 depending on the system’s capacity and the installation’s complexity given the space’s specific constraints. Choosing a system with multiple smaller indoor units, rather than a single larger unit, sometimes allows more flexible and visually discreet placement options throughout an irregularly shaped attic space.
A common mistake is selecting climate control equipment based purely on cost or capacity without considering how visible the resulting installation will be within a preserved historic space. Prioritizing visual discretion alongside functional performance when selecting and placing HVAC equipment avoids this common oversight that undermines the broader preservation effort.
12. Restoring Original Iron Or Brass Hardware Throughout
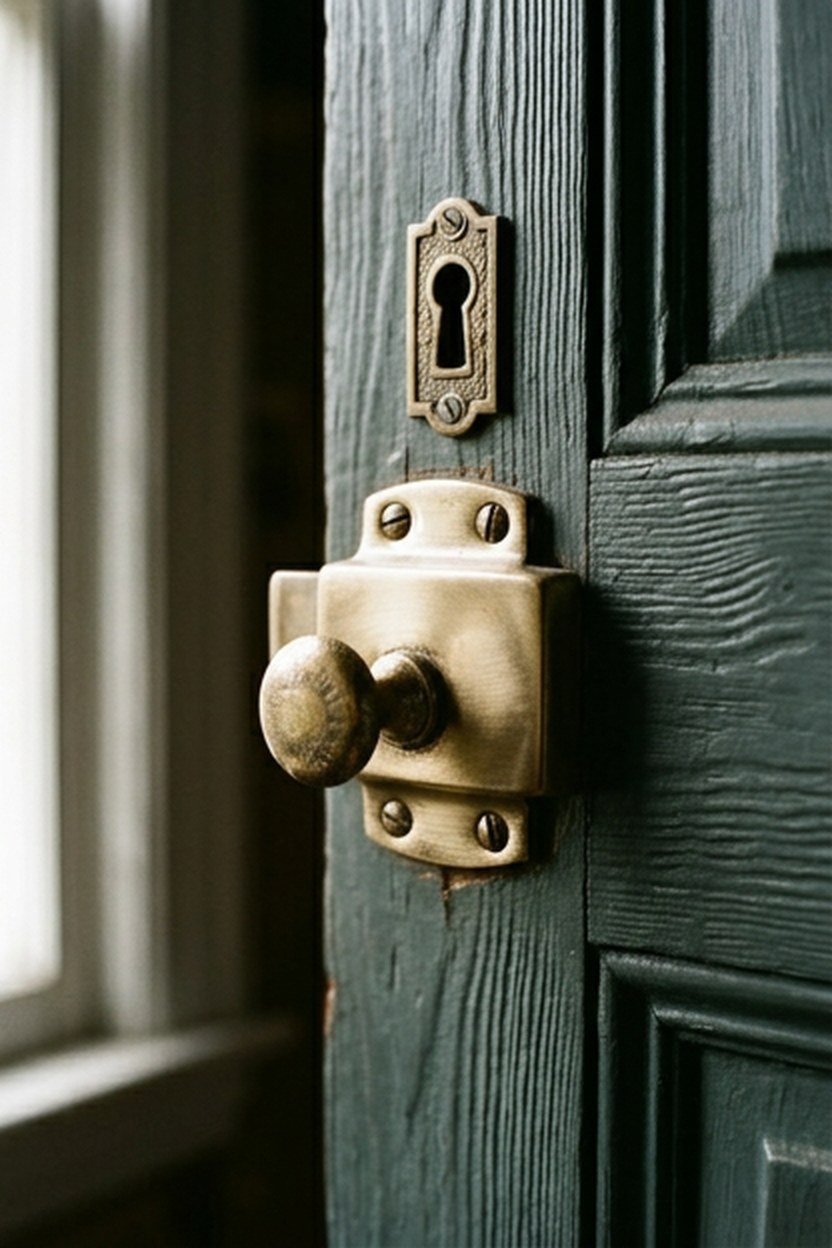
Restoring original iron or brass hardware, door hinges, window latches, or cabinet pulls, throughout the attic space preserves small but genuinely significant details that collectively contribute to the room’s overall period authenticity. This hardware restoration typically involves careful cleaning to remove decades of paint or grime buildup without damaging the underlying metal’s original patina or finish.
Cleaning original hardware with appropriate methods specific to the metal type, brass, iron, or a mixed alloy, avoiding harsh abrasives that could strip a desirable original patina, requires research specific to each piece’s material composition. Consulting with a metal restoration specialist for hardware with genuine historic or decorative significance protects against well-intentioned but potentially damaging cleaning attempts.
Sourcing appropriate reproduction hardware for any pieces too deteriorated or missing entirely to restore, matching the style and material of surviving original pieces, maintains visual consistency throughout the space. Specialty historic hardware suppliers can often identify or closely match a specific period style even when an exact original piece is unavailable.
Cost And Cleaning Guidance
Restoring original iron or brass hardware throughout a typical attic space typically costs $500 to $2,000 depending on the quantity of pieces and the extent of cleaning or repair required. Hiring a metal restoration specialist for pieces with genuine decorative or historic significance, rather than attempting DIY cleaning with generic household products, protects against irreversible damage to irreplaceable original material.
A common mistake is using harsh commercial metal cleaners or aggressive polishing on original hardware, which can strip away a desirable patina that took decades to develop and cannot be easily recreated. Testing any cleaning method on a small, inconspicuous area first, and consulting a specialist for pieces of genuine significance, avoids this common and often irreversible mistake.
13. Preserving Original Wall Texture And Wainscoting
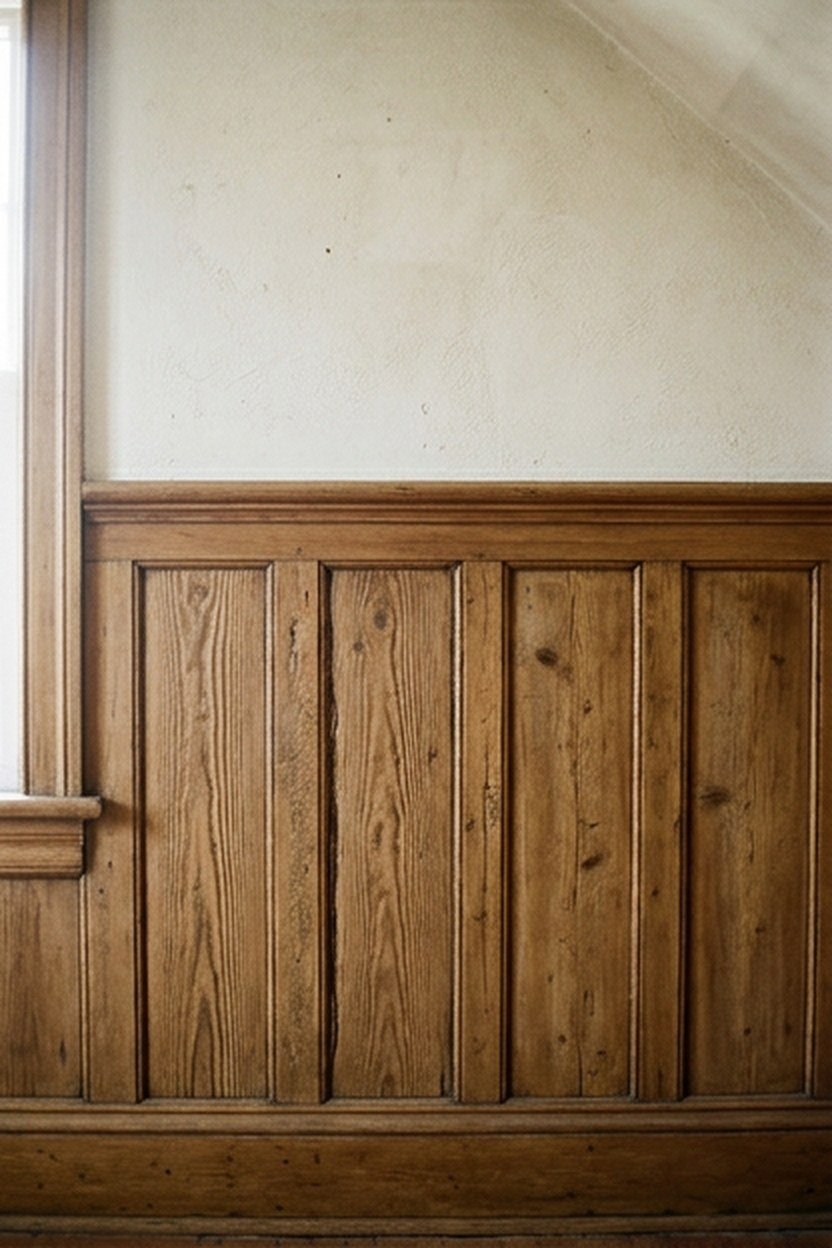
Preserving original wall texture, whether decorative plaster patterning or original wainscoting paneling, retains details that contribute significantly to a Victorian attic’s overall period character beyond the more prominent features already discussed throughout this guide. This preservation effort focuses on careful repair of any damaged sections rather than full removal and replacement with modern materials.
Matching any necessary patch repairs to the original wall texture’s specific pattern and depth requires a skilled plasterer experienced in replicating historic decorative techniques, a skill considerably less common than standard modern drywall finishing. Sourcing this specialized expertise, sometimes requiring a plasterer who travels specifically for historic preservation projects, is worth the additional cost and scheduling effort this specialized skill requires.
Restoring original wainscoting through careful stripping, repair, and refinishing, rather than replacement with modern paneling, preserves both the material and the specific joinery techniques period craftsmen used. This restoration approach requires similar lead-safe precautions discussed earlier regarding millwork and window restoration, given the likelihood of historic paint layers on this surface as well.
Cost And Matching Guidance
Preserving and repairing original wall texture or wainscoting typically costs $1,500 to $5,000 depending on the extent of damage requiring repair and the specific technique’s complexity. Sourcing a plasterer or woodworker with specific experience matching historic decorative techniques, rather than a general contractor, ensures repairs blend seamlessly with surviving original material.
A common mistake is patching damaged sections with modern materials that create a visible texture mismatch against the surrounding original surface, undermining the preservation effort’s overall goal. Insisting on a texture and material match before approving any repair work, even if this requires a more specialized and costly contractor, avoids this visible inconsistency.
14. Documenting The Renovation Process Thoroughly
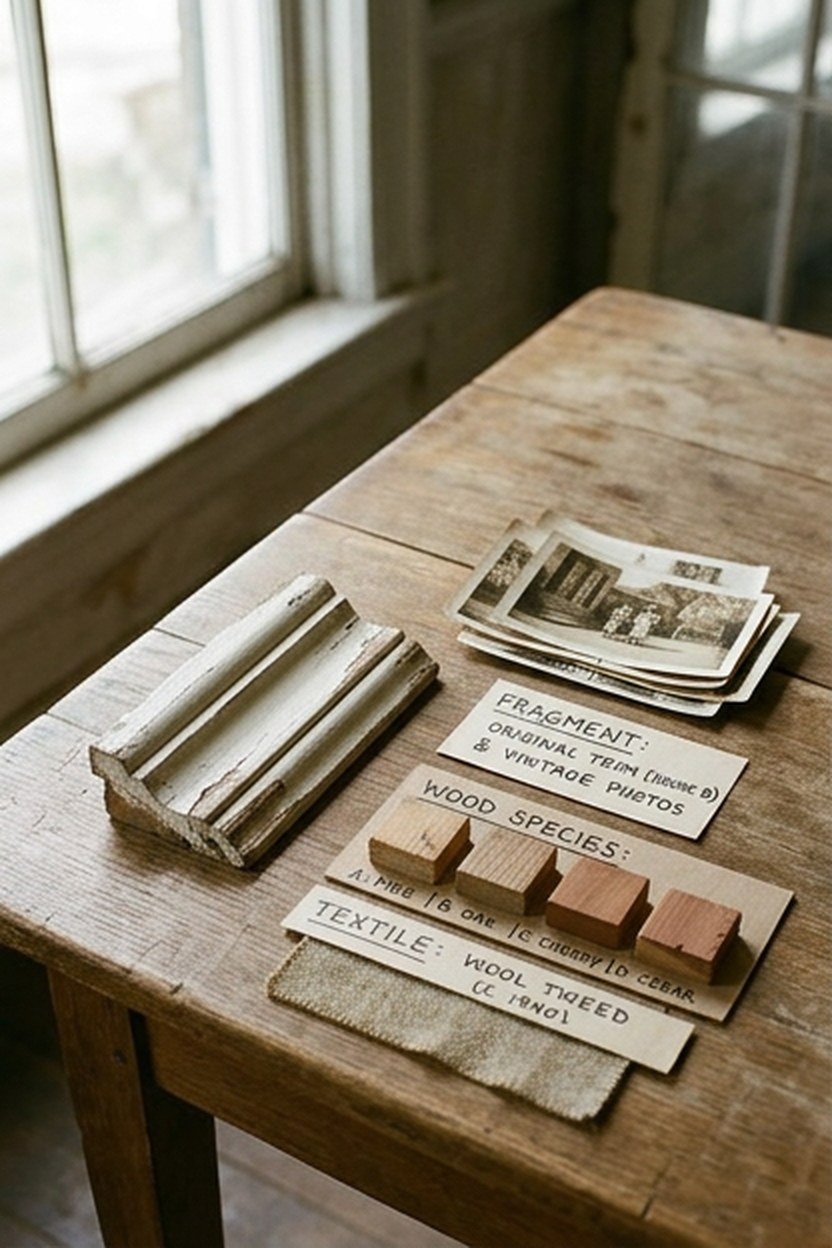
Documenting the entire renovation process, through photographs, written notes, and retained material samples, creates a valuable historical record for future homeowners and preserves knowledge about what original material existed before any necessary replacement occurred. This documentation practice, while not a physical preservation technique itself, supports the broader preservation goal by ensuring the home’s history remains traceable even where physical originals could not be fully retained.
Photographing every original element before any work begins, including detailed close-up images of hardware, trim profiles, and paint layers, creates a reference record useful both during the current renovation and for any future preservation work. This photographic documentation is a low-cost practice relative to its long-term value for the property’s ongoing preservation history.
Retaining small samples of any original material that must be fully replaced, a section of original flooring, a piece of deteriorated trim, or a fragment of original wallpaper, preserves physical evidence of the home’s history even where full retention was not feasible. Storing these samples with clear labeling and the documentation photographs creates a comprehensive historical record for the property.
Cost And Documentation Guidance
Thorough documentation throughout a renovation project typically costs very little beyond the time investment required, making it one of the more worthwhile preservation practices on this entire list. Hiring a professional photographer for particularly significant documentation, before major structural or cosmetic work begins, is a reasonable additional investment for homes with genuinely significant historic value.
A common mistake is treating documentation as an afterthought rather than a planned part of the renovation process, resulting in incomplete records of what original conditions actually looked like before work began. Building a documentation plan into the project timeline from the very start, rather than attempting to catch up on missed documentation partway through construction, ensures this valuable record remains complete.
15. Consulting A Historic Preservation Architect For Overall Guidance
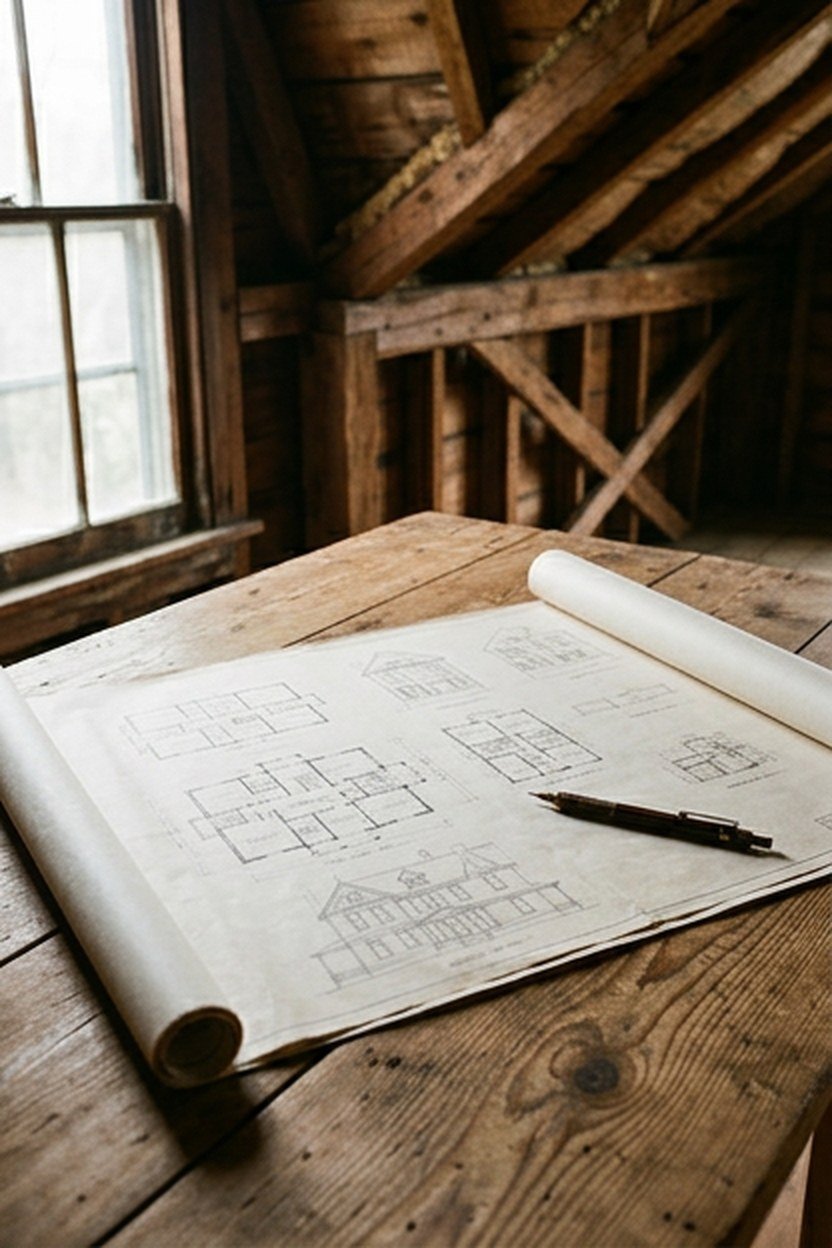
Consulting a historic preservation architect throughout the renovation, rather than relying solely on a general contractor’s judgment for preservation-related decisions, provides specialized expertise that considerably improves the likelihood of a genuinely successful preservation outcome. This professional guidance spans the entire project, from initial assessment through final detail decisions, providing consistent preservation-minded oversight throughout. This consultation represents a meaningful additional cost but often proves worthwhile given the stakes involved in irreversible preservation decisions.
Involving this architect early in the planning process, rather than only consulting them for specific isolated questions as they arise, allows their expertise to shape the project’s overall sequencing and approach rather than only addressing individual problems reactively. This early involvement consideration matters considerably for achieving a cohesive preservation strategy rather than a series of disconnected decisions made without overall project context.
Choosing an architect with specific experience in Victorian-era preservation, rather than general historic preservation experience across many different architectural periods, ensures their specific expertise matches your home’s particular period and construction techniques. This period-specific experience matters considerably given how much construction methods and detailing varied across different historic eras and regional traditions.
Cost And Engagement Guidance
Engaging a historic preservation architect for full project guidance typically costs $5,000 to $15,000 depending on the project’s scope and the level of ongoing involvement required throughout construction. This cost represents a meaningful additional investment but is worth weighing against the potential cost of preservation mistakes that could permanently compromise irreplaceable historic material.
A common mistake is engaging a preservation architect only after significant renovation decisions have already been made, limiting their ability to influence the project’s overall approach and sequencing. Engaging this expertise at the very earliest planning stage, before any contractor is hired or demolition begins, maximizes the value this specialized guidance can provide throughout the entire project.
What A Historic Victorian Attic Preservation Renovation Actually Costs
A complete historic preservation renovation of a Victorian attic, incorporating several concepts from this guide, typically costs $15,000 to $60,000 depending on the attic’s size and how much original material needs restoration. This range reflects the wide variation in starting conditions across different Victorian homes, since some retain excellent original material requiring only careful cleaning while others need considerably more extensive restoration. Understanding this rough breakdown helps prioritize spending toward the elements with the most historic and functional significance.
Ongoing costs beyond the initial renovation remain relatively modest for most preserved elements, mainly consisting of periodic maintenance appropriate to historic materials, refinishing wood floors every decade or two, or repainting with appropriate historic paint products. Most well-executed preservation renovations require considerably less ongoing maintenance than might be expected, given how durable well-maintained original materials often prove over many additional decades.
| Investment Category | Typical Cost Range | Notes |
|---|---|---|
| Structural and mechanical | $5,000 to $20,000 | Insulation, wiring, climate control |
| Original feature restoration | $8,000 to $30,000 | Beams, windows, millwork, plaster |
| Professional consultation | $2,000 to $10,000 | Preservation architect, specialists |
Prioritizing structural and mechanical upgrades first, then original feature restoration, and finally cosmetic details gives the most reliable path to a successful preservation renovation even on a limited initial budget. This prioritization strategy, discussed throughout this guide’s planning section, is worth committing to as a firm sequencing principle rather than a loose suggestion. Most experienced preservation contractors find this order of investment produces the most successful outcomes relative to the budget spent at each stage.
Common Mistakes That Undermine A Historic Preservation Renovation
The most common mistake across Victorian attic preservation projects is sequencing the work incorrectly, restoring cosmetic details before completing structural and mechanical upgrades, resulting in newly restored surfaces getting damaged or requiring rework once later construction phases proceed. Following the correct sequence, structural first, then mechanical, then cosmetic restoration, a principle discussed throughout this guide’s planning section, avoids this costly and frustrating rework.
A second frequent mistake is hiring contractors without specific historic preservation experience, resulting in well-intentioned but ultimately damaging techniques applied to irreplaceable original material. Vetting every contractor and specialist specifically for their historic preservation experience, rather than assuming general renovation skill transfers adequately to this specialized work, avoids this common and sometimes irreversible mistake.
Recovering From These Setbacks
Recovering from incorrect work sequencing typically means accepting the cost of redoing damaged cosmetic work after completing the structural and mechanical upgrades that should have happened first. This correction, while frustrating and costly, is usually still less expensive than the alternative of never properly completing the necessary underlying upgrades. Identifying this sequencing error early, before extensive cosmetic work proceeds, minimizes the amount of rework this correction ultimately requires.
Recovering from damage caused by an inexperienced contractor’s well-intentioned but inappropriate technique depends considerably on what specific material was affected and how severely. Consulting immediately with a genuine historic preservation specialist, rather than the original contractor, provides the most accurate assessment of whether the damage is repairable and what specialized remediation it requires.
Conclusion
A historic preservation renovation of a Victorian attic succeeds by respecting the correct sequencing of structural, mechanical, and cosmetic work while engaging specialized expertise for irreplaceable original material. The fifteen concepts here, from restoring exposed beams to engaging a preservation architect, each address a piece of what separates a respectful renovation from one that compromises historic character. Prioritizing structural and mechanical work first, then careful restoration, gives the most reliable path to a space that honors its history while serving modern needs.
Whether this is a first historic renovation project or a continuation of ongoing preservation work on an already-cherished Victorian home, the underlying principles stay consistent: sequence the work correctly, hire genuinely experienced specialists, and document everything thoroughly along the way. These fundamentals matter more than any single restoration decision on this list. Get them right, and the attic becomes a space that honors the home’s full history while still serving its current occupants well.
Frequently Asked Questions
What is historic preservation in the context of a Victorian attic renovation? Historic preservation means retaining original architectural details, beams, windows, trim, and plaster, while carefully upgrading insulation, wiring, and structural support. It balances honoring the home’s history with making the space genuinely usable today.
How much does a historic preservation attic renovation cost? A complete renovation typically costs $15,000 to $60,000 depending on the attic’s size and how much original material requires restoration. Structural and mechanical work usually represents the largest portion of this budget.
Should I hire a general contractor or a preservation specialist? A contractor with specific historic preservation experience is strongly recommended, since general renovation skills do not always translate to appropriate techniques for irreplaceable original material. This specialized experience often proves worth any additional cost.
What order should the renovation work happen in? Structural and mechanical upgrades should happen first, followed by restoration of original features, and finally cosmetic details. Reversing this order often results in newly restored surfaces getting damaged during later construction phases.
Can I add modern insulation without damaging original plaster? Yes, blown-in insulation through small access holes preserves original plaster while still improving energy performance significantly. This method has become the standard preservation-minded approach for attic insulation upgrades.
Do I need permits for historic preservation renovation work? Many Victorian homes in historic districts require permits or preservation board approval for visible changes, including dormers and windows. Researching your property’s specific designation before beginning design work avoids costly rejected proposals.
What is the biggest mistake people make in historic attic renovations? Sequencing the work incorrectly, restoring cosmetic details before completing structural and mechanical upgrades, is the most common mistake. This often results in newly restored surfaces getting damaged during later construction phases.