
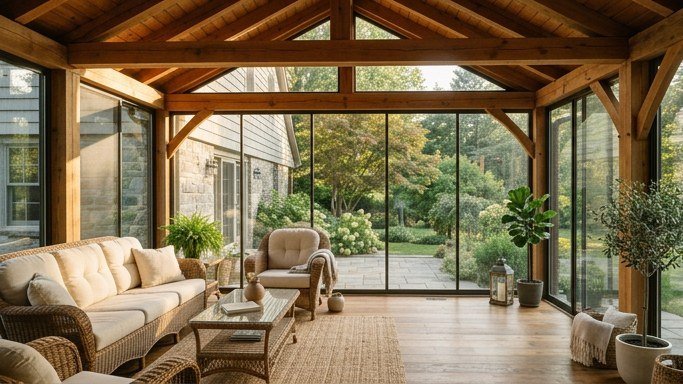
The right sunroom addition style pays for itself twice, once in daily enjoyment and once at resale. I have walked through more than a dozen sunroom projects with friends and neighbors over the years, and the ones that felt right from day one all shared the same trait. They matched the style of the house instead of bolting on a generic glass box.
Sunrooms range from simple three season additions with screened walls to fully conditioned four season rooms that read as permanent living space. The style you choose determines your budget, your permit process, and how much of the year you actually get to use the room. Skipping this decision and jumping straight to contractor quotes is the single most common mistake homeowners make.
This guide walks through fifteen specific style and feature decisions that shape a sunroom project from the ground up. Expect real talk about cost ranges, permit realities, and the trade offs between glass types and framing materials. By the end you will know exactly which direction fits your climate, your house, and your budget.
Why Sunroom Style Matters More Than Square Footage
Homeowners often size a sunroom addition before choosing its style, which backwards approach costs real money down the line. A style mismatch, like a sleek modern glass box on a traditional colonial home, actively hurts resale value even when the room itself is well built. Appraisers and buyers both notice when an addition looks like an afterthought rather than a considered extension.
Climate compatibility matters just as much as visual style. A three season sunroom with single pane glass makes no sense in a climate with real winters, while a fully insulated four season room may be overbuilt for a mild coastal climate. Matching the structural style to your actual weather patterns saves thousands in unnecessary heating or cooling costs.
The table below compares the two broad sunroom categories on the factors that drive most decisions. Both categories can suit the same house depending on climate and budget, so treat this as a starting comparison rather than a final decision. Review your own priorities against each row before picking a direction.
| Factor | Three season sunroom | Four season sunroom |
|---|---|---|
| Typical cost per square foot | $150 to $250 | $300 to $500 |
| Usable months per year | 6 to 8 depending on climate | 12 |
| Permit complexity | Moderate | High, often needs full engineering review |
Planning Your Sunroom Project Before You Call A Contractor
Start with your actual use case rather than a Pinterest board full of pretty rooms. A sunroom meant for morning coffee and reading needs far less than one meant to host dinner parties or double as a home office. Write down the top three activities you want this room for before looking at a single style photo.
Check your local permit requirements early, since sunroom additions almost always require a building permit and sometimes a full engineering review. Many homeowners assume a sunroom counts as a simple patio cover and skip permitting, only to run into problems at resale when the addition shows up unpermitted on inspection reports. A quick call to your local building department clarifies this in ten minutes.
Budget for utilities separately from the structure itself, especially if you want a four season room with heating and cooling. Extending an existing HVAC system into a new room often costs more than the sunroom’s basic construction, particularly in older homes where the existing system already runs near capacity. Get a separate HVAC quote before finalizing your overall budget.
1. Traditional Three Season Sunroom With Screened Walls
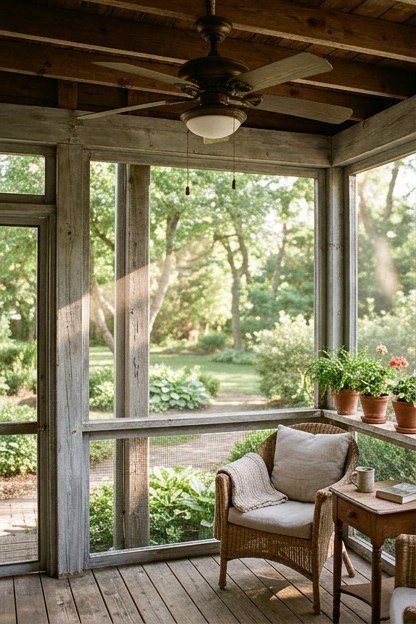
A traditional three season sunroom uses large screened openings instead of full glass panels, prioritizing airflow and insect protection over temperature control. This style suits a warm climate porch replacement or a budget conscious first sunroom project, typically running on the lower end of the cost spectrum. Screens can usually be swapped for glass panels seasonally on higher end kits.
The roof structure matters more than people expect here, since a three season room still needs to shed rain and snow load even without full insulation. Match the roof pitch to your existing house roof rather than defaulting to whatever the sunroom kit manufacturer suggests. A mismatched pitch is one of the more common visual mistakes on this style of addition.
Wood trim on this style ages by mellowing to a soft gray patina if left unpainted, especially on the south facing side that takes the most sun. This weathering looks intentional on a farmhouse or cottage style home and less so on a crisp modern build, so factor your house style into the trim material choice. A protective clear sealant slows this weathering if you prefer to keep the trim’s original tone longer. Reapply it every few years for the best protection.
Screening Material Options And Their Trade Offs
Standard fiberglass screening costs the least and works fine for basic insect protection, but it sags slightly within a few years and needs periodic re-stretching. Pet resistant screening costs more upfront but holds up far better against a dog or cat pushing against it repeatedly. Choose based on whether pets will actually spend time in this room.
Solar screening, a thicker mesh that blocks a portion of UV rays, adds real value in a hot climate sunroom that faces west or south. It reduces glare significantly and cuts down on the greenhouse effect that makes an all glass room uncomfortably hot by midafternoon. The tighter weave costs about twenty percent more than standard screening.
2. Fully Glazed Four Season Sunroom
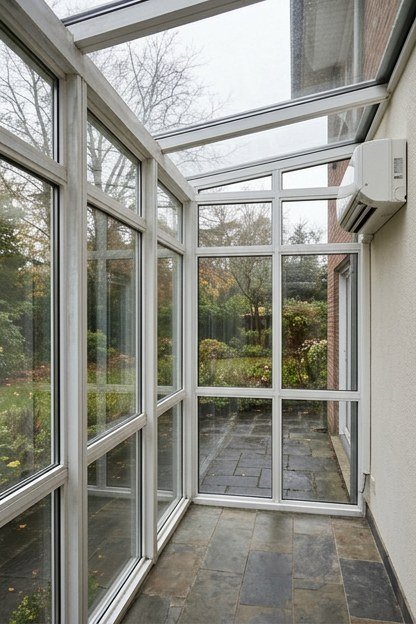
A fully glazed four season sunroom uses insulated glass panels on all walls and often the roof, built to handle real heating and cooling loads year round. This style commands the highest price point on this list but also adds the most usable square footage to a home’s official living space. Many four season rooms count toward total home square footage on appraisals, unlike three season additions.
Glass quality is the detail that separates a good four season room from an uncomfortable one. Low emissivity, double pane glass keeps the room comfortable through both summer heat and winter cold, while cheaper single pane glass turns the room into a greenhouse in summer and an icebox in winter. Spend the extra money on glass quality before cutting corners anywhere else.
The aluminum or vinyl framing on quality four season rooms holds its finish well for decades, developing only a faint chalking on the surface after many years of direct sun exposure. This gradual dulling is a normal sign of UV exposure on painted aluminum and does not affect the frame’s structural integrity at all. A gentle wash once a year keeps the chalking from building up visibly if you prefer a fresher look. Most homeowners never notice the change until it is pointed out directly.
Heating And Cooling A Glass Room Efficiently
A mini split heat pump system is the most common and budget friendly way to condition a four season sunroom without extending your main HVAC ductwork. These units handle the extreme temperature swings a glass room experiences better than a standard central system sized for the rest of the house. Installation typically runs a few thousand dollars per unit.
Radiant floor heating pairs particularly well with a four season sunroom, since it warms the room from the ground up rather than fighting against cold air pooling near all that glass. It costs more to install initially but runs efficiently over the long term and avoids the noise of forced air vents. Consider it seriously if you are already doing a full floor replacement.
3. Craftsman Style Sunroom With Exposed Beams
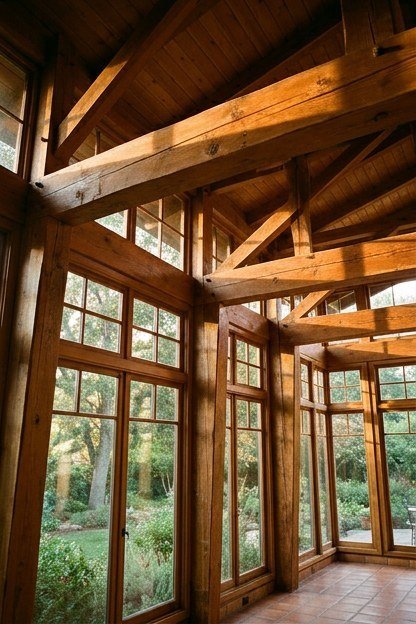
A craftsman style sunroom brings exposed wood beams, tapered columns, and a lower pitched roof into the addition, matching the classic craftsman bungalow aesthetic. This style works exceptionally well on homes already built in the craftsman or arts and crafts tradition, extending the house’s existing character rather than introducing a foreign element. It reads as original construction rather than a later addition when done well.
The exposed beams are usually a structural element rather than decorative, meaning the roof load actually rests on them rather than hidden trusses above a flat ceiling. This adds real cost compared to a hidden truss system, since the beams need to be sized and finished to a visible standard. Budget accordingly if this detail matters to your overall design.
Fir and cedar beams in this style develop a rich honey patina as they age, especially where afternoon sun hits directly through the sunroom glass. This deepening color is considered a feature rather than a flaw in craftsman design circles, and many homeowners specifically choose unstained wood to let this natural aging happen over time. Skip film forming finishes if you want the aging to progress naturally.
Matching Craftsman Details To Your Existing Home
Study your home’s existing craftsman details, like porch column proportions and trim profiles, before finalizing the sunroom’s beam sizing and spacing. A sunroom with beams noticeably thicker or thinner than the home’s existing porch columns creates a jarring visual mismatch that undermines the whole point of matching styles. Bring photos of your existing details to your contractor’s first design meeting.
Stone or brick knee walls under the craftsman sunroom’s windows tie the addition back to the home’s foundation materials when matched carefully. This detail costs more than a simple wood or vinyl knee wall but does more to make the addition look original to the house. It is worth the investment on a home where craftsman details are already prominent.
4. Victorian Style Sunroom With Curved Glass
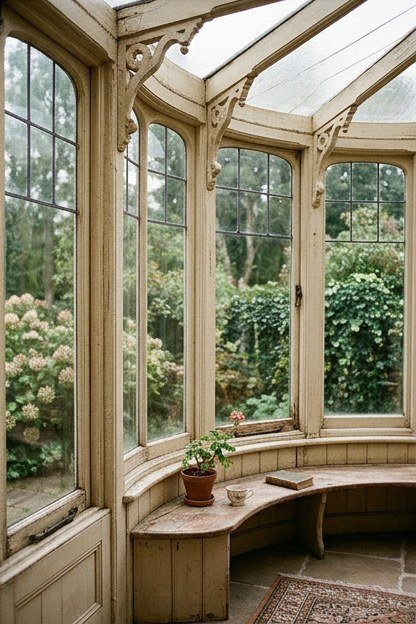
A Victorian style sunroom uses curved or angled glass panels, often in a bay or bow configuration, to match the ornate detailing common on Victorian era homes. This style tends to run expensive due to the custom curved glass and matching curved framing, but it is one of the few styles that can genuinely enhance a Victorian home’s historic character. A boxy modern sunroom on a Victorian home almost always looks wrong by comparison.
Detail work matters enormously here, since Victorian architecture relies on ornamentation like decorative brackets, finials, and patterned trim. Skimping on these details to save money undermines the entire point of choosing this style, since a plain curved glass room without the supporting ornamentation reads as an odd compromise rather than a coherent design. Budget extra specifically for the trim package.
Painted wood trim on this style shows a gentle crazing in the paint film after many years, a fine network of hairline surface lines that develops naturally in older oil based paints. This is a normal aging characteristic of traditional paint formulations and is often left as is on historic homes rather than stripped and repainted immediately. Talk to your painter about formulation options during the finishing stage.
Sourcing Curved Glass And Custom Millwork
Curved glass panels are a specialty order item from most window manufacturers, typically adding several weeks to the project timeline compared to standard flat glass. Order these components as early as possible in your project planning, since a delay here can push back your entire construction schedule. Some manufacturers require a minimum lead time of two to three months.
Local millwork shops can often match historic trim profiles more affordably than ordering pre-made Victorian trim packages from a big box supplier. Bring a sample of your home’s existing trim to a local shop for a quote before assuming custom millwork is out of your budget. Many homeowners are surprised at how competitive local pricing can be.
5. Modern Minimalist Sunroom With Black Frame Glass
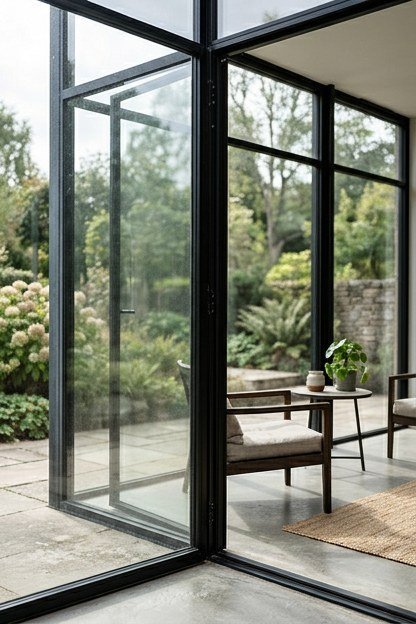
A modern minimalist sunroom uses thin black metal framing around large glass panels, creating a clean grid pattern that suits contemporary and modern farmhouse homes equally well. This style has become one of the most requested sunroom looks in recent years, largely because the black frame reads as intentional and architectural rather than generic. It pairs particularly well with a home that already has black window frames elsewhere.
Structural glazing on higher end versions of this style eliminates visible frames entirely on certain wall sections, using structural silicone instead of a mechanical frame to hold the glass in place. This look costs significantly more than standard framed glass but creates an almost frameless appearance that reads as very high end. Reserve this upgrade for a feature wall rather than the whole room if budget is a concern.
The black powder coated frames hold their finish exceptionally well, though a very faint sheen dulling can appear on frames facing constant direct sun after a decade or more. This slow, even change is barely noticeable in person and is considered normal wear for exterior powder coating exposed to UV for that long. A quality powder coat warranty typically covers this kind of gradual change for ten years or more. Check the manufacturer’s specific warranty terms before assuming full coverage applies.
Balancing Glass Coverage With Privacy Needs
Full glass walls on a modern minimalist sunroom offer stunning views but sacrifice privacy, particularly on a lot with close neighbors or a street facing position. Consider frosted or reeded glass on the lower portion of walls facing the street while keeping upper sections clear for light and views. This compromise preserves the aesthetic while addressing a real practical concern.
Motorized shades built into the frame system add cost but solve the privacy question without changing the glass itself. These systems retract completely when not needed, preserving the clean minimalist look the style is chosen for in the first place. Budget an additional several thousand dollars for a full room shade system.
6. Cottage Style Sunroom With Multi Pane Windows
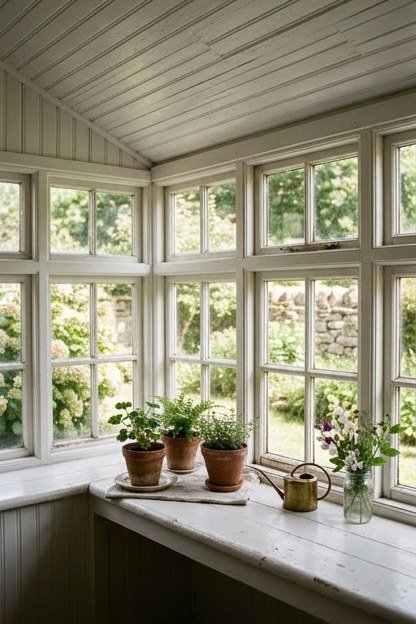
A cottage style sunroom uses smaller multi pane windows with visible grilles, creating a cozy, traditional look that suits colonial, cape cod, and cottage style homes. This style costs less than large single pane glass systems since the individual panes are smaller and simpler to produce, though the grille pattern does reduce the unobstructed view somewhat. Many homeowners find the trade off worthwhile for the character it adds.
Interior finishes on this style often lean toward beadboard ceilings and painted wood trim rather than the exposed structure of a modern sunroom. This creates a room that feels more like an extension of a cozy interior than a glass box bolted onto the house. The finish choices here matter as much as the window style itself for achieving the cottage look.
Painted wood windowsills on this style develop a soft, worn smooth texture at the edges where hands rest over years of daily use, a gentle polish that comes from repeated contact rather than any kind of damage. Many cottage style homeowners consider this natural burnishing part of the room’s charm rather than something to prevent or repair. A protective wax applied occasionally maintains the wood’s health without interrupting this natural polish from developing. This small maintenance step extends the sill’s life significantly.
Choosing Grille Patterns That Suit Your Home Era
A six over six grille pattern suits an earlier colonial or cape cod home, while a simpler two over two pattern reads as more relaxed cottage than formal colonial. Match the grille pattern to your home’s existing window style rather than choosing one that looks appealing in isolation. Inconsistent grille patterns between the house and the new sunroom stand out immediately to a trained eye.
Simulated divided lite windows, which use a single pane with applied grilles rather than true multiple panes, cost less and clean more easily than true divided lite versions. The visual difference is minor from a normal viewing distance, making this the practical choice for most cottage style sunroom projects on a moderate budget. Most homeowners choose simulated divided lite once they compare the price gap directly.
7. Mediterranean Style Sunroom With Arched Openings
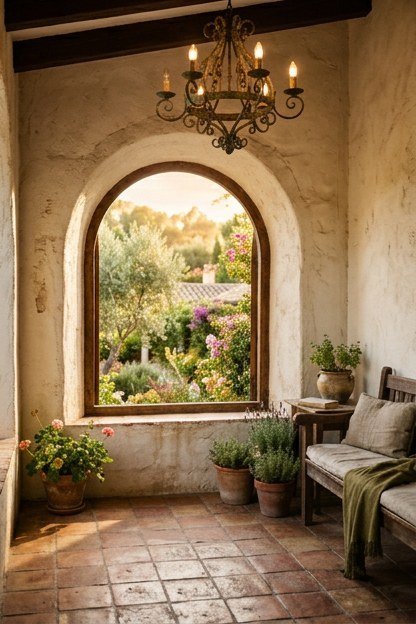
A Mediterranean style sunroom uses arched window and door openings along with stucco exterior finishes, matching the Mediterranean and Spanish revival homes common in warmer climates. This style requires more specialized construction than a standard rectangular sunroom, since arched openings need custom framing and glass cut to match the curve. Expect a higher labor cost as a result.
Terra cotta tile flooring pairs naturally with this style and holds up exceptionally well in a sunroom’s variable temperature and humidity conditions. The tile can develop a soft, mellowed patina over years of foot traffic and sun exposure, deepening slightly in color rather than showing wear in any damaging way. Sealing the tile periodically maintains this look while protecting against staining.
Wrought iron accents, common on window grilles and light fixtures in this style, develop a light surface tarnish over time unless regularly maintained with a protective coating. Many homeowners embrace this tarnished look as authentically Mediterranean rather than fighting it with constant polishing, since a slightly aged patina actually suits the style better than a bright polished finish. Skipping maintenance entirely lets the tarnish continue developing naturally instead.
Stucco Maintenance For Sunroom Additions
Stucco exteriors need periodic resealing, typically every five to ten years depending on climate exposure, to prevent water infiltration at the sunroom’s connection points to the main house. This maintenance step is often overlooked by homeowners unfamiliar with stucco, leading to moisture problems that could have been prevented easily. Add this to your annual home maintenance checklist once the sunroom is complete.
Color matching new stucco to an existing house’s aged stucco can be tricky, since stucco naturally lightens somewhat over years of sun exposure. Request a sample panel from your contractor and compare it against your existing wall in actual daylight before approving the final color. This simple step avoids a visible seam between old and new stucco.
8. Farmhouse Style Sunroom With Exposed Trusses
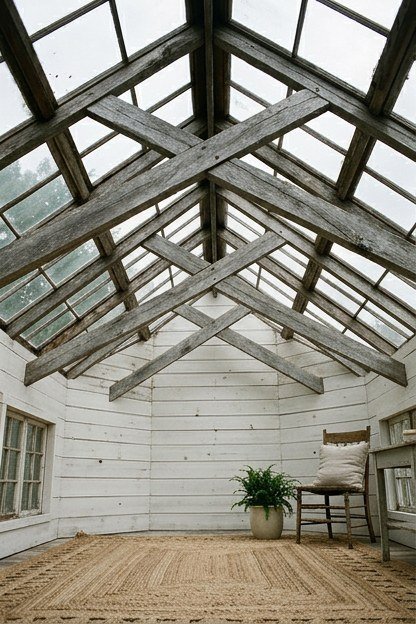
A farmhouse style sunroom features exposed wood trusses, often in a distinctive scissor or king post configuration, paired with simple board and batten or shiplap interior walls. This style has surged in popularity alongside the broader modern farmhouse trend and suits both true farmhouses and newer homes built in that aesthetic. The exposed truss ceiling is usually the room’s signature visual feature.
Shiplap walls in this style are typically painted white or a soft neutral, creating a bright backdrop that contrasts with the darker stained wood trusses above. This contrast is central to the farmhouse look and should be planned deliberately rather than left to chance during construction. Bring paint samples to the site during framing to check the contrast in actual light.
Unstained truss wood develops a natural silvering over years of sun exposure through the sunroom glass, a soft gray tone that many farmhouse style homeowners specifically seek out rather than avoid. Some contractors offer a pre-weathered wood option that achieves this look immediately if you do not want to wait years for it to develop naturally. Ask for sample boards showing both natural and pre-weathered finishes before committing to either approach. The price difference between the two options is usually modest.
Choosing Between Real Wood And Faux Beam Trusses
Real structural wood trusses cost significantly more than faux beams applied to a hidden steel or engineered wood structure, but they offer genuine structural function alongside the visual appeal. Faux beams work well when the sunroom’s actual structural needs are met by a simpler hidden frame, saving considerable cost without a major visual sacrifice. Most homeowners cannot tell the difference from normal viewing distance once installed.
Engineered wood trusses, a middle option, offer more consistent sizing and fewer natural defects than solid sawn timber while still providing genuine structural support. These cost less than solid timber trusses of the same size and are worth considering if a fully custom look is not the top priority for your design. Ask your structural engineer whether engineered trusses meet your specific span requirements before ruling out solid timber entirely. Most residential sunroom spans work fine with either option.
9. Coastal Style Sunroom With Wide Plank Flooring
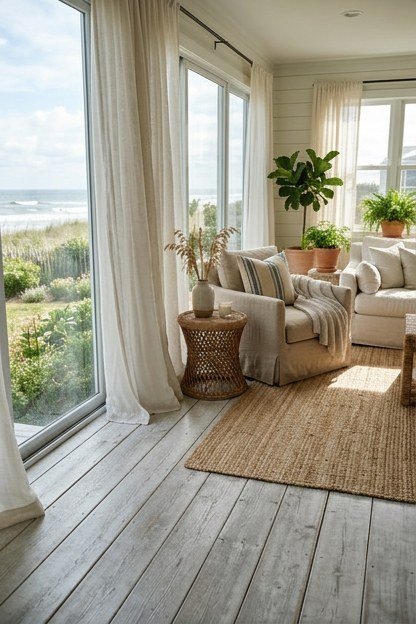
A coastal style sunroom emphasizes light, airy finishes like wide plank whitewashed flooring, white painted trim, and simple linen curtains, suiting beach adjacent homes and any house aiming for a relaxed seaside feel. This style keeps furnishings and finishes light in both color and visual weight, letting natural light bounce around the room rather than getting absorbed by dark surfaces. It works particularly well in a room meant purely for relaxing.
Wide plank wood or engineered flooring in this style shows a gentle silvering or graying if left unfinished and exposed to salt air, which many coastal homeowners consider part of the authentic look rather than something to prevent. A protective sealant slows this process considerably if you prefer to maintain the original wood tone longer instead. Reapply the sealant roughly every two years in a true coastal environment for the best protection. Skipping this maintenance simply speeds up the natural graying process instead.
Rope and jute accents, common in coastal styling through window treatments or light fixtures, develop a soft, faded look after prolonged sun exposure that suits the style’s relaxed aesthetic well. This natural fading happens gradually and evenly across the material rather than in any uneven or damaging pattern. Rotating these accents occasionally keeps the fading even across the full piece. Replacement every few years is normal for natural fiber accents in a sun exposed room.
Protecting Coastal Finishes From Salt Air Corrosion
Metal hardware in a true coastal environment needs marine grade or stainless steel components to resist the accelerated corrosion that salt air causes on standard hardware. Skimping on hardware quality in this style leads to premature rust and hardware failure within just a few years near the ocean. Specify marine grade fasteners and hinges explicitly in your project contract.
Window glass in a coastal sunroom benefits from a protective coating that resists salt spray buildup, reducing how often you need to clean the glass to maintain clear views. This coating adds a modest cost but pays for itself in reduced maintenance over the life of the windows, particularly for a home directly facing the water. Ask your glass supplier specifically about coastal or marine rated coatings during the ordering process. Standard residential glass coatings are not always rated for this level of salt exposure.
10. Contemporary Sunroom With Retractable Glass Walls
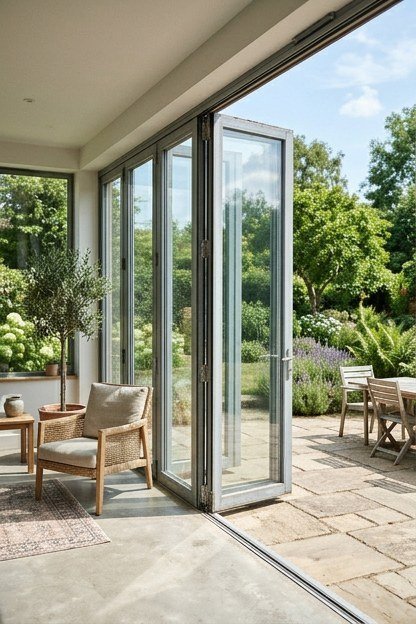
A contemporary sunroom with retractable glass walls uses a folding or sliding glass door system that opens the entire wall, blurring the line between indoor sunroom and outdoor patio completely. This style commands a premium price due to the specialized hardware required, but it offers unmatched flexibility between an enclosed room and an open air space. Many homeowners consider it the closest thing to having two rooms in one.
The track system for retractable walls requires precise installation and periodic maintenance to keep panels sliding smoothly for years to come. Dust and debris in the track are the most common cause of sticking panels, so factor a simple quarterly cleaning routine into your maintenance plan from the start. A well maintained system should glide easily for decades.
Aluminum framing on these systems develops a very faint, even dulling of its factory finish after many years of exposure to direct sun and weather, a slow change that professional grade powder coating resists far better than cheaper anodized finishes. Choosing quality framing upfront avoids a visibly uneven appearance developing over time. Request the manufacturer’s finish warranty length as a quick quality indicator when comparing systems. A longer warranty usually signals a more durable coating process.
Climate Considerations For Fully Open Sunrooms
A fully retractable wall system works best in a climate with a long mild season, since the room’s main appeal, opening completely to the outdoors, only applies when outdoor conditions are actually pleasant. In a climate with harsh winters or extreme summer heat, budget for a strong HVAC system to keep the room usable when the walls stay closed. A climate with only a few pleasant months may not justify the premium this system commands.
Screen panels that pair with retractable glass systems let you enjoy airflow without full insect exposure when the glass is open. Not all retractable systems include this option standard, so confirm it is available and budget for it separately if your chosen system does not include it by default. Test the screen panel’s operation in person if possible, since some slide smoothly while others require more effort. This small detail affects daily usability more than it seems.
11. Transitional Sunroom Blending Traditional And Modern Elements
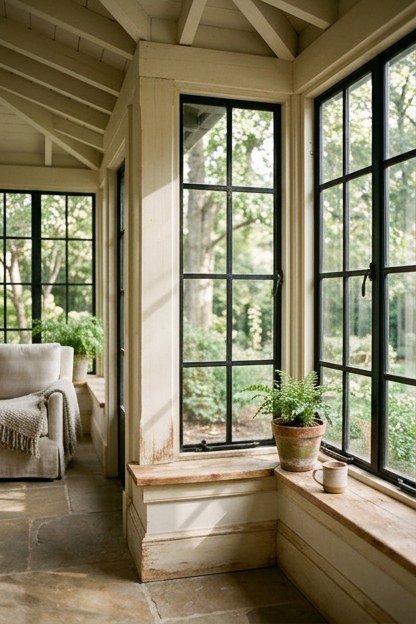
A transitional style sunroom deliberately blends traditional elements, like classic trim profiles, with modern touches, like large expanses of glass and minimal ornamentation. This approach suits homeowners who want a sunroom that feels current without looking like a jarring departure from a more traditional main house. It is one of the more forgiving styles to get right since it does not demand strict adherence to one aesthetic.
Balancing the traditional and modern elements takes a more experienced designer’s eye than committing fully to one style or the other. Too much traditional detail and the room reads as dated rather than transitional, while too much modern minimalism and it loses the connection to the house that made transitional style appealing in the first place. Work with a designer who can show examples of successfully balanced transitional rooms.
Mixed material palettes, like painted wood trim paired with black metal window frames, are common in this style and each material ages according to its own separate timeline. The painted wood may need repainting well before the metal frames show any wear at all, so plan your long term maintenance budget around the shorter lived material rather than assuming uniform aging. This upfront conversation prevents budget surprises many years down the road.
Getting Proportions Right In A Blended Style
Window to wall ratio matters enormously in transitional design, since too much glass pushes the room toward modern while too little pushes it toward traditional regardless of trim details. Aim for roughly sixty to seventy percent glass coverage as a starting point for a genuinely balanced transitional look. Adjust based on your specific climate and privacy needs from there.
Trim thickness and profile complexity should sit at a middle ground between ornate traditional millwork and the flat, minimal trim common in modern design. A simple, chunky trim profile without excessive detail usually reads as transitional rather than clearly landing in either camp. Bring photos of both extremes to your contractor to help calibrate this middle ground.
12. Prefab Sunroom Kit With Customizable Panels
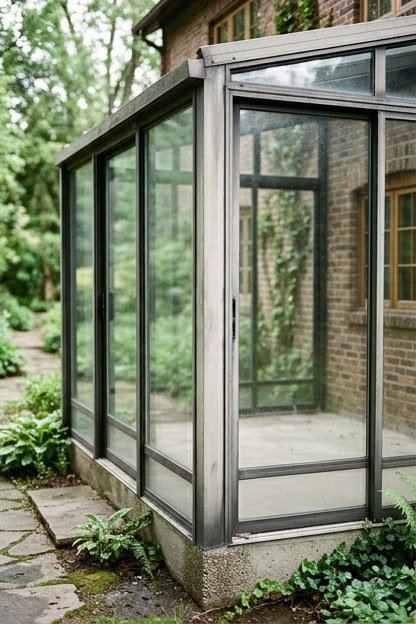
A prefab sunroom kit ships as pre-engineered panels that a crew assembles on site, typically costing less and building faster than a fully custom stick built sunroom. This approach suits homeowners on a tighter budget or timeline, though customization options are more limited than a fully custom design. Many manufacturers now offer enough panel and finish options to approximate several of the styles covered elsewhere in this guide.
Foundation requirements for prefab kits vary significantly between manufacturers, with some requiring a full poured foundation matching custom construction standards while others work with a simpler pier system. Confirm your specific kit’s foundation requirements before assuming the cost savings extend to site preparation as well. This is a common area where budget surprises appear.
The powder coated aluminum framing common on prefab kits holds up well over time, typically showing only a faint, even fading after a decade or more of direct sun exposure. Warranty coverage on framing finish often extends ten to twenty years depending on the manufacturer, so review this coverage carefully when comparing kit options. Ask specifically whether the warranty covers fading and chalking or only structural failure. These are often separate warranty categories with different coverage lengths.
Comparing Prefab Manufacturers Effectively
Request finish samples from at least three manufacturers before deciding, since panel quality and finish options vary more between brands than marketing materials suggest. A cheaper kit sometimes uses thinner gauge aluminum that dents more easily during shipping and installation, a real difference that only becomes apparent when comparing samples side by side. Handle each sample directly rather than judging from photos or a showroom display alone. The weight and rigidity difference between gauges is obvious once you compare them in hand.
Read warranty terms carefully, particularly around glass seal failure, which is the most common prefab sunroom warranty claim. A strong warranty on glass seals specifically, separate from the general structural warranty, indicates a manufacturer confident in their glazing process. Ask for the specific failure rate data if a manufacturer is willing to share it. This detail reveals more about actual product quality than marketing claims alone.
13. Sunroom Conversion From An Existing Porch
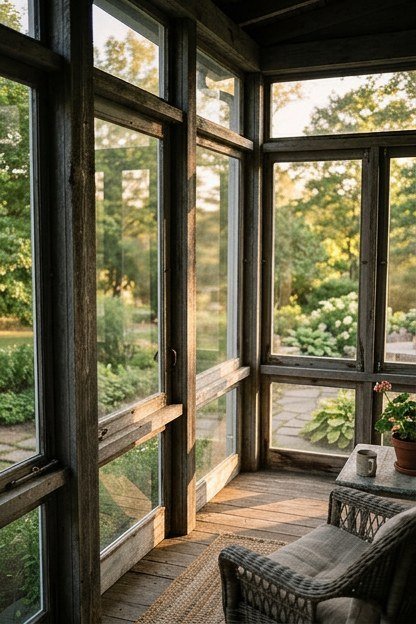
Converting an existing covered porch into a sunroom often costs less than building a new addition from scratch, since the roof structure and foundation already exist. This approach works best when the existing porch already has good bones, meaning a solid foundation and roof structure that just needs glass and insulation added. A structural inspection before committing to this approach comes first.
Existing porch flooring, often concrete or older wood, may need upgrading to handle the added weight of glass walls and any HVAC equipment. Budget for this potential upgrade separately, since it is easy to underestimate when the porch conversion is marketed as a budget friendly option compared to new construction. A contractor’s initial walkthrough should flag this concern early.
Original porch woodwork, if preserved through the conversion, often already carries years of weathering and a soft gray patina that gives the new sunroom instant character a brand new addition would lack. Many homeowners specifically choose this conversion route to preserve that established, lived in look rather than starting completely fresh. Discuss preservation techniques with your contractor before demolition begins on any part of the existing structure. Original material lost during construction cannot be replaced authentically later.
Assessing Whether Your Porch Is A Good Conversion Candidate
Check the existing roof’s condition and remaining lifespan before committing to a porch conversion, since a roof needing replacement soon adds significant unplanned cost to the project. A roofing contractor can typically assess remaining lifespan in a single visit for a modest inspection fee. This assessment should happen before finalizing any conversion budget.
Foundation cracks or settling issues on an older porch need addressing before glass walls go in, since glass systems are far less forgiving of foundation movement than open porch framing ever was. A structural engineer’s assessment, while an added upfront cost, prevents expensive problems after the glass installation is complete. Budget this inspection as a non negotiable early step rather than an optional add-on. The cost of the inspection is small compared to repairing a cracked glass panel later.
14. Sunroom With Integrated Outdoor Kitchen Access
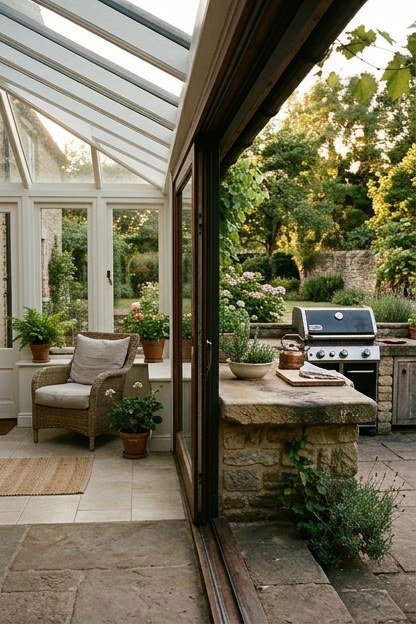
A sunroom designed with direct access to an outdoor kitchen or grilling area creates a natural indoor outdoor entertaining flow that many homeowners specifically request for this style of addition. Wide sliding or folding doors between the sunroom and outdoor kitchen area work best for this layout, allowing easy movement during meal preparation and serving. Plan the door placement around your actual grilling and serving patterns.
Ventilation planning matters significantly here, since cooking odors and smoke need a clear path away from the sunroom rather than drifting inside every time the doors open. Position the outdoor kitchen’s grill area downwind of the typical breeze direction relative to the sunroom’s main doors wherever possible. This small planning detail prevents a persistent smoke smell inside the room.
Stone or concrete countertops near this transition zone develop a natural honed patina from years of food preparation and cleaning, a soft dulling of the original polished finish that many homeowners consider a sign of a well used, well loved space. Sealing these surfaces periodically slows this natural change without preventing it entirely. Reseal these surfaces roughly once a year in a heavily used outdoor kitchen zone. This simple habit protects the material while still allowing its character to develop naturally.
Flooring Choices That Bridge Indoor And Outdoor Zones
Porcelain tile that mimics natural stone works well as a flooring choice that bridges a sunroom and adjacent outdoor kitchen area, since the same tile can run across both zones for visual continuity. This material handles moisture and temperature swings far better than most wood options in a zone this exposed to outdoor conditions. Confirm the specific tile is rated for both indoor and outdoor use before ordering.
A slight level change or threshold between the sunroom and fully outdoor area helps manage water drainage away from the conditioned interior space. This small transition detail prevents water intrusion during heavy rain without creating a significant trip hazard if designed with a gentle, gradual slope. Discuss the exact slope and threshold height with your contractor during the design phase rather than leaving it to standard defaults. A well designed transition should be barely noticeable underfoot.
15. Sunroom With Skylights For Additional Natural Light
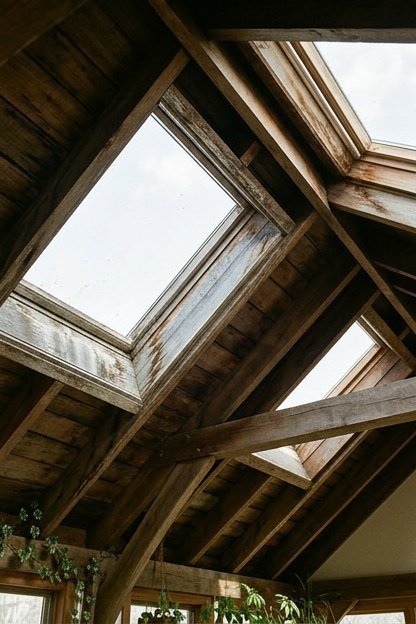
Adding skylights to a sunroom’s roof structure brings in additional overhead light that side windows alone cannot provide, particularly valuable in a sunroom positioned on a shaded side of the house. This feature works with nearly any of the styles covered above, adding a genuinely different quality of light rather than just more of the same. Consider it especially if your sunroom faces north or is shaded by mature trees.
Skylight placement requires careful planning around the sun’s path throughout the day and across seasons, since a poorly placed skylight can create uncomfortable glare or excessive heat gain at certain times of year. A solar path study, which many contractors can run digitally before construction, helps position skylights for the best light without the drawbacks. The modest cost of the study is worth avoiding a permanently misplaced skylight.
The skylight’s flashing and seal are the components most likely to need attention over the years, and a well installed skylight shows only a faint, even weathering on its exterior frame after a decade or more of sun and weather exposure. Budget for a professional seal inspection every several years to catch any issues before they become water intrusion problems. Addressing a failing seal early is far cheaper than repairing water damage later.
Choosing Between Fixed And Operable Skylights
Fixed skylights cost less and have fewer failure points over time, making them the practical choice when additional light is the only goal. Operable skylights that open for ventilation cost more and add another seal point that needs maintenance, but they offer genuine functional benefit in a sunroom that benefits from rising heat escaping through the roof. Weigh your actual ventilation needs against the added maintenance before choosing the operable version. Many sunrooms with good cross ventilation elsewhere do fine with fixed skylights alone.
Remote operated skylights, an upgrade over manual crank versions, add convenience for skylights positioned out of easy reach in a vaulted sunroom ceiling. This upgrade costs several hundred dollars per unit but is worth considering for any skylight higher than you can comfortably reach with a pole. Rain sensors are often bundled with remote operated models, closing the skylight automatically if weather turns. This added feature alone justifies the upgrade for many homeowners.
What A Sunroom Addition Actually Costs By Style
Cost ranges for sunroom additions vary enormously based on the style choices covered throughout this guide, from a basic three season kit to a fully custom four season Victorian style room. A realistic budget conversation with your contractor should reference specific styles rather than a vague overall sunroom estimate, since the gap between the cheapest and most expensive options here spans tens of thousands of dollars. Vague estimates early in the process tend to grow substantially once details are finalized.
Financing options matter for larger sunroom projects, and many contractors partner with financing companies specifically for home addition projects. Compare these financing terms against a home equity line of credit or a personal loan from your own bank before committing, since contractor financing terms are not always the most competitive option available. Get at least two outside financing quotes before accepting a contractor’s in-house offer. The difference in total interest paid can be substantial over a multi year loan term.
The table below gives rough per square foot ranges across the style categories covered in this guide, though actual costs vary by region and material choices. Use these ranges as a starting point for budget conversations rather than a firm quote. Your local labor market and material availability will shift these numbers in either direction.
| Style category | Cost per square foot | Best suited climate |
|---|---|---|
| Basic three season, prefab | $150 to $250 | Mild to warm |
| Custom four season, high end finishes | $400 to $600+ | Any climate |
| Porch conversion | $100 to $200 | Any climate |
Common Mistakes When Planning A Sunroom Addition
Choosing a style purely from photos without considering your home’s actual architecture is the most frequent mistake homeowners make on this type of project. A style that looks stunning on a different home style can look genuinely out of place on yours, actively hurting curb appeal rather than helping it. Bring photos of your own home to every design consultation as a constant reference point.
Underestimating the HVAC and utility costs of a four season room is the second common trap, since many homeowners budget for the glass and framing but forget the equipment needed to actually condition the space comfortably. Get a full mechanical quote before finalizing your overall project budget, not after construction has already started. This single step avoids the most common budget overrun on sunroom projects.
Skipping the permit process to save time is the third mistake, and it is one that causes real problems at resale when an unpermitted addition surfaces during a buyer’s inspection. The time saved skipping permits rarely outweighs the complications it creates later, including potential fines and forced removal in the worst cases. Factor permit review time into your project timeline from the very beginning rather than treating it as a formality. A little patience here avoids a much larger headache later.
Working Effectively With Your Sunroom Contractor
Request references specifically from clients who built the same style sunroom you are considering, not just general home addition references. A contractor experienced in modern minimalist glass rooms may not have the same skill set for Victorian curved glass work, so match their portfolio to your specific style choice. This targeted reference check reveals more than a general contractor rating ever could.
Get every style specific detail, down to trim profiles and glass types, written into the contract rather than left as a verbal understanding. Sunroom projects with vague contracts are the ones most likely to end in disputes over finish quality or missing details once construction begins. Request material samples be referenced by name and model number directly in the contract language. This level of specificity protects both you and the contractor from misunderstandings.
Conclusion
Choosing the right sunroom addition style starts with an honest look at your home’s existing architecture, your climate, and how you actually plan to use the room day to day. The fifteen styles and features covered here range from a budget friendly three season screened room to a fully custom four season glass addition, giving you real options across nearly any budget and any home style. Matching the addition to your house genuinely matters more than chasing whatever style is currently trending online.
Take the time to plan utilities, permits, and maintenance realistically before signing a contract, since the projects that go smoothly are always the ones where these details got attention early rather than as an afterthought. A well matched sunroom addition adds genuine daily enjoyment to your home while protecting, rather than hurting, its resale value down the road. Revisit this guide’s style comparisons whenever you feel unsure during the planning process. A little extra research upfront pays off across years of enjoying the finished room.
Frequently Asked Questions
Does a sunroom addition actually increase home value? A well built, permitted sunroom that matches the home’s style typically adds real value, though it rarely returns its full cost at resale. Value depends heavily on your local market and how well the addition matches the rest of the house.
How long does a typical sunroom addition take to build? A prefab three season kit can go up in a few weeks, while a fully custom four season room with specialty glass often takes two to four months. Permit approval time adds to this timeline and varies significantly by location.
Can I convert my existing sunroom from three season to four season later? Yes, though it usually requires replacing the glass and adding insulation and HVAC capacity, which costs nearly as much as building a four season room from scratch. Planning for this upgrade path during initial construction saves money if you expect to make this change eventually.
Do I need a permit for a small sunroom addition? Almost every sunroom addition requires a permit regardless of size, since it involves new structural elements and often electrical or HVAC work. Check with your local building department before starting any work.
What is the most budget friendly sunroom style? A prefab three season kit with screened walls typically offers the lowest entry cost while still providing genuine usable outdoor adjacent space. Porch conversions can cost even less if the existing structure is in good condition.
How do I know which style matches my home? Look at your home’s existing trim, window style, and roofline details, then choose a sunroom style that echoes those same elements rather than introducing a completely different aesthetic. A contractor experienced in additions can help identify these matching details if you are unsure.