
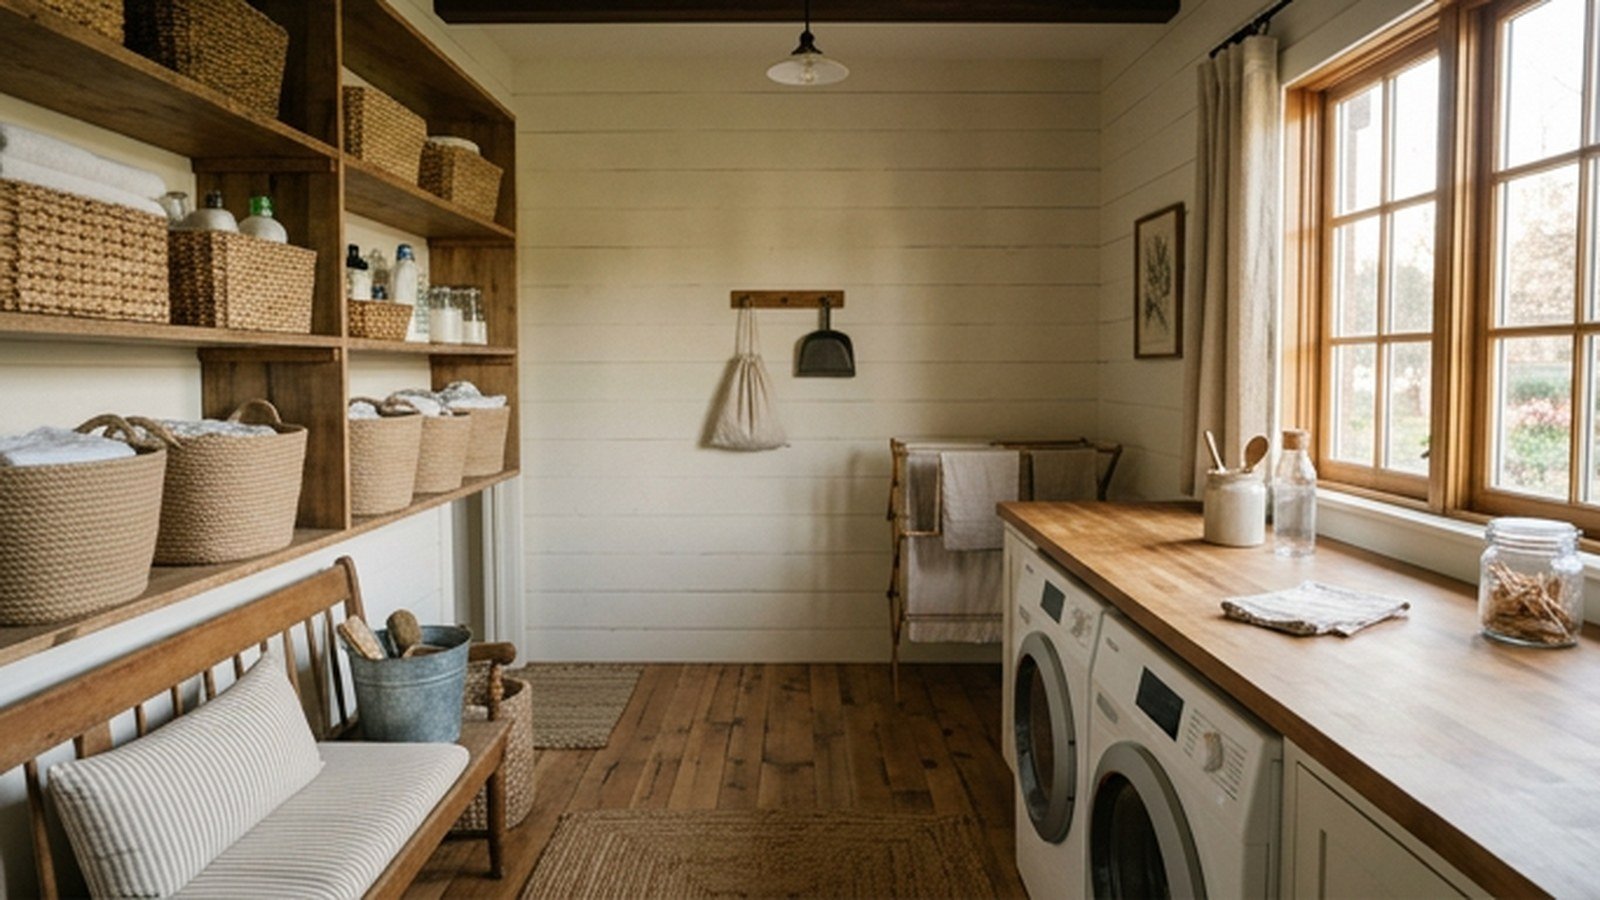
Farmhouse style turns a laundry room from a chore you hide behind a closed door into a space that looks intentional. The look leans on warm wood, simple hardware, and practical materials that hold up to detergent spills and wet floors, which makes it one of the most durable styles for this room. I have redone four laundry rooms in this style, ranging from a full renovation to a weekend refresh.
This guide covers fifteen specific farmhouse laundry room ideas, what each one actually costs, and where the style choices can go wrong in a room that sees daily wear. Expect honest notes about material durability, ventilation, and the small details that separate a genuine farmhouse look from a generic rustic one. By the end you will have a real plan scaled to whatever budget you are actually working with.
Farmhouse style can slide into looking dated or overly themed if every single element leans on the same barn wood and mason jar cliches. I will flag which choices earn their place and which ones read as costume rather than design throughout this guide. A restrained approach almost always looks more genuinely farmhouse than a room stuffed with every trend at once.
Why Farmhouse Style Works So Well In A Laundry Room
Farmhouse design grew out of genuinely practical rural buildings, and a laundry room is one of the most practical rooms in a modern home, which makes the style a natural fit rather than a forced one. The materials farmhouse style favors, painted wood, simple metal hardware, and durable stone or tile, handle moisture and daily wear better than more delicate styles would. This practical overlap is why farmhouse laundry rooms tend to age well rather than look tired.
The style also tolerates a working room’s inherent clutter better than a minimalist or modern aesthetic would. Open shelving, exposed hooks, and visible baskets read as intentional farmhouse charm rather than mess, which takes real pressure off keeping a laundry room perfectly tidy at all times. This forgiving quality matters enormously in a room that handles daily loads of clothes, detergent bottles, and drying racks.
The table below compares farmhouse style against a modern and a traditional laundry room approach on the factors that matter most for this specific room. None of the three is objectively better, since the right pick depends on your budget and how much daily wear the room actually sees. Use it as a starting point before reading the planning section that follows.
| Factor | Farmhouse | Modern | Traditional |
|---|---|---|---|
| Tolerance for visible clutter | High, reads as charm | Low, needs concealment | Moderate |
| Material durability | High, favors solid wood and stone | Moderate, depends on finish | High |
| Typical cost to achieve | Low to moderate | Moderate to high | Moderate |
Planning A Farmhouse Laundry Room Before You Start
Walk through your actual laundry routine before choosing any specific design element, noting where you fold, where wet items hang, and where supplies need to be within reach. A beautiful farmhouse shelf placed somewhere inconvenient for your real routine becomes a display piece rather than a functional part of the room. I redesigned my own laundry layout twice before landing on one that matched how I actually move through the space.
Check your room’s ventilation and moisture levels honestly before committing to raw or lightly sealed wood finishes, since farmhouse style leans heavily on wood tones that can warp or discolor in a consistently humid laundry room. A properly vented dryer and a working exhaust fan matter more here than in almost any other room in the house. Address ventilation issues before investing in finishes that moisture will damage.
Set a realistic budget range before shopping, since farmhouse style can be achieved through inexpensive paint and hardware changes or through a full custom cabinetry renovation. Both approaches produce a genuine farmhouse look, so match your plan to what you can actually spend rather than assuming the style requires a full remodel. The ideas below are ordered roughly from lower cost to higher investment.
1. Shiplap Wall Treatment Behind The Machines
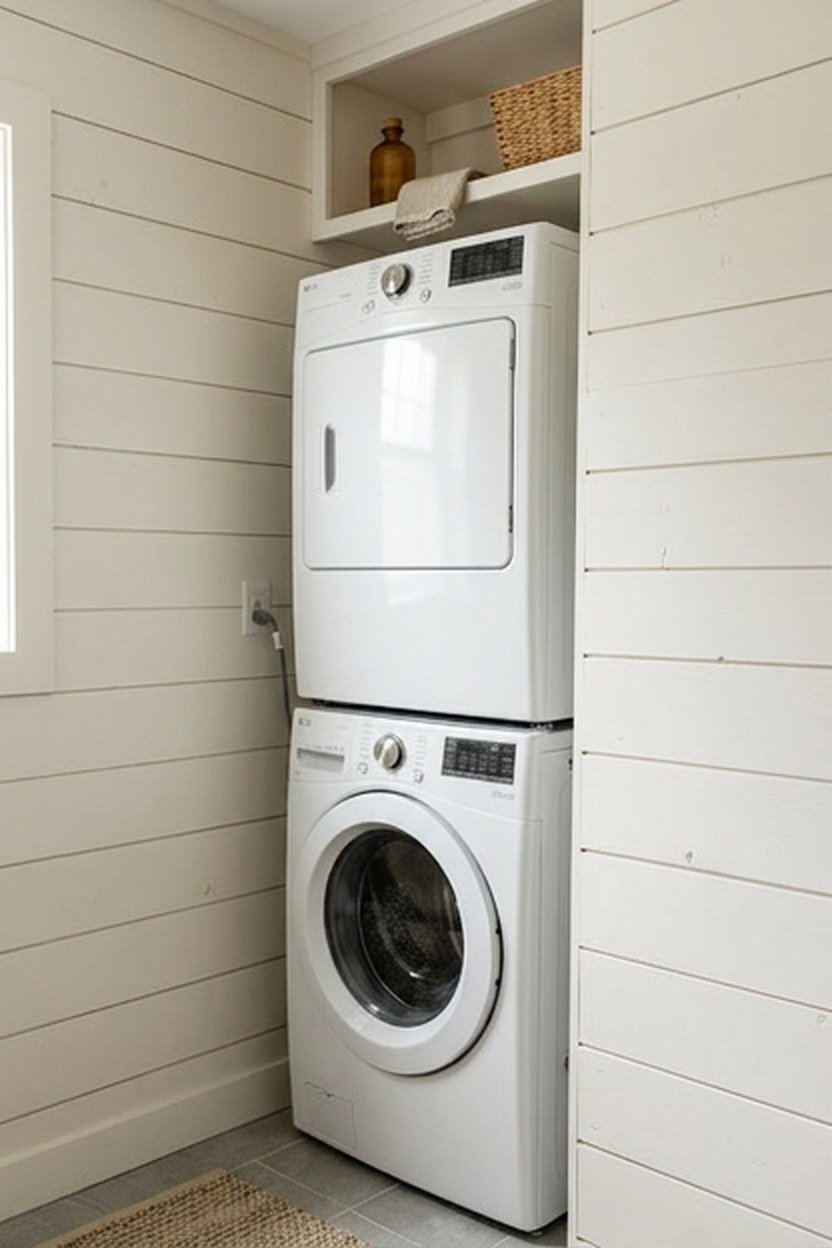
Shiplap paneling installed on the wall behind or around the washer and dryer is one of the most recognizable farmhouse laundry room features, and it delivers strong visual impact for a moderate cost. Most shiplap installations for a single wall run between 200 and 500 dollars in materials, with the cost climbing if you hire installation rather than doing it yourself. The horizontal lines and visible seams are the whole point, so resist the urge to fill every gap perfectly smooth.
Paint the shiplap in a soft white or warm cream rather than a stark bright white, since the slightly warmer tone reads as more authentically farmhouse and hides everyday scuffs better over time. I painted my own shiplap in a bright white originally and repainted within a year once I noticed how quickly every mark showed against it. A warmer off white solved that problem completely while still keeping the classic farmhouse look.
The painted shiplap boards will show a soft matte texture developing across the surface within the first year of normal humidity exposure from the laundry appliances nearby. This gradual textured change in the paint’s original sheen is expected for painted wood in a laundry environment and does not affect the boards’ structural integrity. A humidity resistant paint formulation slows this change if you want to preserve the original finish longer.
Choosing Shiplap Board Width For Your Room Size
Wider shiplap boards, around six to eight inches, suit a larger laundry room and install faster since fewer total boards are needed to cover the same wall. Narrower boards, closer to three or four inches, suit a smaller laundry room since the tighter spacing of lines reads as more detailed and can make a small wall feel less plain. Bring a sample board home before committing, since width matters more to the finished look than most people expect.
Real wood shiplap costs more than an MDF or engineered alternative but holds up better long term in a room with regular moisture exposure from the washer and dryer. Budget the price difference against how long you plan to stay in the home before choosing purely on upfront cost. A rental or short term home usually favors the cheaper engineered option instead.
2. Open Shelving With Woven Baskets
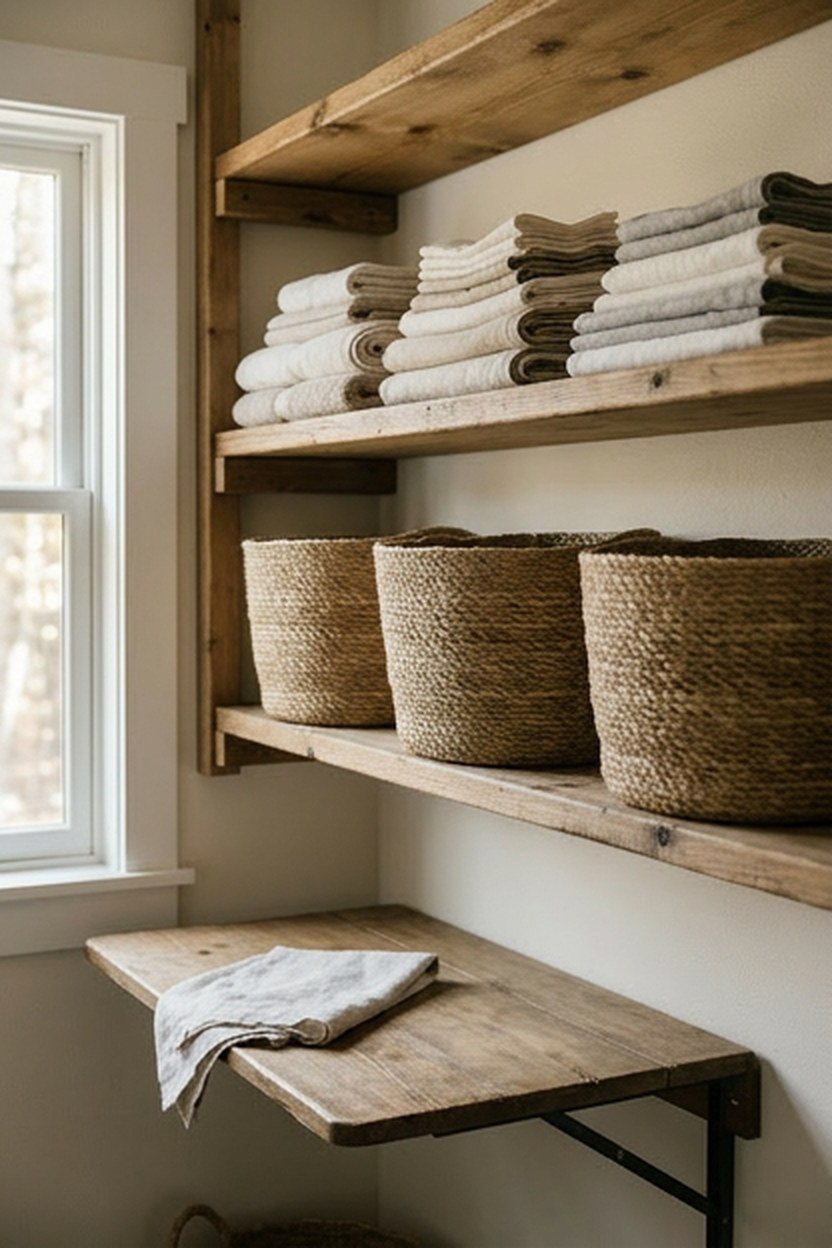
Open wood shelving lined with woven baskets replaces closed cabinetry with a display that keeps supplies accessible while looking intentionally styled rather than cluttered. This approach costs considerably less than built-in cabinetry, typically 150 to 400 dollars for shelving brackets, boards, and a set of matching baskets. The open format also makes it easier to see at a glance when a supply is running low.
Group baskets by category, detergent and cleaning supplies on one shelf, extra linens on another, rather than mixing everything together across the shelving. This organizational habit keeps the open shelving looking curated instead of like a random collection of bins. I sort mine seasonally as well, moving out of season items to a higher shelf that sees less daily reach.
The woven baskets will develop a soft natural fiber texture becoming more visible over time as the material settles and the fibers loosen slightly with regular handling. This gradual textured change is completely normal for natural woven materials under daily use and actually adds to the authentic farmhouse character many people want. A basket kept away from direct handling shows less of this change than one used daily.
Shelf Bracket Weight Ratings For Heavy Baskets
Check the weight rating on any shelf bracket you install, particularly if you plan to store bulk detergent or heavy linens in the baskets above, since laundry supplies add up in weight faster than people expect. A bracket rated for light decorative use will sag or fail under a fully loaded basket over time. Choose brackets rated at least twice your expected load for a genuine safety margin.
Anchor shelving brackets into wall studs rather than relying on drywall anchors alone whenever possible, since a laundry room’s shelving typically carries more sustained weight than a decorative shelf elsewhere in the home. A stud finder costs little and takes the guesswork out of this step entirely. Skipping it is the most common reason a loaded shelf eventually pulls away from the wall.
3. Farmhouse Sink For Hand Washing
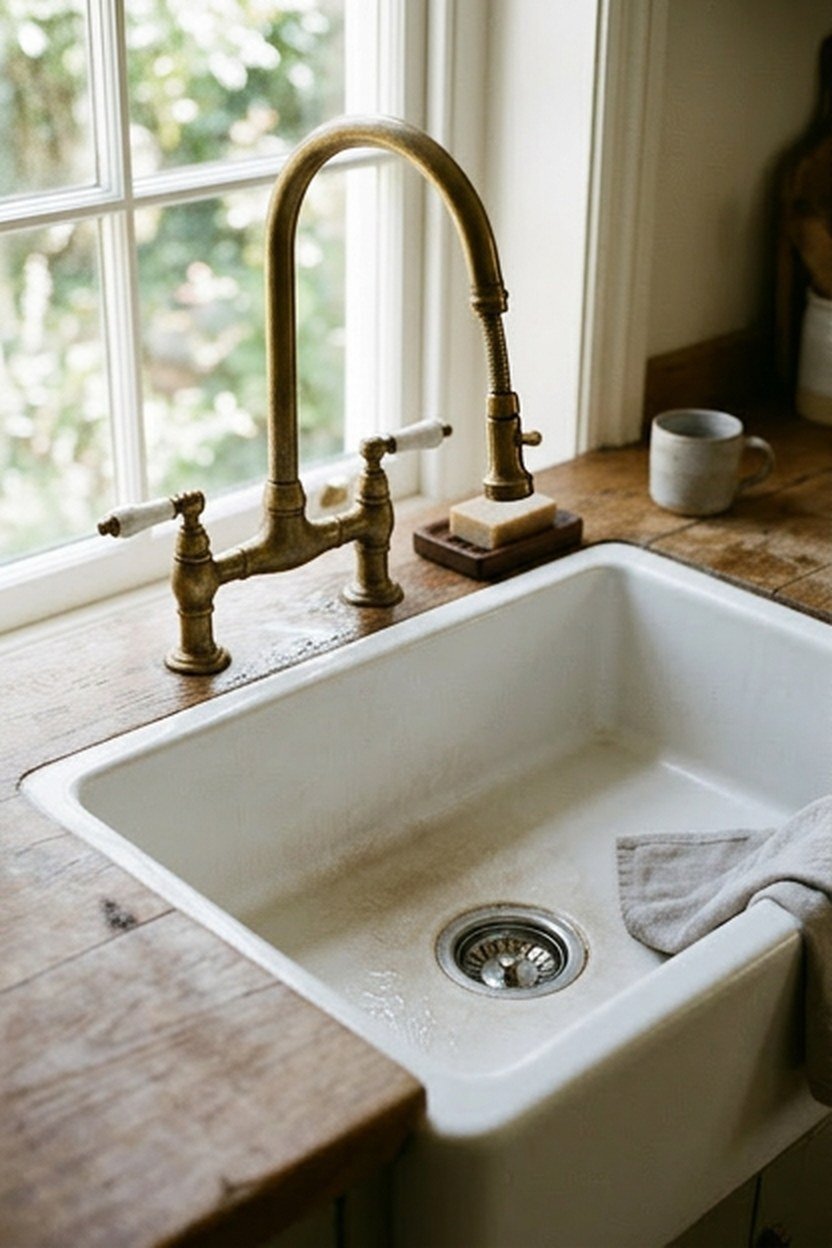
A farmhouse style apron front sink installed in the laundry room gives you a genuinely useful basin for hand washing delicates, soaking stained items, or cleaning up messes too big for a bathroom sink. Expect to pay 300 to 800 dollars for the sink itself, with plumbing installation adding several hundred more if you do not already have supply lines in place. This is one of the pricier ideas on this list but also one of the most functional additions.
Choose a fireclay or cast iron farmhouse sink over a lower cost composite option if your budget allows, since these materials handle the scrubbing and soaking a laundry room sink regularly sees better than composite alternatives. The weight of these materials also means better stability once installed, an important factor given how much force scrubbing a stained garment can apply. A local plumbing supply showroom lets you compare the actual weight and finish in person before ordering.
The fireclay surface will develop a soft matte texture in high contact areas near the drain where scrubbing brushes and heavy pots make regular contact. This textured surface change is a normal characteristic of fireclay under sustained daily use and does not affect the sink’s function or durability. Fireclay resists staining better than many alternative materials specifically because of this dense, textured surface quality.
Plumbing Considerations Before Adding A Sink
Confirm your laundry room already has water supply and drain lines nearby before assuming a farmhouse sink installation will be simple, since running new plumbing to a room that lacks it adds substantially to the project cost. A plumber’s initial assessment, usually a modest service call fee, tells you whether this is a straightforward addition or a more involved project. Get this assessment before falling in love with a specific sink model.
Consider a faucet with a pull down sprayer specifically for a laundry sink, since the extra reach helps with rinsing larger items and cleaning the basin itself more thoroughly than a fixed faucet allows. This upgrade typically adds only a modest amount to the total faucet cost. Most people who skip it end up wishing they had added it once the sink is in daily use.
4. Reclaimed Wood Folding Counter
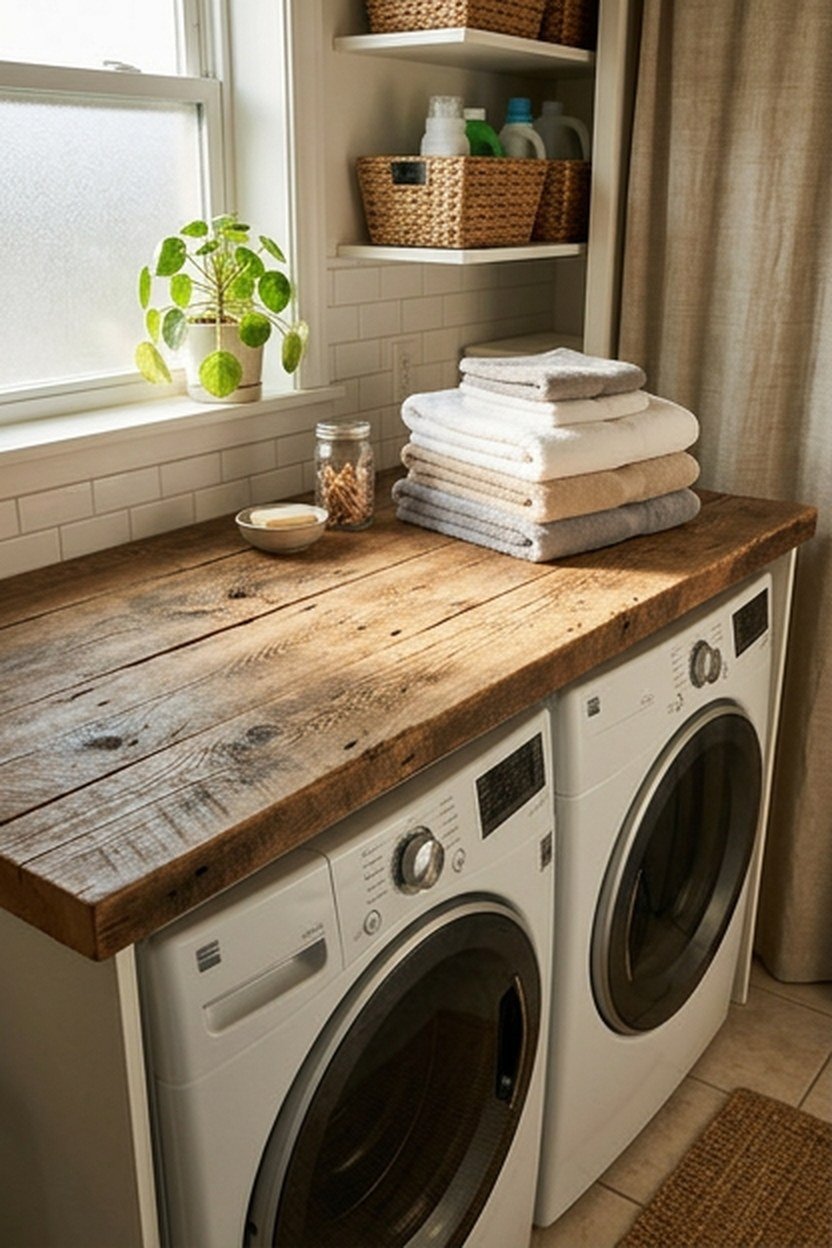
A folding counter built from reclaimed or distressed wood gives you genuine work surface for sorting and folding while adding real farmhouse character through the material itself. This works especially well built over a front loading washer and dryer set, turning otherwise wasted space above the machines into useful counter area. Expect to pay 200 to 600 dollars depending on whether you build it yourself or hire a carpenter.
Seal the reclaimed wood surface with a food safe or laundry safe sealant specifically, since this counter will regularly contact detergent, fabric softener, and damp clothing during normal use. An unsealed or improperly sealed reclaimed wood surface absorbs spills and stains far more readily than a properly finished one. This single step protects the investment in genuine reclaimed material considerably.
The reclaimed wood will show its existing natural grain pattern becoming more pronounced over time as the sealant wears slightly and the wood’s original character continues to show through. This is exactly the appeal of reclaimed material, and most people specifically choose it because this visible grain deepens rather than looks worn out. A fresh coat of sealant every few years maintains both the protection and the wood’s appearance.
Measuring Machines Before Ordering A Custom Counter
Measure your specific washer and dryer’s width and depth precisely before ordering or building a folding counter to sit above them, since machine dimensions vary more between brands than people expect. A counter built even an inch too narrow leaves an awkward gap, while one built too wide can interfere with door clearance on the machines below. Bring the exact manufacturer spec sheet for your appliances when ordering custom counter dimensions.
Leave clearance for the dryer vent and any exhaust hardware when planning counter height and depth, since this hardware sometimes protrudes further than the visible machine housing itself. Pull the machine away from the wall and check the actual vent depth before finalizing any counter design. This five minute check avoids a counter that does not fit once installed.
5. Vintage Style Pendant Lighting
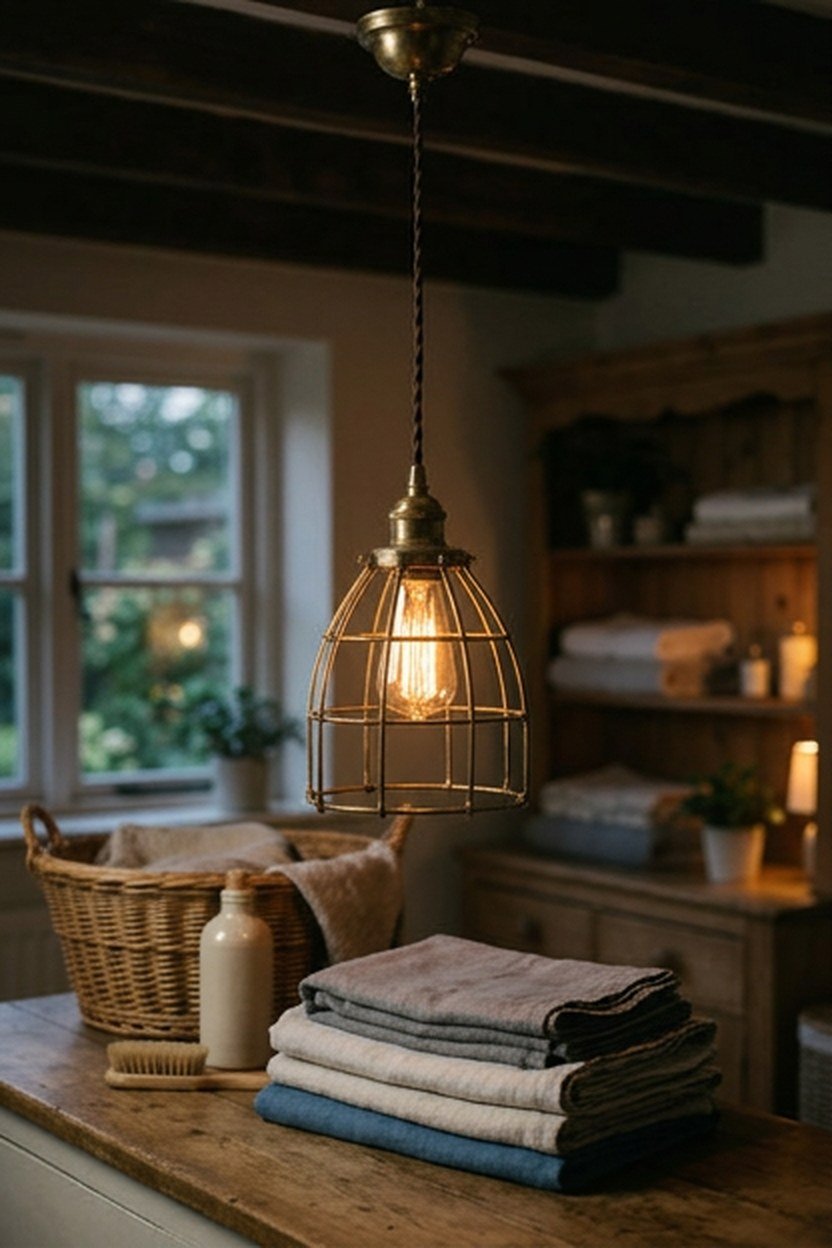
Vintage style pendant lights, often in an aged brass or matte black metal cage design, replace a plain overhead fixture with genuine farmhouse character for a relatively modest cost. Expect to pay 60 to 150 dollars per pendant depending on the size and finish, with most laundry rooms needing just one or two fixtures. This is one of the lowest cost, highest visual impact changes on this entire list.
Position pendant lighting to illuminate your actual folding or sorting surface directly, rather than centering it purely for symmetry in the room, since good task lighting matters more in a laundry room than decorative placement alone. I moved my own pendant six inches off center specifically to land directly over my folding counter, and the improved visibility for spotting stains before washing was immediately noticeable. Function should win over perfect symmetry in this specific room.
The metal fixture, if a brushed brass or bronze finish, will develop a soft natural sheen change over years of exposure to the laundry room’s humidity and temperature swings from the dryer. This gradual textured change in the metal’s original finish is expected for unlacquered brass and bronze specifically and many people choose these finishes anticipating this natural change. A lacquered finish resists this change if you prefer the fixture to look consistent over time.
Matching Pendant Light Height To Ceiling Height
Standard pendant light installation hangs the fixture roughly 30 to 36 inches above a counter or work surface, though a laundry room with a lower ceiling may need to adjust this closer to 24 inches to maintain safe headroom. Measure your specific ceiling height before ordering a pendant with a fixed cord or chain length that cannot be shortened easily. Some pendant styles include an adjustable length specifically to accommodate different ceiling heights.
Choose a pendant with a fully enclosed bulb housing rather than an exposed bulb design if the fixture will hang low enough for regular contact, since an exposed hot bulb near head height creates an unnecessary burn risk. This matters most in a narrow laundry room where people brush past the fixture regularly. A simple glass shade solves this without sacrificing the vintage look.
6. Barn Door For Laundry Room Entry
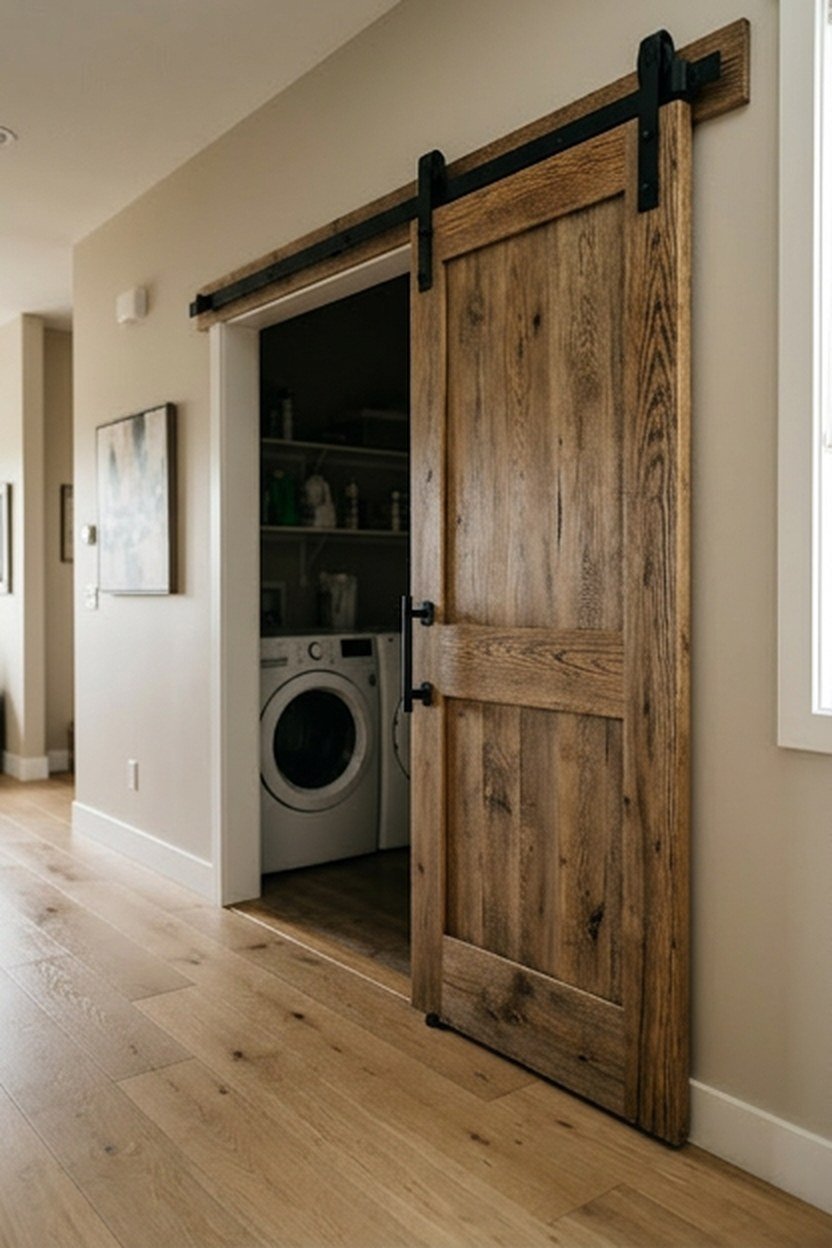
A sliding barn door installed at the laundry room entrance saves the floor space a swinging door would need while adding one of the most recognizable farmhouse details available. This works well for a laundry room in a tight hallway or near a kitchen where a swinging door’s arc would interfere with foot traffic. Expect to pay 250 to 600 dollars for a quality barn door and hardware kit.
Measure your wall space carefully before ordering, since a sliding barn door needs clear wall area beside the doorway roughly equal to the door’s own width to slide open fully. This space requirement catches people off guard in a tight hallway specifically, so confirm the door will not block a light switch, thermostat, or another doorway when fully open. A paper mockup taped to the wall at the door’s actual dimensions reveals this conflict before you order anything.
The door’s wood surface will show a visible natural grain pattern becoming more pronounced along the track rail edge where the door makes repeated contact during sliding. This textured wear pattern at the contact point is normal for a sliding door under regular daily use and does not affect how smoothly the door operates. A quality track system distributes this contact evenly rather than concentrating wear at one specific spot.
Sound And Privacy Considerations With A Barn Door
A sliding barn door does not seal against the door frame the way a traditional swinging door does, which means it offers less sound dampening and privacy than a standard door. This tradeoff matters more in a laundry room that shares a wall with a bedroom or home office than in one tucked away near a garage or mudroom. Consider this acoustic gap honestly before choosing a barn door purely for its visual appeal.
Add a simple foam or felt door seal strip along the door’s edge if sound transfer becomes a genuine problem after installation, which recovers some of the sound dampening a traditional door provides without abandoning the barn door look entirely. This fix costs only a few dollars and installs in minutes. Most households find it solves the majority of the noise complaint.
7. Galvanized Metal Accents And Fixtures
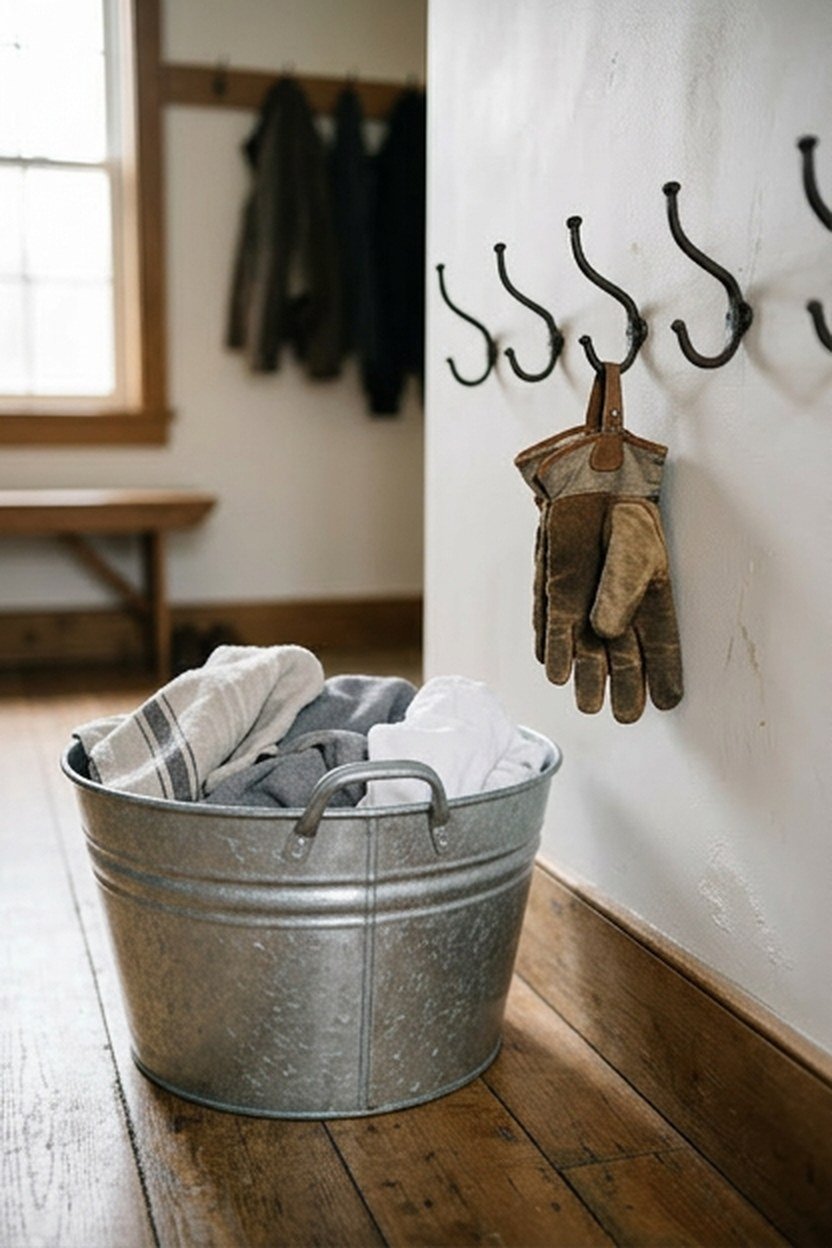
Galvanized metal accents, whether a laundry basket, a set of drawer pulls, or a wall mounted drying rack, add an industrial farmhouse texture that pairs naturally with painted wood and shiplap. These accents typically cost far less than the larger structural ideas on this list, usually 15 to 60 dollars per piece depending on size. This makes galvanized metal one of the easiest entry points into farmhouse style for a limited budget.
Mix galvanized pieces with warmer wood tones and brass or black hardware rather than using galvanized metal for every single accent in the room, since an entirely metal palette reads as more industrial than farmhouse. I use a galvanized basket for dirty linens paired with warm wood shelving and brass hooks, and that mix reads as balanced rather than one note. Aim for galvanized metal as an accent color rather than the room’s dominant material.
The galvanized coating will show a soft natural sheen change developing across the surface within the first year of exposure to the laundry room’s humidity, a gradual dulling from its original bright finish. This textured change in the galvanized coating is completely normal and is actually part of the material’s expected character over time. Genuine galvanized finishes are chosen specifically because they age this way rather than looking worn out.
Where Galvanized Metal Works Best In This Room
Galvanized metal suits functional pieces that see regular handling, like laundry baskets, hampers, and drying racks, better than it suits large structural elements like cabinetry or countertops. Reserve galvanized metal for these accent roles rather than building an entire room around the material. Too much of it in one space starts to feel more like a workshop than a farmhouse laundry room.
Pair a galvanized drying rack specifically with a nearby window or good ventilation, since the metal itself does not affect drying time but the room’s airflow absolutely does. A rack placed in a stagnant corner takes noticeably longer to dry a full load. Moving it even a few feet closer to airflow makes a real difference.
8. Butcher Block Counter For Folding
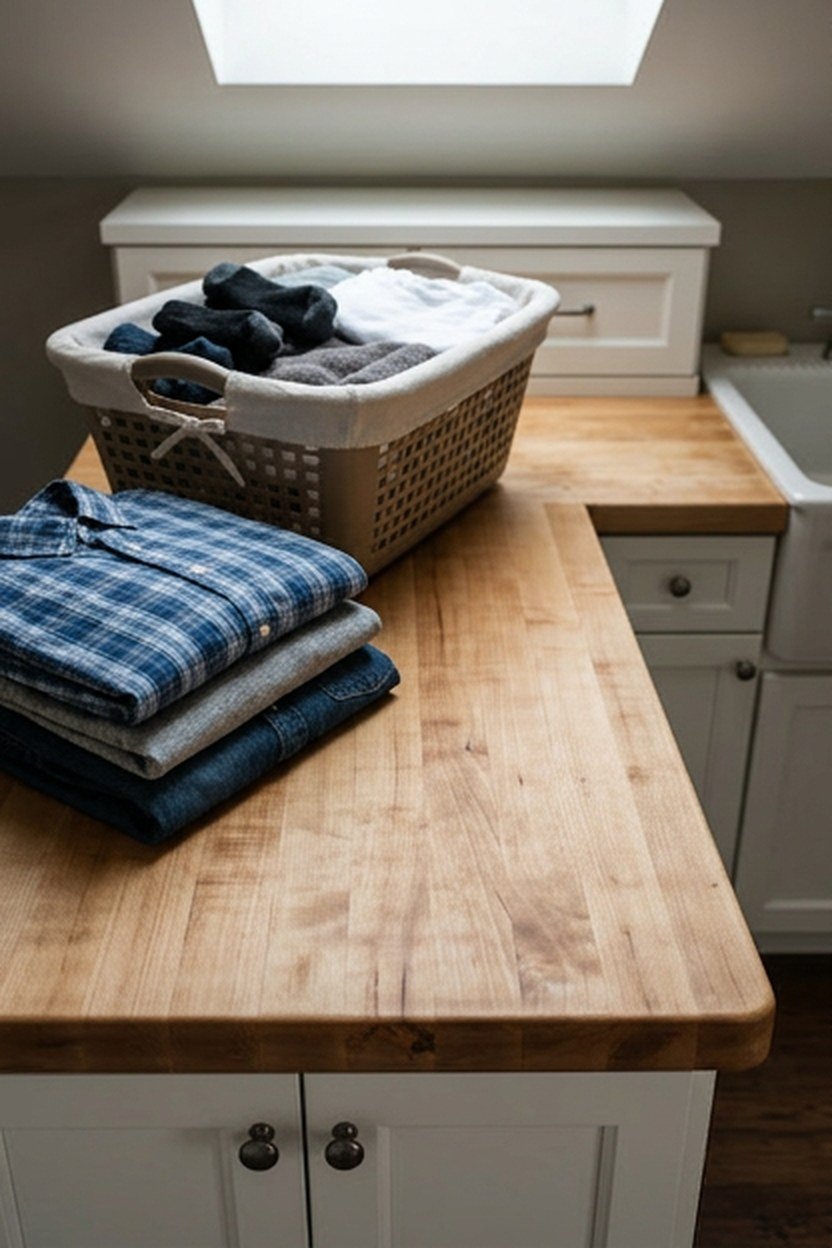
A butcher block counter installed above a laundry sink or storage cabinets gives you a warm, wood toned work surface that suits farmhouse style better than a cold stone or laminate alternative. Expect to pay 150 to 400 dollars for a quality butcher block counter section, depending on the wood species and total square footage covered. This surface works double duty as both a folding station and general laundry room workspace.
Seal butcher block with a food safe mineral oil or a laundry specific sealant regularly, since this surface will contact detergent spills and damp fabric far more often than a butcher block counter in a kitchen typically does. Reapplying sealant every few months keeps the wood protected against the specific moisture exposure a laundry room presents. Skipping this maintenance step is the single most common reason a butcher block counter looks tired within a year or two.
The wood surface will show its natural grain pattern deepening over time as the sealant settles into the material and the surface develops genuine character from years of folding and sorting laundry on it. This visible grain change is exactly what most people choose butcher block specifically to achieve, since it signals real daily use rather than a showroom appearance. Sanding and resealing every few years restores the surface if it becomes too textured for your taste.
Choosing Wood Species For Laundry Room Durability
Maple and walnut butcher block both handle moisture exposure better than softer woods like pine, making them worth the higher price for a laundry room specifically rather than a purely decorative surface elsewhere. Ask your supplier directly about moisture resistance ratings for different wood species before choosing based purely on color or price. This upfront research prevents choosing a beautiful but poorly suited wood for this particular room’s conditions.
Avoid positioning a butcher block counter directly beside a sink without adequate sealant protection at the seam, since standing water at that specific junction causes more wood damage than general ambient humidity in the room. A dedicated bead of waterproof sealant along this seam takes an afternoon and prevents years of slow water damage. Check this seam annually as part of routine maintenance.
9. Painted Beadboard Cabinetry
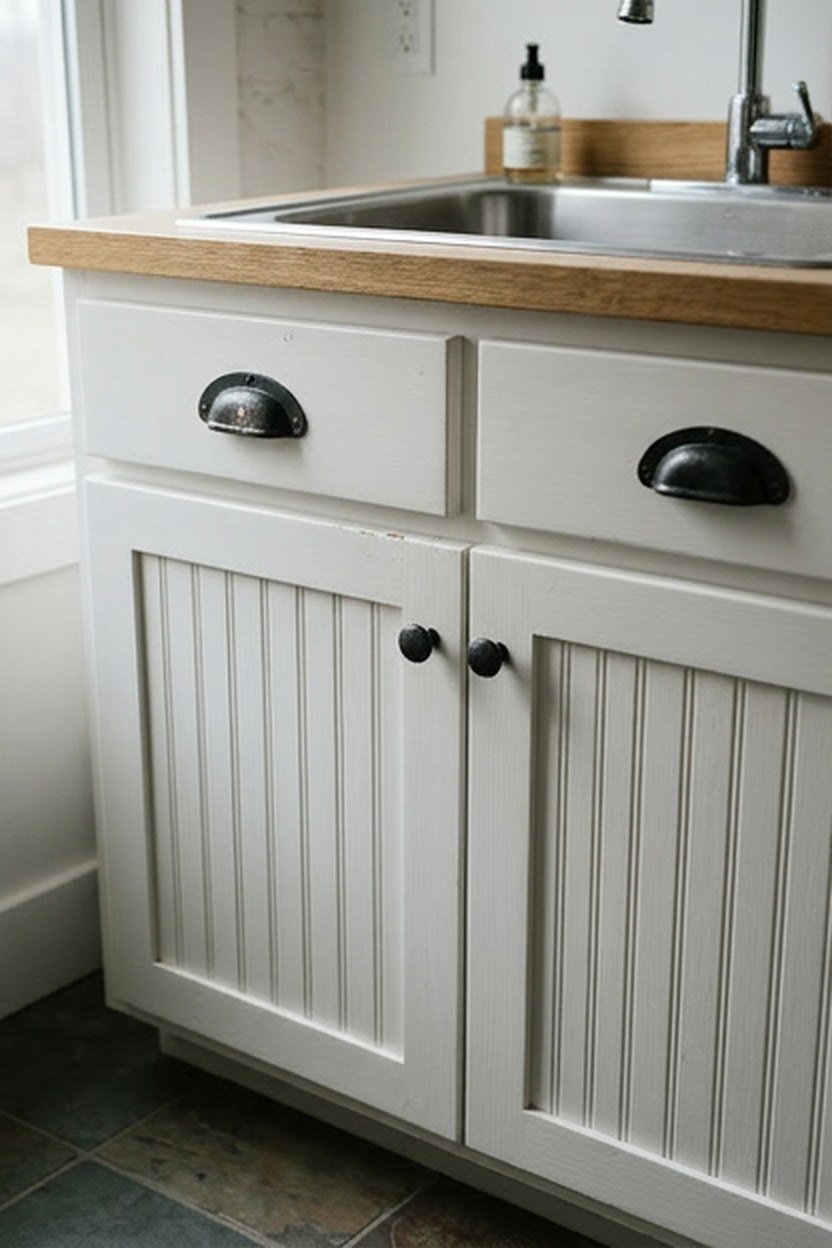
Painted beadboard cabinetry, either as a full cabinet front treatment or as a wainscoting style wall detail, adds classic farmhouse texture at a lower cost than solid wood raised panel cabinetry. Expect to pay 300 to 700 dollars for beadboard cabinet fronts on a modest laundry room cabinet run, with wall mounted beadboard wainscoting costing less per square foot. This detail works especially well paired with simple black or brass hardware.
Choose a moisture resistant beadboard material, either PVC based or a properly primed and sealed real wood, rather than standard interior beadboard not rated for laundry room humidity levels. This material choice matters significantly for the beadboard’s long term durability given the consistent moisture this room generates from washing and drying cycles. A local building supplier can point you toward the specific product line rated for wet or humid rooms.
The painted beadboard will develop a soft matte texture in the grooves between each board as dust and normal handling settle into these recessed areas over time. This gradual textured change in the grooved detail is completely normal for beadboard under regular use and cleaning does not remove the underlying texture entirely. Regular dusting with a soft brush attachment keeps the grooves looking their best between deeper cleanings.
Cabinet Hardware Pairings For Beadboard Style
Simple black iron or aged brass knobs and pulls suit painted beadboard cabinetry better than sleek modern hardware, which tends to clash with the traditional, slightly rustic character beadboard brings to a room. Choose hardware with some texture or a slightly irregular, handmade look rather than perfectly uniform modern hardware for the most authentic farmhouse pairing. A single hardware style used consistently throughout the room reads as more intentional than mixing several styles.
Consider cup style pulls specifically for drawers in a laundry room, since they tend to catch on clothing and cords less than knob style hardware does during daily use. This small hardware choice matters more in a laundry room than almost anywhere else in the home. A household that handles a lot of loose cords and delicate fabric benefits most from this swap.
10. Exposed Wood Beam Or Faux Beam Ceiling Detail
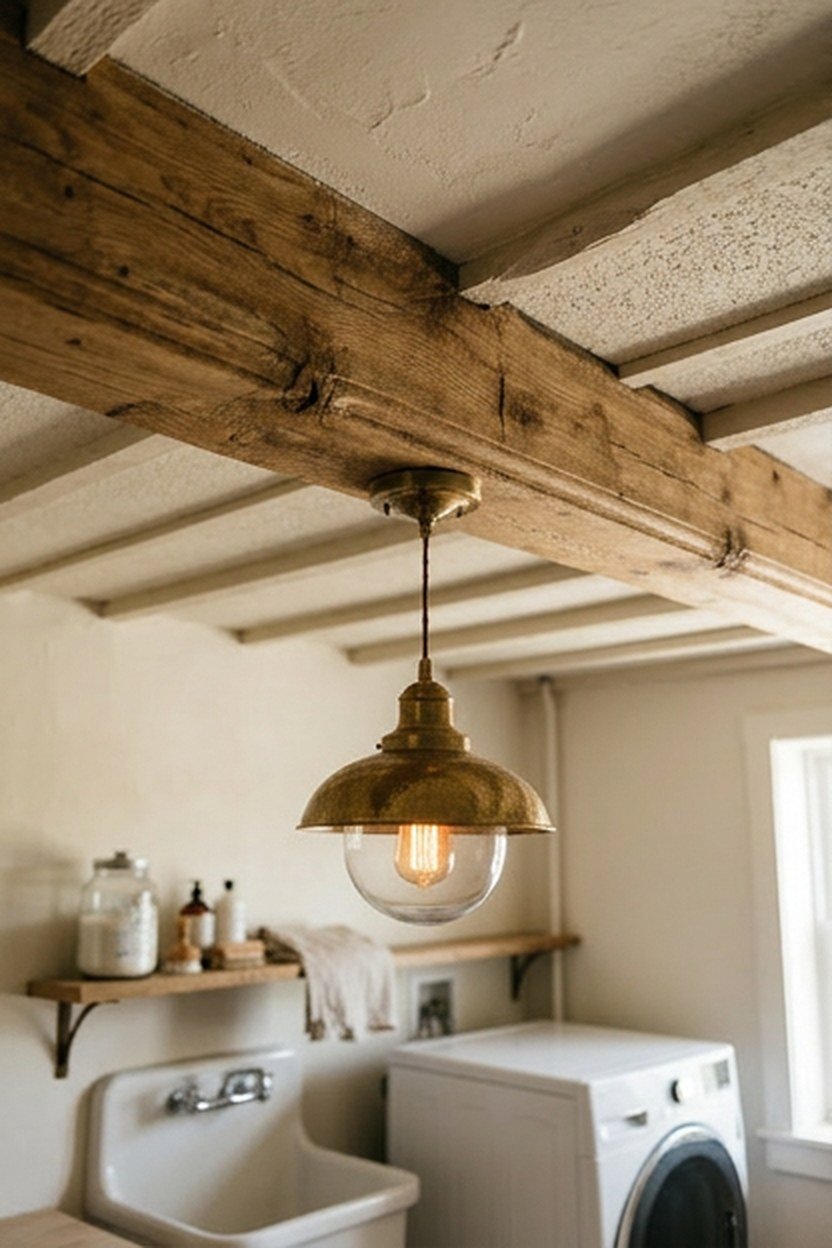
An exposed or faux wood beam running across the laundry room ceiling adds architectural interest overhead in a room that otherwise has little visual detail above eye level. Faux beams made from lightweight polyurethane cost considerably less than structural wood beams, typically 100 to 300 dollars per beam, and install without needing to account for load bearing considerations. This makes faux beams a practical choice for most laundry room ceiling heights and budgets.
Position a single beam running perpendicular to the room’s longest dimension for the strongest visual impact, rather than adding multiple beams that can make a small laundry room ceiling feel lower and busier than it actually is. One well placed beam usually reads as more intentional and farmhouse authentic than a ceiling covered in beams purely for the sake of adding them. Measure your specific ceiling height before committing, since a low ceiling loses usable headroom with any beam addition.
The beam’s faux wood finish will show a visible natural grain pattern that becomes slightly more textured looking as dust settles into the material’s molded surface details over months of normal use. This is a cosmetic characteristic of textured polyurethane beams and does not affect the beam’s lightweight structural mounting at all. Occasional dusting with a long handled duster keeps the beam looking fresh.
Faux Beam Versus Real Wood For A Laundry Ceiling
Real wood beams add genuine structural weight and require confirming the ceiling can support that load, which usually means consulting a contractor before installation in an existing home. Faux polyurethane beams skip this consideration entirely since they weigh a fraction of real wood while looking convincingly similar from normal viewing distance. Most homeowners doing a laundry room specifically choose faux beams for this practical reason rather than any difference in appearance.
Paint or stain a faux beam to match your room’s existing wood tones rather than assuming the manufacturer’s default finish will coordinate, since faux beams typically ship in a base color meant to be customized during installation. Bring a sample of your other wood tones when choosing the beam’s final finish. This extra step avoids an obvious mismatch once the beam is mounted overhead.
11. Vintage Sign Or Typography Wall Art
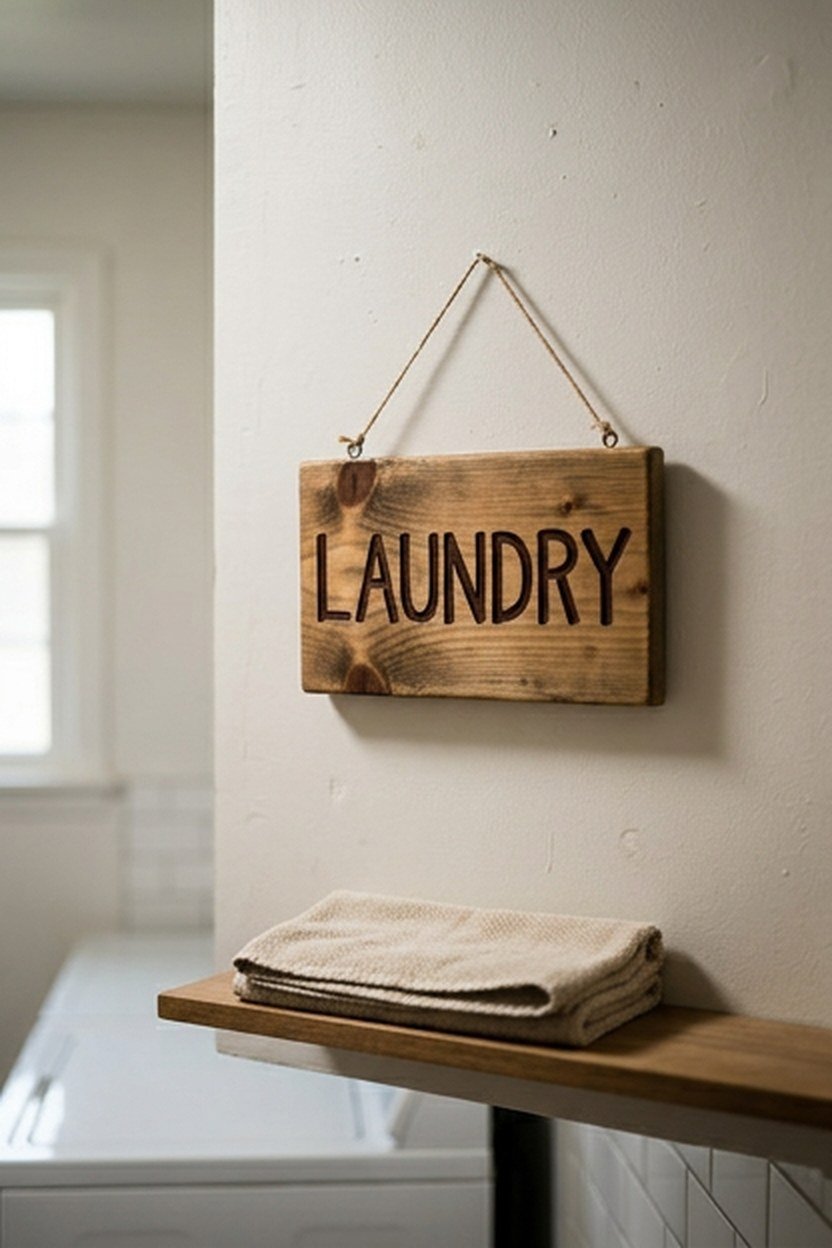
A vintage style sign or simple typography wall art, often reading something related to laundry or home, adds a personal touch that architectural details alone cannot provide. This is one of the lowest cost ideas on this list, typically 20 to 80 dollars, making it an easy way to finish a room after the bigger investments are done. Choose wording that feels genuine to your own taste rather than a generic mass produced phrase.
Position sign or typography art at eye level on an otherwise empty wall section, ideally somewhere it will not compete visually with a window, shelving, or other display elements already in the room. I made the mistake of placing mine directly above a cluttered shelf originally, where it got visually lost against the busy background. Moving it to a clear wall section made it a genuine focal point instead of an afterthought.
The sign’s wood or metal surface, depending on the material, will develop its own gradual textured character over time from the laundry room’s ambient humidity and temperature changes. A wood sign shows a visible grain pattern deepening while a metal sign develops a soft natural sheen change, both entirely normal for these materials in this environment. Choose a material finish you are comfortable seeing develop this character over years of display.
Choosing Sign Wording That Will Not Feel Dated
Avoid trendy phrases specific to a passing decorating moment, since these tend to feel dated faster than a simple, classic phrase or your own family name would. A sign referencing your specific household or a genuinely personal detail tends to age better than one copying a phrase seen on countless other laundry room signs. This small choice affects how long the piece feels genuinely yours rather than generic.
Consider a rotating display approach with a small ledge shelf holding interchangeable seasonal signs, which keeps the display feeling fresh without needing to replace a single large fixed piece. Swapping a small sign takes seconds compared to rehanging a large framed piece. This flexibility suits a household that likes to mark seasons or holidays.
12. Wood Crate Storage Cubbies
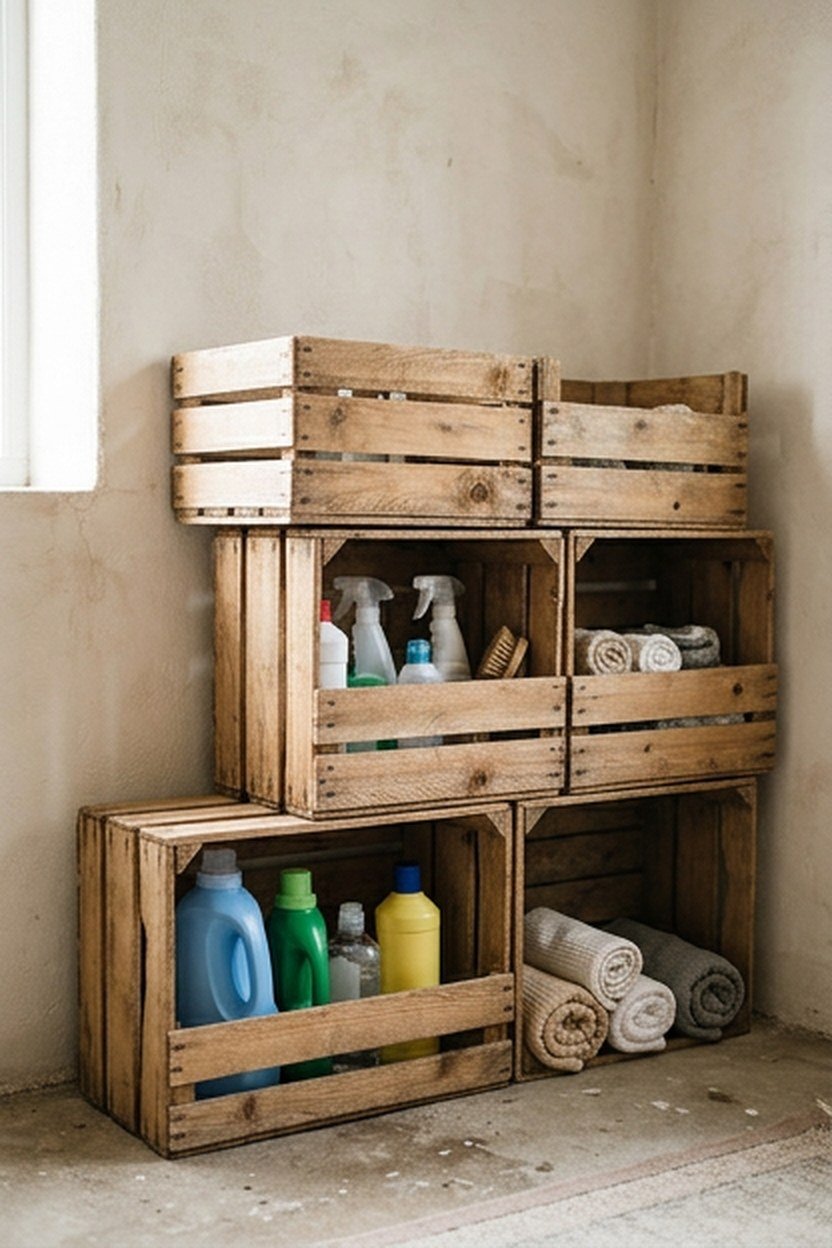
Stacked wood crates, either genuine vintage crates or new ones built to match that aesthetic, create flexible cubby style storage that costs far less than built-in cabinetry while still delivering real farmhouse character. Expect to pay 15 to 40 dollars per crate, with most laundry rooms needing four to eight crates to build a useful storage wall. This modular approach also lets you expand the storage system gradually as budget allows.
Stack crates in a staggered or offset pattern rather than a perfectly uniform grid, since the slightly irregular arrangement reads as more genuinely farmhouse than a rigid, symmetrical layout. Secure stacked crates to each other and to the wall with simple L-brackets if the stack will hold any real weight, since an unsecured stack presents a tipping risk especially in a household with young children. This safety step takes only a few extra minutes during installation.
The wood crates will show their natural grain pattern becoming more pronounced over time as the surface finish wears slightly from repeated loading and unloading of stored items. This visible textured change is part of the genuine character that makes reclaimed or vintage style crates appealing for this kind of storage use. A light sanding and fresh coat of wax refreshes the look if the crates start to feel too rough for comfortable handling.
Sizing Crates To What You Actually Store
Measure your most commonly stored laundry items, detergent bottles, dryer sheets, and stain treatment products, before buying crates in a single uniform size, since a mismatch between crate depth and item size wastes space or leaves items sticking out. Mixing a few different crate sizes within the same staggered display often solves this better than assuming one size fits every item. A quick inventory before shopping saves a return trip later.
Line the bottom of crates holding liquid products with a simple tray or mat, which catches any accidental drips before they reach the wood and cause a lasting stain. This small addition costs only a few dollars per crate. It is worth doing before the first spill rather than after.
13. Statement Tile Floor In A Classic Pattern
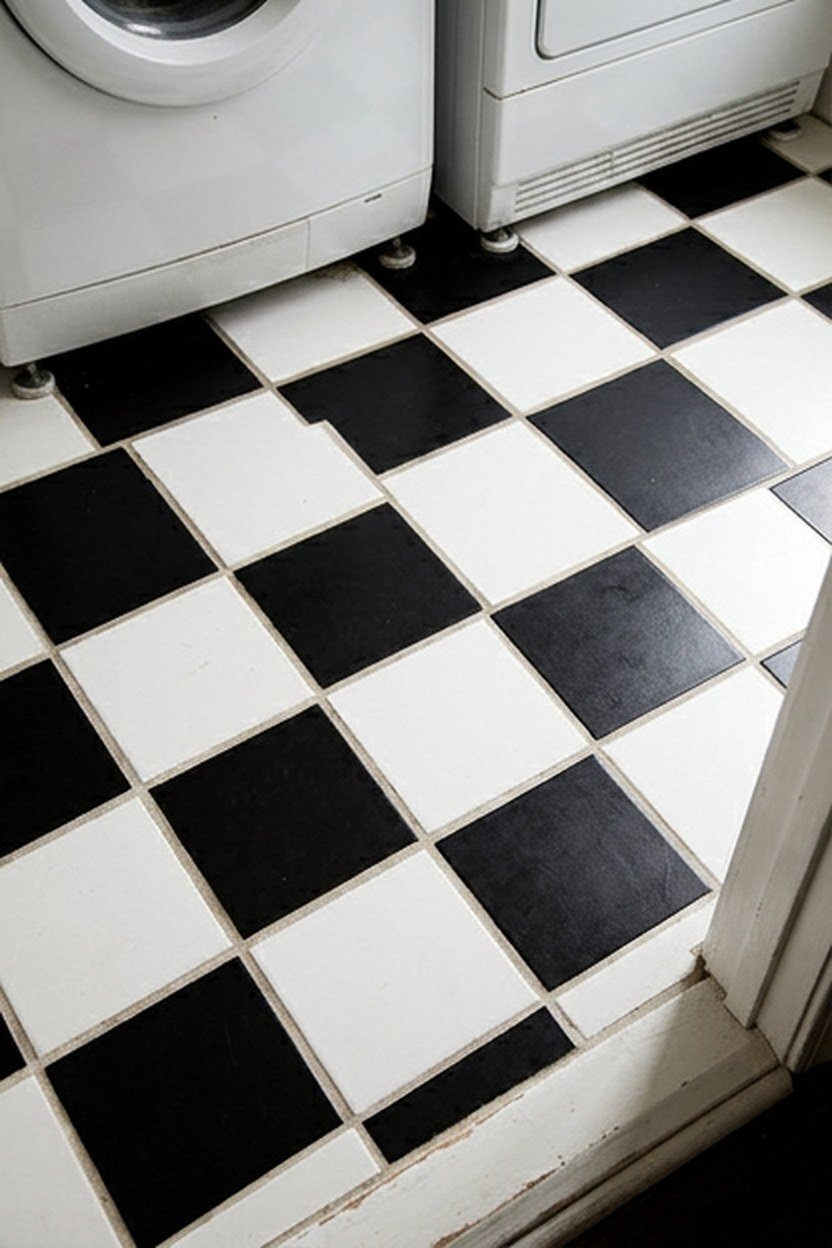
A statement floor tile in a classic black and white checkerboard or a simple hexagon pattern gives a farmhouse laundry room genuine visual anchor from the ground up, which most other ideas on this list do not address. Expect to pay 500 to 1200 dollars for a full laundry room floor including materials and installation, making this one of the larger investments covered here. The payoff is a floor that reads as intentional farmhouse design rather than whatever flooring happened to be there originally.
Choose a matte or slightly textured tile finish rather than a high gloss option, since a laundry room floor deals with water splashes and detergent spills regularly and a matte finish handles this both practically and aesthetically better. A high gloss floor also shows every water spot and footprint far more visibly than a matte alternative does. This practical consideration matters as much as the pattern choice itself.
The grout lines between tiles will develop a soft even darkening in the highest traffic areas near the door and machines after a couple years of regular use and cleaning. This gradual change from foot traffic and cleaning product residue is normal for grout under sustained daily use and does not indicate any installation problem. Resealing the grout annually slows this darkening if you want to maintain a fresher look longer.
Tile Pattern Scale For Small Versus Large Rooms
A smaller checkerboard or hexagon pattern generally suits a compact laundry room better than an oversized pattern, since large scale tile patterns can visually shrink an already small room. Request physical samples at actual scale rather than judging pattern size from a small marketing photo, since tile patterns read very differently at true size on your own floor. This is a detail worth getting right before a full floor installation.
Balance a busy tile pattern against simpler wall and cabinet choices elsewhere in the room, since two competing bold patterns in a small laundry room can feel chaotic rather than intentionally styled. Let the floor be the room’s one bold statement and keep everything above it calmer. This restraint reads as more considered than pairing two loud patterns together.
14. Hidden Ironing Board Cabinet
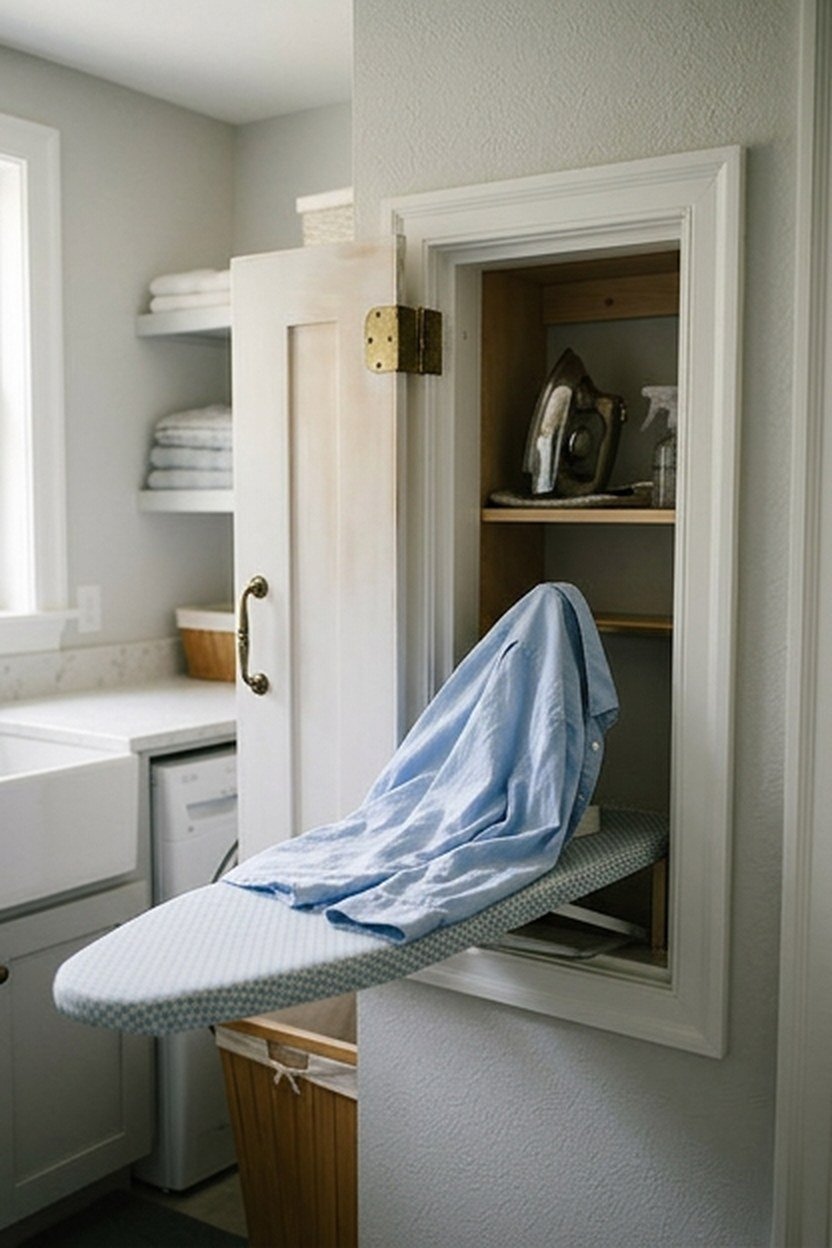
A built-in cabinet that folds out to reveal an ironing board keeps this bulky item accessible without permanently occupying floor or wall space, a genuinely practical farmhouse solution that pairs function with clean visual lines. Expect to pay 150 to 350 dollars for a quality fold-down ironing board cabinet insert, with installation into an existing wall cavity sometimes requiring minor carpentry work. This detail suits anyone who irons regularly enough to want the board readily accessible.
Position the ironing board cabinet near an electrical outlet specifically, since a folding iron needs power and running an extension cord across a laundry room floor creates an unnecessary trip hazard. This placement consideration gets overlooked often during the excitement of finding the perfect farmhouse style cabinet door for the unit. Confirm outlet access before finalizing the cabinet’s wall position.
The cabinet’s painted wood door will show a soft even sheen change near the handle and hinge area from years of regular opening and closing to access the board inside. This gradual textured wear at the highest contact points is normal for painted wood cabinetry under frequent use and does not affect the mechanism’s function. A quality hinge system continues operating smoothly despite this cosmetic surface change.
Wall Cavity Requirements For A Fold-Down Board Unit
Confirm your wall has adequate cavity depth for a fold-down ironing board unit before ordering, since these units typically need at least four inches of depth between wall studs to install properly. An exterior wall or one with existing plumbing or electrical running through it may not accommodate this installation without additional work. A contractor’s quick assessment before ordering avoids discovering this conflict after the unit has already arrived.
Consider a surface mounted version that skips the wall cavity requirement entirely if your walls cannot accommodate a recessed unit, trading a small amount of protruding depth for a much simpler installation process. This option suits an older home with plumbing or wiring already running through the relevant wall. Most families barely notice the small extra depth once it is installed.
15. Fresh Cut Flowers Or A Simple Potted Herb
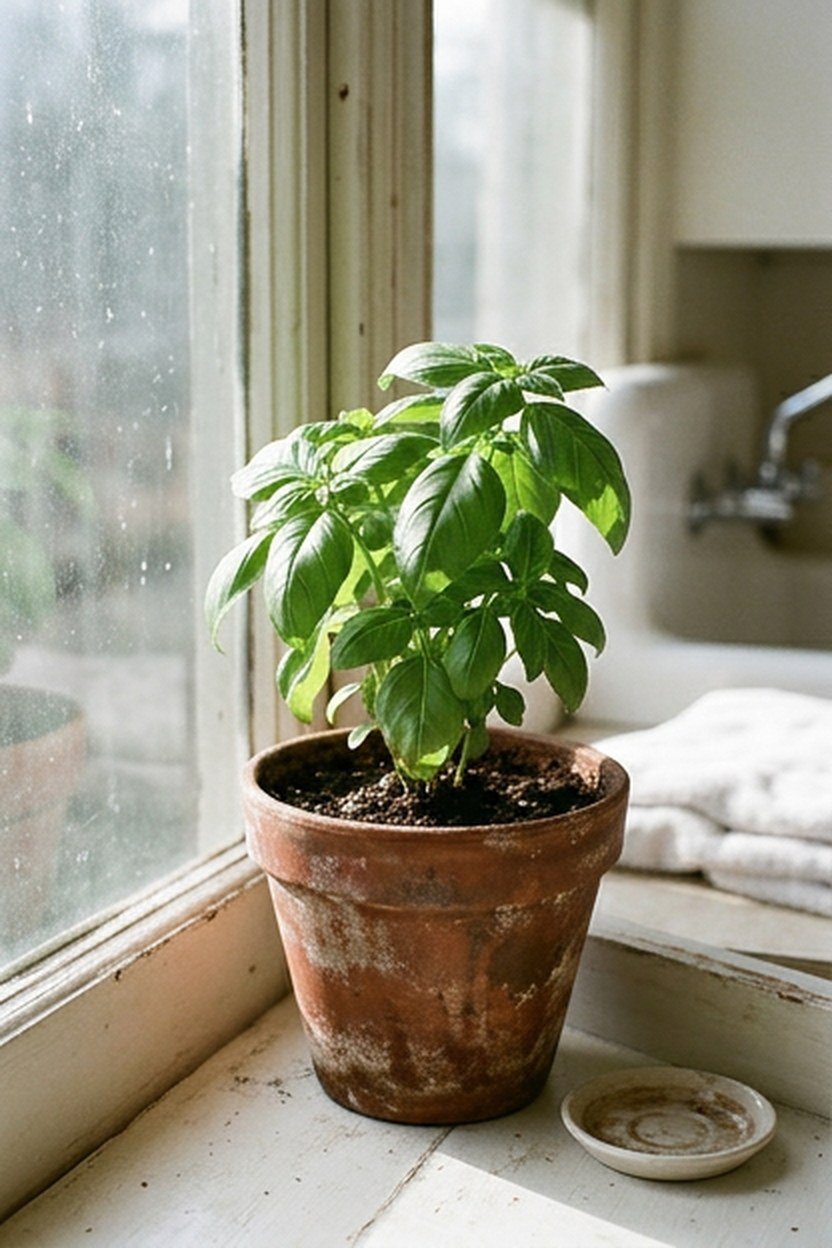
A small vase of fresh cut flowers or a simple potted herb on a windowsill brings a genuinely welcoming touch to a laundry room that easily feels purely utilitarian otherwise. This is the lowest cost idea on the list, often just the price of a grocery store bouquet or a small herb plant, yet it makes a real difference day to day. I keep a rotating herb on my own windowsill since the room gets excellent light that would otherwise go unused.
Choose a plant genuinely suited to your laundry room’s specific light and humidity conditions rather than a decorative choice that will struggle and need frequent replacement. A laundry room with a south facing window and regular humidity from the dryer actually suits many herbs and humidity loving plants quite well. Match the plant to your room’s real conditions rather than picking based on looks alone.
The ceramic or terra cotta pot holding a plant will develop a soft natural texture on its surface from regular watering and the room’s ambient humidity over time. This textured surface change is a normal characteristic of unglazed ceramic and terra cotta under consistent moisture exposure and many people consider it an attractive sign of a well loved, actively used plant display. A glazed pot shows less of this change if you prefer a more consistent appearance.
Keeping A Laundry Room Plant Healthy Long Term
Check a laundry room plant’s soil moisture more frequently than you might in another room, since the fluctuating humidity from washing and drying cycles can throw off a plant’s normal watering schedule in either direction. A plant that seems to need more or less water than expected elsewhere in the home is often responding accurately to this room’s unusual humidity swings. Adjust your watering routine based on what you actually observe rather than a generic care schedule.
Rotate a windowsill plant periodically if it only receives light from one direction, which keeps growth even rather than leaning awkwardly toward the strongest light source. A quarter turn every week or two is usually enough to keep the plant balanced. This tiny habit costs nothing and noticeably improves how the plant looks over time.
What A Farmhouse Laundry Room Actually Costs
A complete farmhouse laundry room transformation can range from under 500 dollars using paint, hardware, and small accent changes to several thousand dollars for a full renovation including a farmhouse sink, custom cabinetry, and new flooring. Most homeowners land somewhere in the middle, choosing a handful of higher impact ideas from this list rather than attempting every single one at once. Prioritize the changes that address your room’s specific weak points rather than following this list in strict order.
Spread larger investments like flooring or a farmhouse sink across a longer timeline if the full cost feels like a stretch, tackling lower cost changes like paint, hardware, and lighting first for immediate visual impact. I approached my own laundry room this way, starting with paint and hardware changes that cost under 200 dollars combined before saving toward the farmhouse sink over the following year. This phased approach let the room improve steadily without a single overwhelming expense.
The table below breaks down rough cost tiers for a farmhouse laundry room project, acknowledging that regional material and labor costs shift these numbers somewhat. Treat it as a planning starting point rather than a firm quote for your specific project. Most homeowners land in the middle tier once accessories and small extras are included.
| Budget tier | What it covers | Approach |
|---|---|---|
| Under $500 | Paint, hardware, small accents, lighting | Mostly DIY, cosmetic changes |
| $500 to $1500 | Shelving, counter surface, barn door | Mix of DIY and hired installation |
| $1500 and up | Farmhouse sink, flooring, custom cabinetry | Best with professional installation |
Common Mistakes When Designing A Farmhouse Laundry Room
Choosing every farmhouse trend at once, shiplap, barn doors, mason jars, and distressed everything in a single small room, is the most common mistake and the one that tips a genuine farmhouse look into looking like a themed costume instead. A restrained approach using two or three strong farmhouse elements paired with simpler supporting choices almost always reads as more authentic and more expensive than a room packed with every possible detail. Pick your strongest ideas and let them stand out.
Ignoring ventilation and moisture management while prioritizing wood finishes and fabric textures is the second frequent mistake, since farmhouse style’s favorite materials are exactly the ones most vulnerable to a laundry room’s humidity if ventilation is inadequate. Address your exhaust fan and dryer venting before investing in any raw or lightly sealed wood surfaces. A beautiful reclaimed wood counter warps and discolors quickly in a poorly ventilated room regardless of how well it was finished initially.
Underestimating how much daily wear a laundry room’s finishes will see compared to a purely decorative room elsewhere in the home is the third mistake, leading people to choose delicate finishes better suited to a formal living space. This room handles water, detergent, heat, and constant traffic, so prioritize durability alongside style in every material decision. A gorgeous finish that cannot handle daily laundry room conditions will not stay gorgeous for long.
Testing Finishes Before Committing To The Whole Room
Test any new paint color, sealant, or finish on a small, inconspicuous section of the actual room before committing to the full space, since laundry room lighting and humidity can make a color or finish look different than it did in a showroom or on a paint chip. Live with the sample for at least a few days across different times of day before finalizing. This small step prevents an expensive full room commitment to a choice that does not actually work once installed.
Ask your material supplier directly about a specific product’s suitability for high humidity rooms rather than assuming a product marketed for general home use will perform the same way in a laundry room’s specific conditions. Suppliers usually know exactly which lines in their catalog are rated for this and can steer you away from a poor match. This one question can save a costly redo.
Conclusion
Building a farmhouse laundry room comes down to choosing durable, practical materials that carry genuine farmhouse character, then applying them with restraint rather than piling on every trend at once. Start with the ideas that address your room’s specific weak points, whether storage, work surface, or visual interest, and build outward from there. The fifteen ideas here scale from an almost free weekend refresh up to a full renovation with a farmhouse sink and custom cabinetry.
Prioritize ventilation and material durability alongside style in every decision, since this room’s daily wear will test every finish choice you make. A well planned farmhouse laundry room rewards you with a space that looks intentional today and continues holding up well years into regular use. Get the durability right first, and the style choices will keep paying off long after installation.
Frequently Asked Questions
How much does a farmhouse laundry room makeover typically cost? A budget conscious approach using paint, hardware, and small accents can transform a laundry room for under 500 dollars. A more extensive renovation including a farmhouse sink and new flooring can run several thousand dollars depending on the scope.
Is shiplap a good choice for a laundry room specifically? Yes, as long as it is properly painted and sealed, since a laundry room’s humidity can affect unsealed wood over time. Choose a humidity resistant paint formulation and ensure adequate ventilation to protect the installation long term.
What is the most budget friendly farmhouse laundry room update? Paint and hardware changes deliver the most visual impact for the lowest cost, often transforming a room’s entire feel for under 200 dollars. Open shelving with woven baskets is a close second in terms of cost to impact ratio.
Can I add farmhouse style to a small laundry closet rather than a full room? Yes, many of these ideas scale down well, including painted hardware, a small vintage sign, open shelving, and a folding counter built above stacked machines. Focus on two or three ideas rather than attempting a full room transformation in a compact space.
How do I prevent farmhouse wood finishes from being damaged by humidity? Ensure your laundry room has adequate exhaust ventilation and a properly vented dryer before investing in wood finishes, and choose sealants specifically rated for high humidity environments. Address any existing ventilation issues before adding vulnerable wood surfaces to the room.
What is the biggest mistake people make with farmhouse laundry room design? Combining too many farmhouse trends at once is the most common mistake, which tips the look from authentic to overly themed. Choose a smaller number of strong farmhouse elements and let them stand out rather than filling the room with every available detail.