
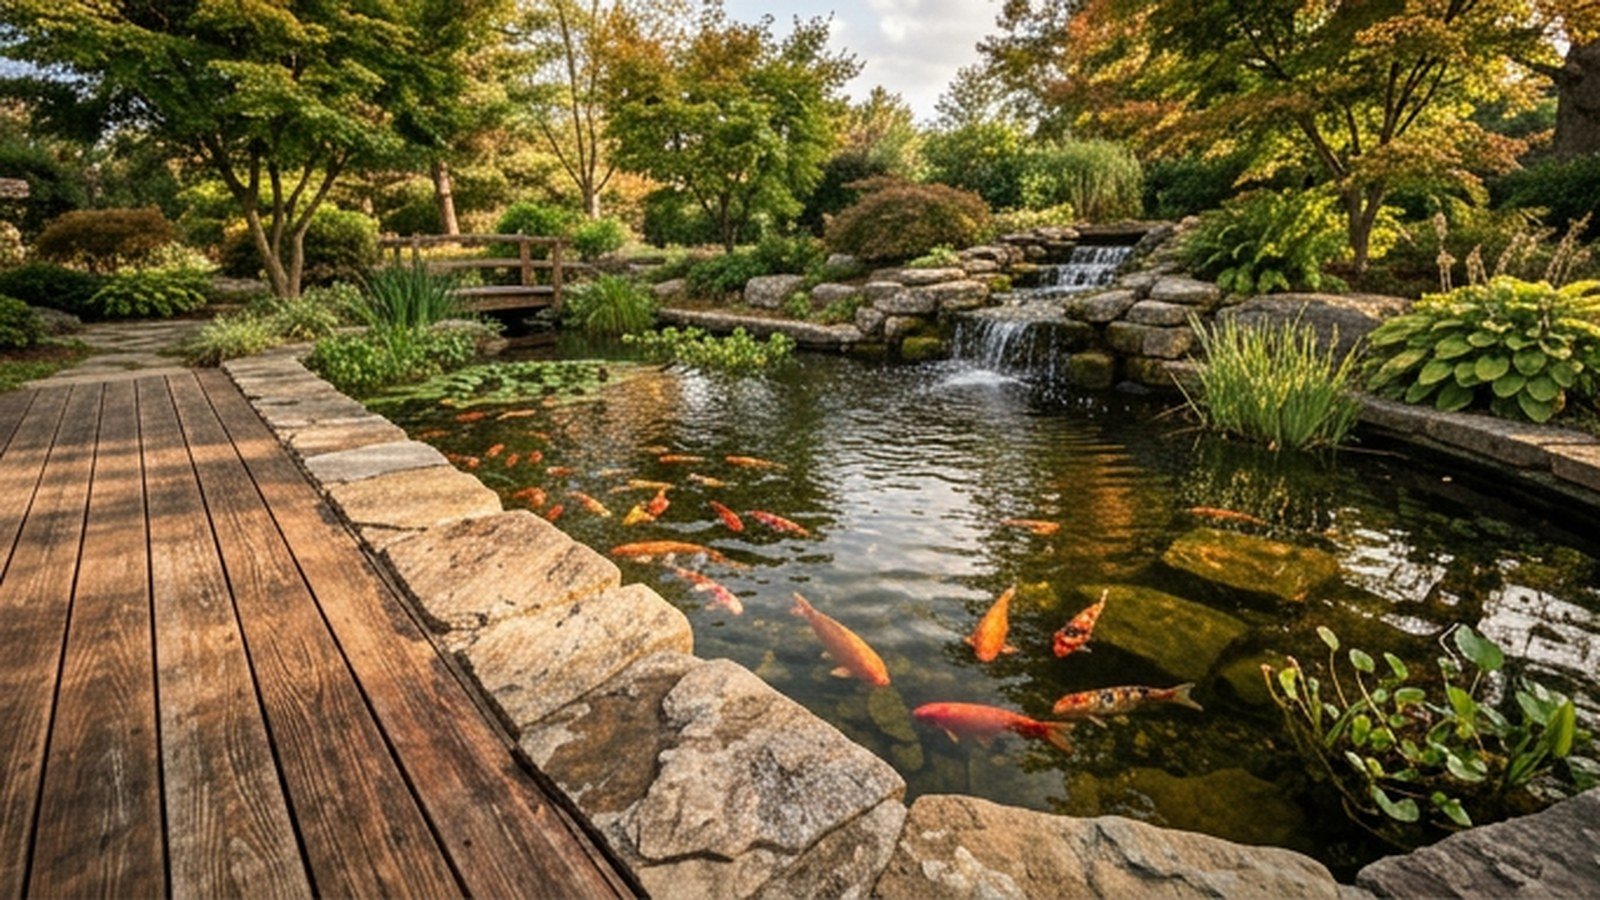
High end koi pond ideas center on scale, filtration quality, and framing the water as a genuine focal point rather than an afterthought tucked in a corner. A koi pond earns the word “luxury” when the fish are visibly healthy, the water stays clear year round, and the surrounding hardscape treats the pond as the garden’s centerpiece. This guide walks through fifteen concepts, from raised stone edging to underwater lighting, that push a backyard pond toward genuine zen luxury.
I built my first koi pond with a builder-grade kit and watched the water turn green by July, which taught me that filtration capacity matters more than almost anything else here. Since then I have toured private ponds with owners who spent real money getting it right, and the pattern is always the same: oversized filtration and hardscape that makes the pond feel intentional. These fifteen ideas reflect what separates a forgettable backyard pond from one guests remember.
Below you will find fifteen numbered concepts covering structure, planting, lighting, and daily upkeep, plus a cost comparison table and a rundown of the mistakes that sink most first attempts. Each idea includes a sub-angle on cost, timing, or what commonly goes wrong so you can plan realistically rather than guessing. By the end you should know exactly where your budget is best spent and which shortcuts actually cost more in the long run.
Why High End Koi Ponds Look And Function Differently
A high end koi pond differs from a starter pond mainly in scale and redundancy, since larger volume dilutes waste and gives filtration more room to keep pace with fish load. Builders working at the luxury end typically target at least 1,000 gallons for a modest collection of mature koi, since smaller volumes swing in temperature and water chemistry far faster.
The second differentiator is redundancy: a serious pond runs a mechanical filter stage, a biological filter stage, and often a UV clarifier in series, so a single component failing does not immediately crash water quality. Cheaper setups skip the UV stage or undersize the biological media, which works fine for months until a hot week spikes algae and ammonia at once. Redundant filtration costs more upfront but avoids the emergency pond-draining weekends that plague underbuilt systems.
| Pond Tier | Typical Volume | Filtration Approach |
|---|---|---|
| Starter kit | 300 to 600 gallons | Single mechanical filter, no UV |
| Mid-range | 600 to 1,000 gallons | Mechanical plus biological stages |
| High end | 1,000+ gallons | Mechanical, biological, and UV in series |
A 1,500 gallon high end pond with full three-stage filtration typically runs $18,000 to $35,000 installed, while the same footprint with a single-stage filter can come in under $10,000 but risks algae blooms within the first summer. The gap in ongoing maintenance time between the two tiers is real, often three to four hours less per month for the properly filtered system. That difference compounds over years of ownership into a genuine quality-of-life gap.
Planning Your Koi Pond For Long-Term Success
Planning starts with sizing the pond to the koi collection you actually intend to keep, since koi grow to 24 inches or more and a pond sized for juveniles becomes crowded within three to four years. Most experienced keepers recommend planning for mature fish size from day one rather than upgrading later, since retrofitting a finished pond is far more disruptive than building it right the first time.
Materials selection matters nearly as much as size, since natural stone edging and a properly lined excavation resist decades of freeze-thaw cycles better than poured concrete alone. A well-built high end pond uses a reinforced EPDM liner beneath the stone, since liner failure is the single most expensive repair a pond owner can face. Budgeting an extra 10 to 15 percent for a heavier-gauge liner upfront avoids a full re-excavation five years down the road.
The biggest mistake in planning is underestimating winter care in colder climates, where a pond needs either sufficient depth (at minimum 3 feet) or a heater and de-icer to keep a breathing hole open through freezing weather. Koi can survive cold water fine but cannot survive a fully frozen surface that traps toxic gases beneath the ice. This single oversight causes more winter fish losses than any disease or predator combined.
Choosing Between A Natural And A Formal Pond Style
A natural-style pond uses irregular stone edging, marginal planting, and a informal outline that mimics a wild pond, while a formal style uses straight edges, symmetrical planting, and often a raised wall. Natural styles tend to suit larger properties with existing garden beds, while formal styles read as more intentional in a smaller, more architectural backyard. Neither style affects water quality, so this choice is really about matching the pond to the home’s existing design language.
Cost differs modestly between the two, with formal raised ponds typically running 10 to 20 percent more due to the retaining wall construction involved. A natural-style pond can also be built in phases more easily, since additional stone and planting can be added later without disrupting a fixed geometric outline.
1. Raised Stone Edging With A Waterfall Feature
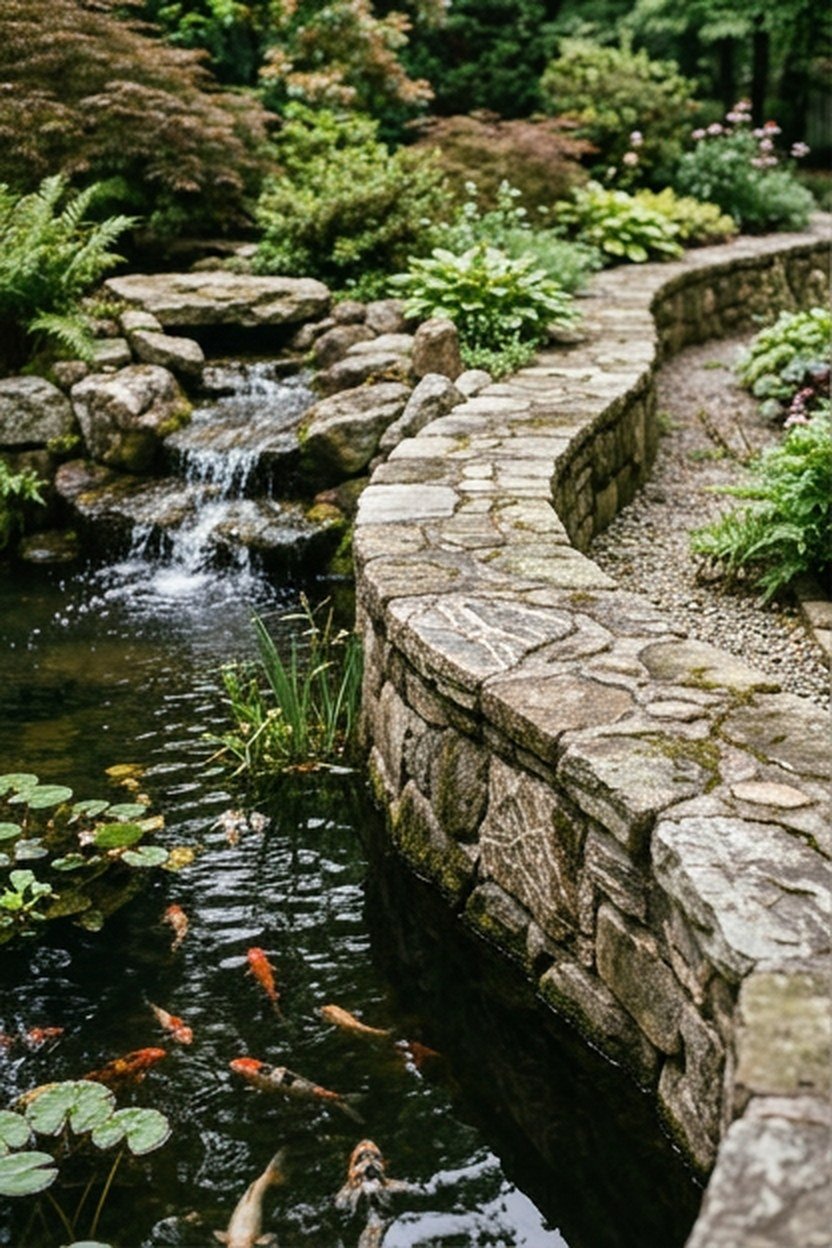
Raised stone edging lifts the pond’s rim above grade, framing the water at a height that is easier to view from a seated patio position and reduces debris runoff from the surrounding lawn. Pairing this edging with a waterfall feature at one end adds both visual movement and oxygenation, since falling water aerates far more efficiently than a still surface alone. The stone itself, typically large fieldstone or cut granite, becomes a structural and visual anchor for the entire garden.
The waterfall’s height and flow rate should scale to the pond’s volume, since an oversized waterfall on a small pond creates excessive current that stresses fish, while an undersized one barely aerates a large volume. Most builders target a flow rate that turns over the entire pond volume once every one to two hours through the waterfall and filtration system combined.
Lighting the waterfall from below with a submersible fixture extends its visual impact into the evening, turning a daytime feature into a genuine nighttime focal point. Positioning this light to avoid direct glare toward seating areas takes some trial adjustment during installation. Getting the angle right the first time saves a return visit from the electrician later.
Cost And Common Waterfall Mistakes
A raised stone waterfall feature typically adds $4,000 to $9,000 to a pond project, depending on stone type and the pump size required to drive the flow. Fieldstone sourced locally costs less than imported cut granite, though the savings vary significantly by region and availability. Budgeting for a slightly oversized pump avoids the disappointing trickle that results from underpowering the feature.
The most common mistake is building the waterfall structure before finalizing the pump size, which often results in a retrofit once the flow proves inadequate. Testing the pump with a temporary setup before finalizing stone placement catches this early enough to adjust cheaply.
2. Deep Zone For Winter Refuge And Predator Safety
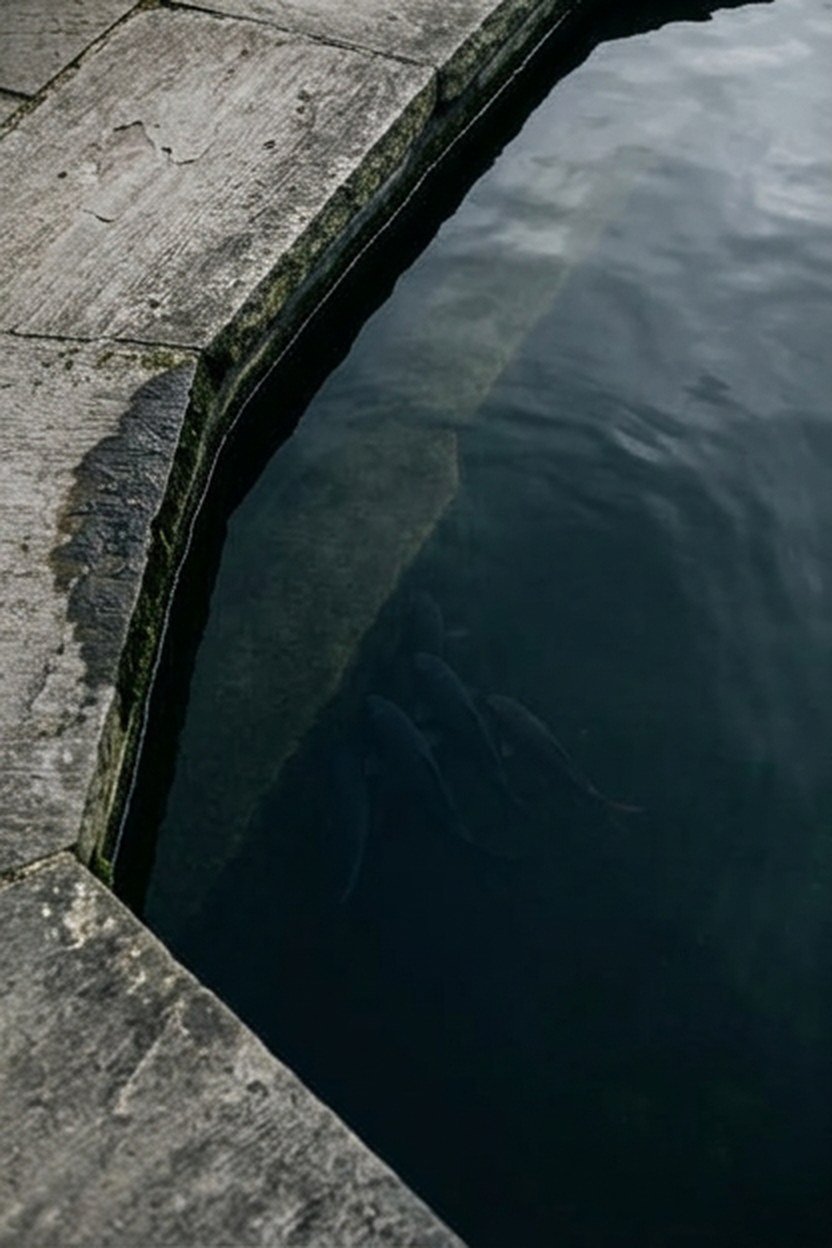
A deep zone, typically 3 to 4 feet at its lowest point, gives koi a stable thermal refuge during both winter cold and summer heat, since deeper water resists rapid temperature swings far better than shallow water. This zone also serves as predator refuge, since herons and raccoons struggle to reach fish sitting well below the surface. Building this depth into the initial excavation is far cheaper than deepening an existing pond later.
The deep zone typically occupies only 20 to 30 percent of the total pond footprint, with the remainder built at a shallower depth suited to planting shelves and viewing. This proportion keeps excavation costs reasonable while still giving fish the refuge they need during extreme weather. Skipping the deep zone entirely to save excavation cost is one of the more common regrets among first-time pond owners.
Positioning the deep zone away from the pond’s most visible viewing angle keeps the overall water surface looking more uniform, since deep water reads visually darker than shallow water. Most designers place the deep zone toward the back or side of the pond, reserving the shallow, planted areas for the primary viewing angle.
What Happens Without Adequate Depth
Ponds under 2 feet deep in cold climates risk a fully frozen surface that traps toxic gases and can kill an entire koi collection in a single hard winter. Even in milder climates, shallow ponds overheat in summer, stressing fish and encouraging algae blooms that cloud the water within days. The deep zone is not a luxury upgrade so much as a baseline requirement for keeping koi safely year-round.
Retrofitting depth into an existing shallow pond requires draining, relocating fish to a temporary holding tank, and re-excavating, a process that typically costs more than building the depth correctly the first time. This retrofit commonly runs several thousand dollars more than the original excavation would have, purely from the added labor and fish relocation involved. Planning depth correctly from the start remains the cheaper path by a wide margin.
3. Underwater LED Lighting For Nighttime Viewing
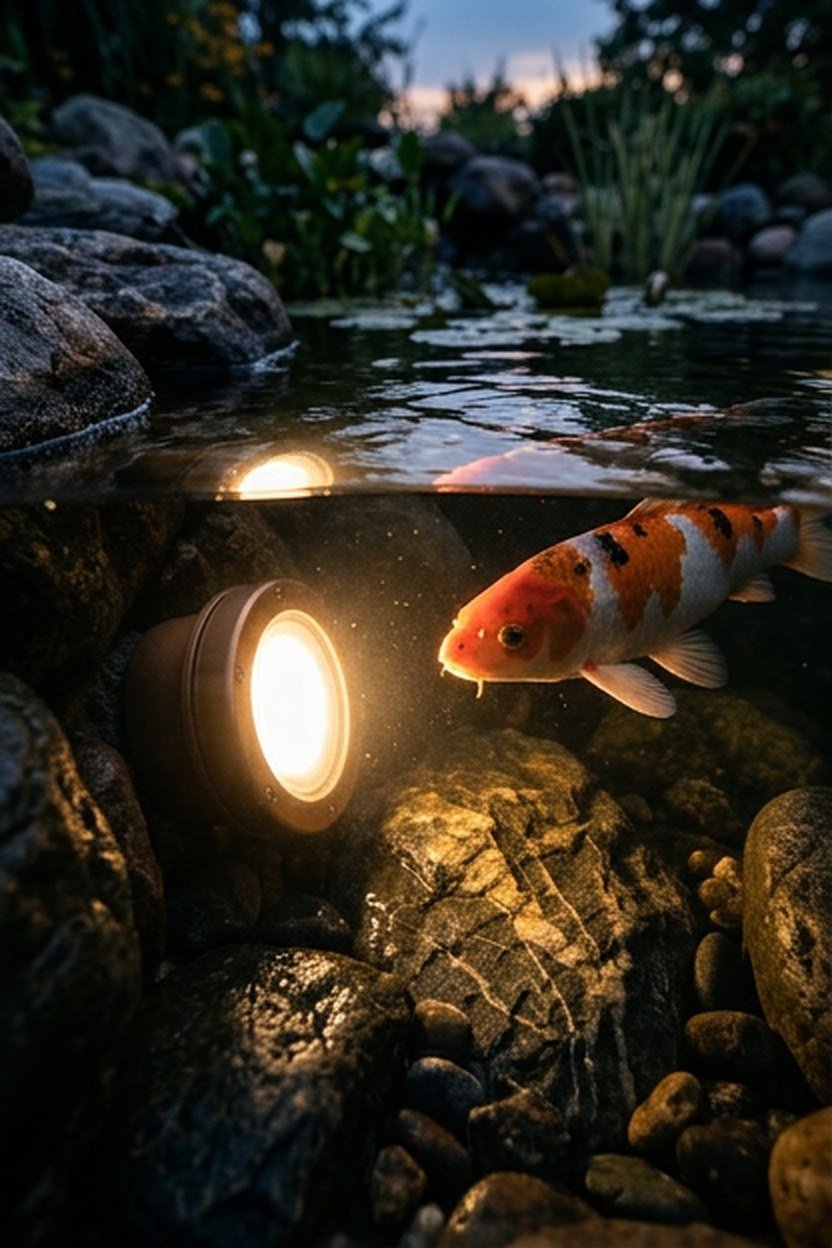
Underwater LED fixtures, mounted at varying depths around the pond’s perimeter, illuminate koi from below and turn the pond into a genuine evening feature rather than something that disappears after sunset. Warm white or color-changing LED options both work well, though most high end installations favor a warm white tone that renders koi coloring most naturally. Positioning fixtures to avoid direct glare toward seating areas takes some care during placement.
A typical high end pond uses four to eight submersible fixtures depending on pond size, wired through a low-voltage transformer for safety around water. This lighting draws relatively little power compared to the pond’s pumps and filtration, making it an affordable add relative to its visual impact. Most owners report the lighting as one of the most complimented features by evening guests.
Placing at least one fixture near the waterfall or any moving water feature highlights the movement itself, since light scattering through falling water creates a shimmer effect that still water cannot replicate. This single placement decision often does more for the pond’s evening presence than adding several additional fixtures elsewhere. A lighting designer or experienced pond builder can usually suggest this placement without much additional planning time.
Cost And Installation Timing
Underwater LED lighting for a mid-size koi pond typically runs $1,500 to $3,500 installed, including the transformer, wiring, and fixtures themselves. Installing conduit for this wiring during the initial excavation phase avoids the far more disruptive process of trenching through finished stonework later.
Skipping conduit installation to save a small amount upfront is a common regret, since retrofitting lighting into a finished pond often means removing stone edging to run new wiring. This retrofit typically costs two to three times what the original conduit installation would have. Planning lighting into the initial build, even if fixtures are added later, avoids this expensive rework.
4. Marginal Planting Shelves With Aquatic Species
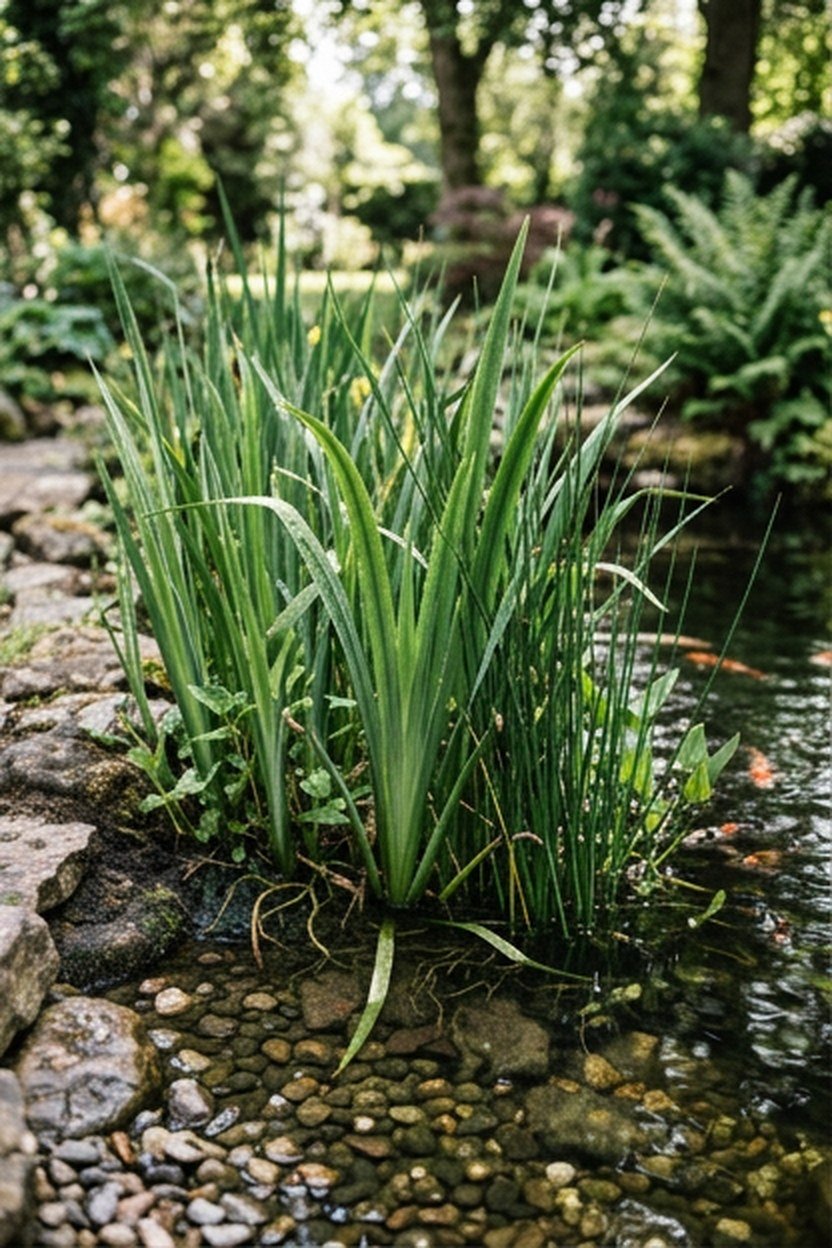
Marginal shelves, built at a shallower depth around the pond’s perimeter, support aquatic plants like iris, rush, and pickerelweed that soften the pond’s hard edges and provide natural filtration by absorbing excess nutrients. These shelves also give koi shaded refuge on hot days, since dense marginal growth blocks direct sun across part of the water surface. A well-planted shelf reads as far more natural and finished than bare stone edging alone.
Choosing plant species suited to your climate zone matters more than picking the showiest option, since a plant that dies back in winter or fails to establish leaves bare shelf space that looks unfinished. Most experienced pond builders recommend starting with three to five hardy marginal species and expanding gradually once the pond’s nutrient balance stabilizes.
Positioning taller marginal plants toward the back of the shelf and shorter species toward the front creates a layered look that reads intentionally landscaped rather than randomly scattered. This layering technique, borrowed directly from garden bed design, translates well to the water’s edge. A few afternoons of careful placement during planting season pays off in how finished the pond looks for years afterward.
Cost And Seasonal Maintenance
Marginal planting for a mid-size pond typically costs $800 to $2,000 depending on species selection and shelf size, with potted aquatic plants generally costing more than bare-root options. Dividing and thinning marginal plants every two to three years keeps the shelves from becoming overcrowded and shading out the water surface entirely. This maintenance task takes a single afternoon and prevents a much larger overgrowth problem later.
Neglecting to net or physically block koi from certain marginal plants can result in the fish uprooting or eating the plants within days of installation, a frustrating and expensive mistake for new pond owners. Choosing koi-resistant species or protecting new plantings with a temporary mesh barrier during establishment avoids this common setback. Most plants can go unprotected once fully rooted, typically after four to six weeks.
5. Bridge Or Stepping Stones Across The Water
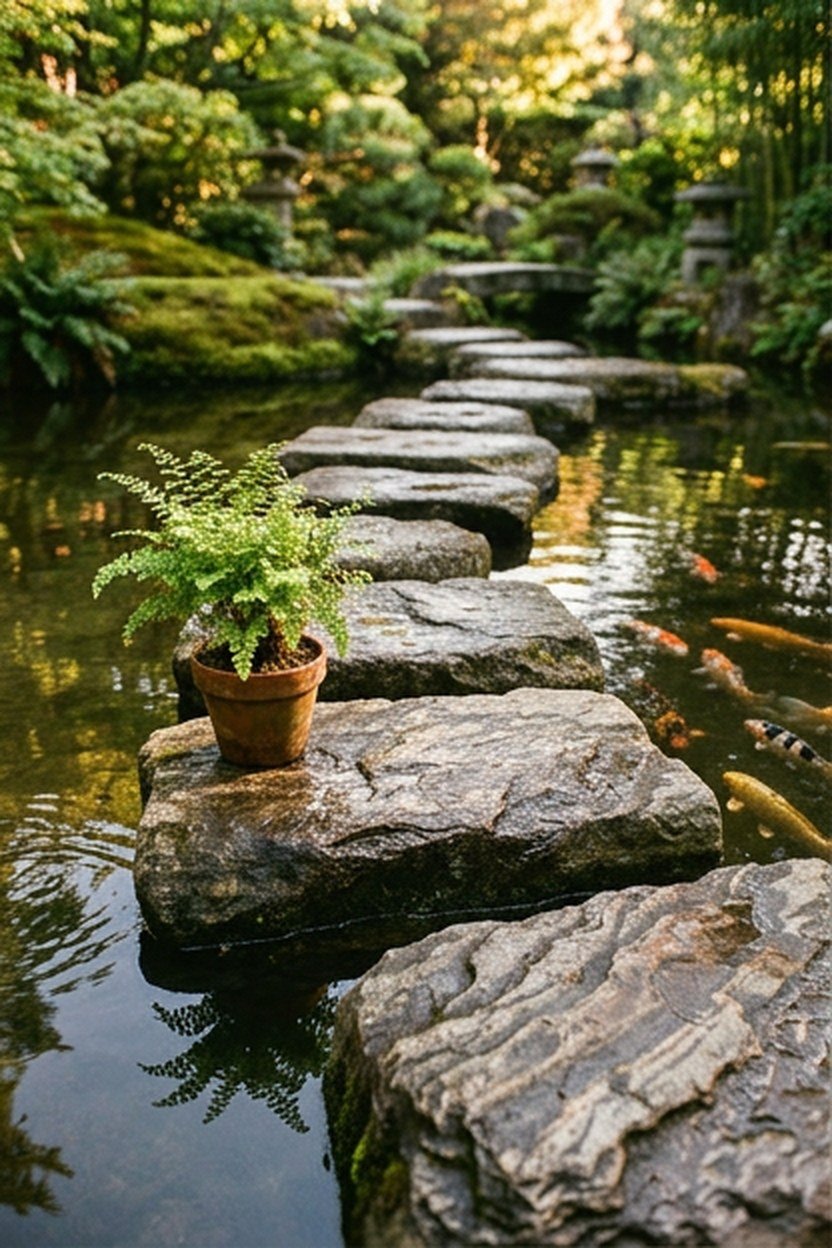
A bridge or a run of stepping stones across the pond invites the water to become a walkable, interactive part of the garden rather than something viewed only from the perimeter. A simple wood or stone bridge suits a natural-style pond, while stepping stones set at a comfortable stride length work well for a narrower crossing point. Either option turns the pond into a destination guests actually walk through rather than around.
Structural considerations matter here, since a bridge needs footings set below frost line in cold climates to avoid heaving and cracking over multiple winters. Stepping stones set directly into the pond’s excavation need a stable base beneath the liner to prevent shifting once weight is applied. Both options require coordination with the pond’s structural plan well before the liner goes in.
Lighting a bridge or stepping stone path with small integrated fixtures extends its usability into the evening and adds a second layer of illumination beyond the underwater lighting. This lighting also serves a genuine safety function, since a wet stone crossing at night without illumination is a real fall hazard. Most owners find this a worthwhile add given how frequently the crossing gets used once installed.
Cost And Structural Planning
A simple wood bridge for a residential koi pond typically costs $2,000 to $6,000, while a stone bridge with footings runs considerably higher, often $8,000 or more depending on span and material. Stepping stones are the more affordable option, typically $500 to $1,500 for a full crossing including the stable base beneath each stone. Deciding on this feature before excavation begins avoids costly retrofitting of the pond’s structural plan.
The most common mistake is adding a bridge or stepping stones as an afterthought once the pond is already excavated, which often requires partial re-excavation to install proper footings. Planning this feature from the earliest design phase, even if construction happens later, keeps the structural plan coordinated from day one.
6. Bottom Drain System For Effortless Debris Removal
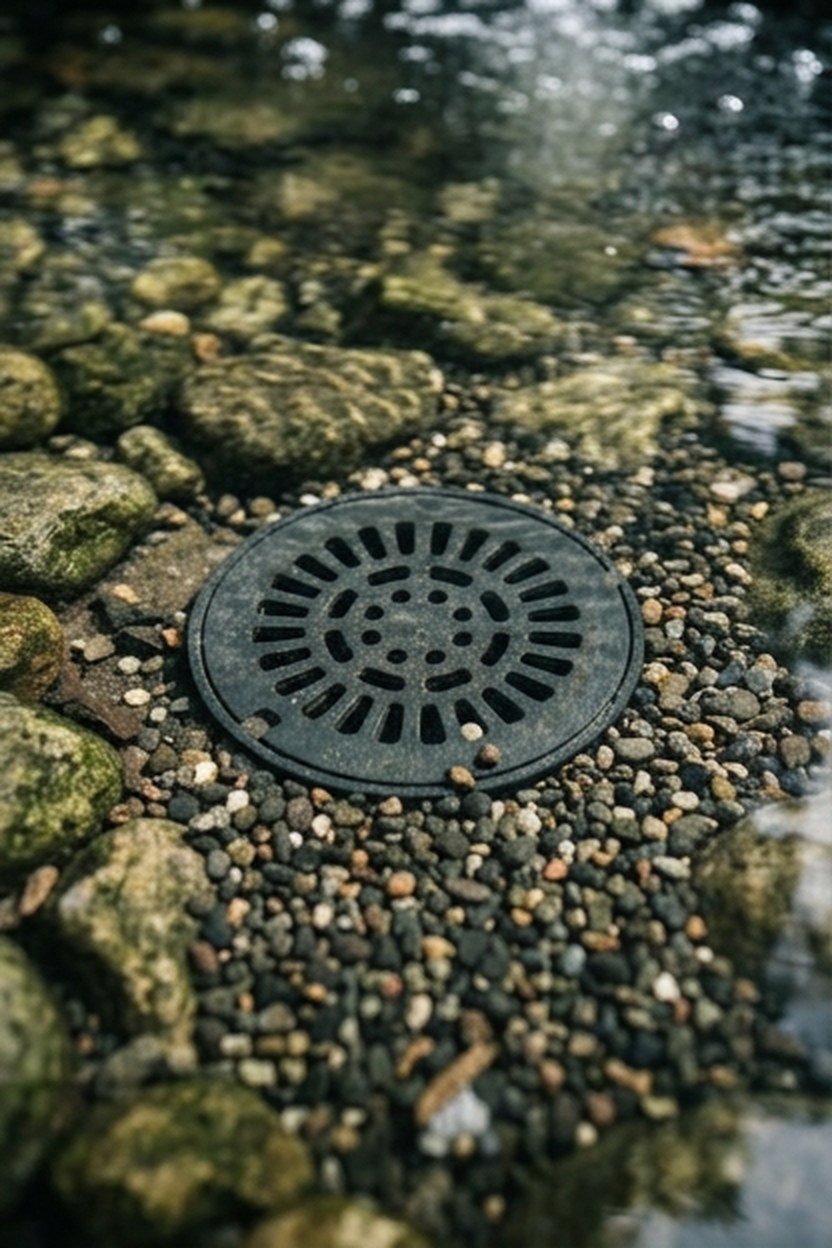
A bottom drain, positioned at the pond’s deepest point, pulls settled debris and waste directly to the filtration system rather than relying on surface skimming alone. This system dramatically reduces the manual vacuuming most pond owners otherwise perform every few weeks, since gravity constantly moves waste toward the drain rather than letting it accumulate on the pond floor. High end ponds almost universally include this feature for exactly this reason.
Installing a bottom drain requires running plumbing beneath the pond floor before the liner and stone go in, making this a decision that must happen early in the design process rather than as a later addition. The drain connects to the mechanical filtration stage, where solid waste gets captured before the water moves on to biological filtration.
A properly sized bottom drain moves a significant portion of the pond’s total waste load automatically, cutting manual cleaning time by more than half in most reported cases. This time savings is one of the most frequently cited reasons owners consider a bottom drain worth its upfront cost. The reduction in manual labor alone often justifies the expense within the first year of ownership.
Cost And Retrofit Difficulty
A bottom drain system typically adds $2,500 to $5,000 to a pond project, including the plumbing, the drain fitting itself, and the additional excavation required to route pipe beneath the pond floor. This cost is meaningfully higher if added after the pond is already built, since retrofitting requires draining the pond and cutting through the existing liner. Planning for a bottom drain from day one avoids this expensive rework entirely.
Skipping the bottom drain to save on upfront cost is a common decision that many owners later regret once they experience the manual cleaning burden of a drain-free system. A pond without a bottom drain typically needs vacuuming every two to three weeks during peak growing season, compared to a few times a year with one installed.
7. Koi-Specific Feeding Station With Automatic Feeder
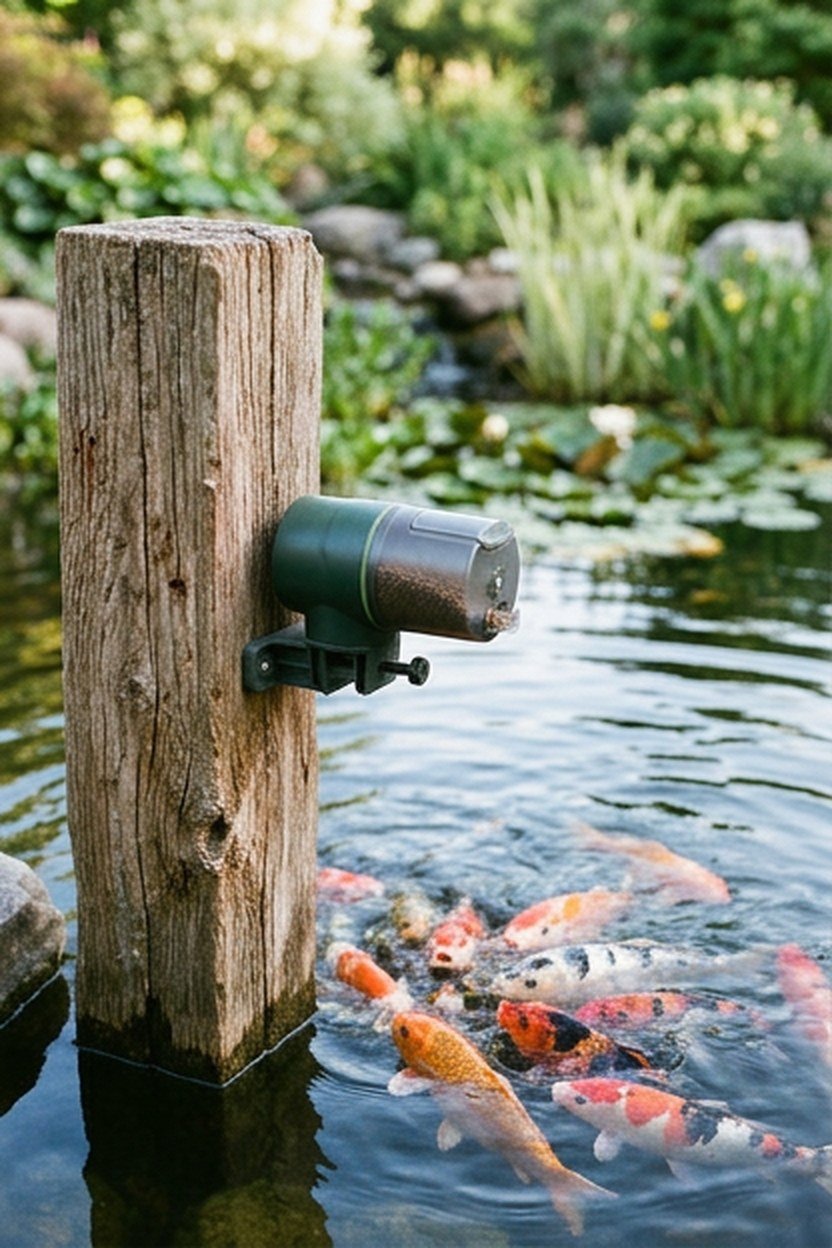
A dedicated feeding station, often a small platform or ledge near the viewing area, trains koi to gather predictably at feeding time, which both makes the fish easier to observe and health-check and reduces uneaten food settling elsewhere in the pond. Pairing this station with an automatic feeder ensures consistent feeding even when the owner travels, since erratic feeding schedules stress koi more than most owners realize.
Automatic feeders should be programmed for small, frequent feedings rather than one large daily dose, since koi digest more efficiently with smaller portions spread across the day. Overfeeding remains one of the most common causes of poor water quality in home ponds, since uneaten food breaks down and spikes ammonia levels quickly. A properly programmed feeder actually improves water quality compared to manual feeding done inconsistently.
Positioning the feeding station where it is visible from the primary seating area lets owners observe fish health daily without extra effort, since changes in feeding behavior are often the earliest sign of illness. This small design choice turns a routine task into an easy daily health check. Most experienced keepers consider this observation habit as valuable as any water testing routine.
Cost And Feeding Schedule Guidance
A quality automatic pond feeder typically costs $150 to $400, a modest expense relative to the rest of a high end pond build. Programming the feeder for two to three small feedings daily during warm months, tapering to less frequent feeding as water temperature drops below 50 degrees, matches koi’s natural seasonal metabolism. Feeding koi in cold water when their digestion has slowed is a common mistake that can cause serious digestive illness.
Overfeeding, even with an automatic feeder, remains possible if the feeder is not calibrated to the pond’s actual fish population and size. Checking that food is fully consumed within five minutes of each feeding, and adjusting the feeder’s portion size accordingly, prevents this overfeeding problem before it affects water quality. This calibration takes only a few observed feedings to get right.
8. Natural Stone Bridge Crossing With Integrated Lighting
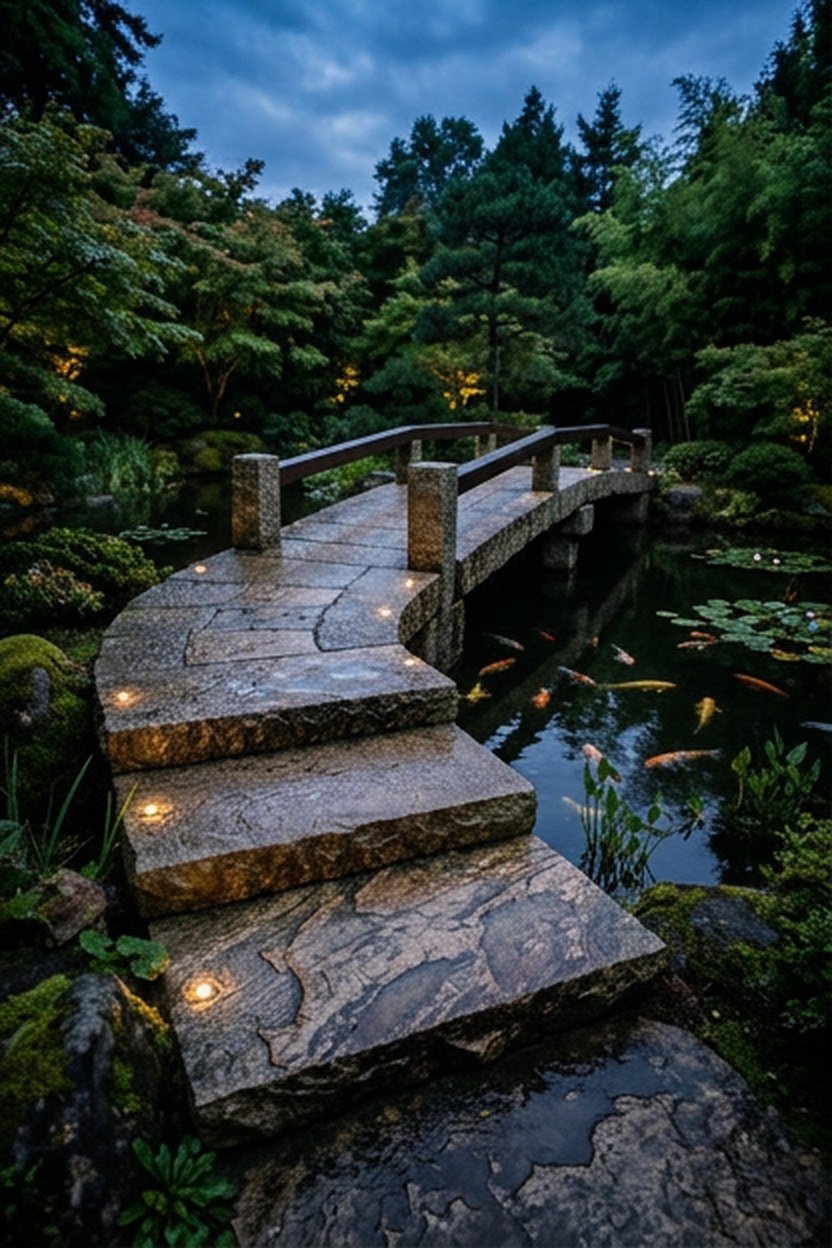
Beyond a simple stepping stone crossing, a full stone bridge with integrated step lighting elevates the pond into a genuine architectural feature, particularly in larger gardens where the pond spans a significant width. Cut stone or fitted fieldstone construction gives the bridge a permanence that a wood structure cannot match over decades of exposure. This feature typically anchors the pond as the garden’s clear visual centerpiece.
Structural engineering matters considerably more here than with simple stepping stones, since a full stone bridge carries real weight and needs footings engineered for the specific span and expected foot traffic. Working with a structural engineer or an experienced pond builder familiar with bridge construction avoids costly structural failures down the road.
Integrated step lighting, recessed directly into the stone treads, provides safe nighttime crossing without the visual clutter of surface-mounted fixtures. This lighting approach requires planning conduit routes during the bridge’s construction phase, since retrofitting recessed lighting into finished stonework is extremely difficult. Coordinating this early with your electrician and mason prevents a costly redo.
Cost And Engineering Considerations
A full stone bridge with integrated lighting typically costs $12,000 to $25,000 depending on span, stone type, and lighting complexity, making it one of the more significant investments on this list. This cost reflects both the material expense of cut stone and the structural engineering required for a safe, durable crossing. Most owners who choose this feature treat it as the pond’s primary architectural statement.
Underestimating the structural engineering requirement is the most serious mistake possible with this feature, since a bridge built without proper footings can shift, crack, or fail entirely within a few years. Hiring a structural engineer for this specific element, even when the rest of the pond uses a general landscaper, is money well spent.
9. Color-Coordinated Koi Selection For Visual Impact
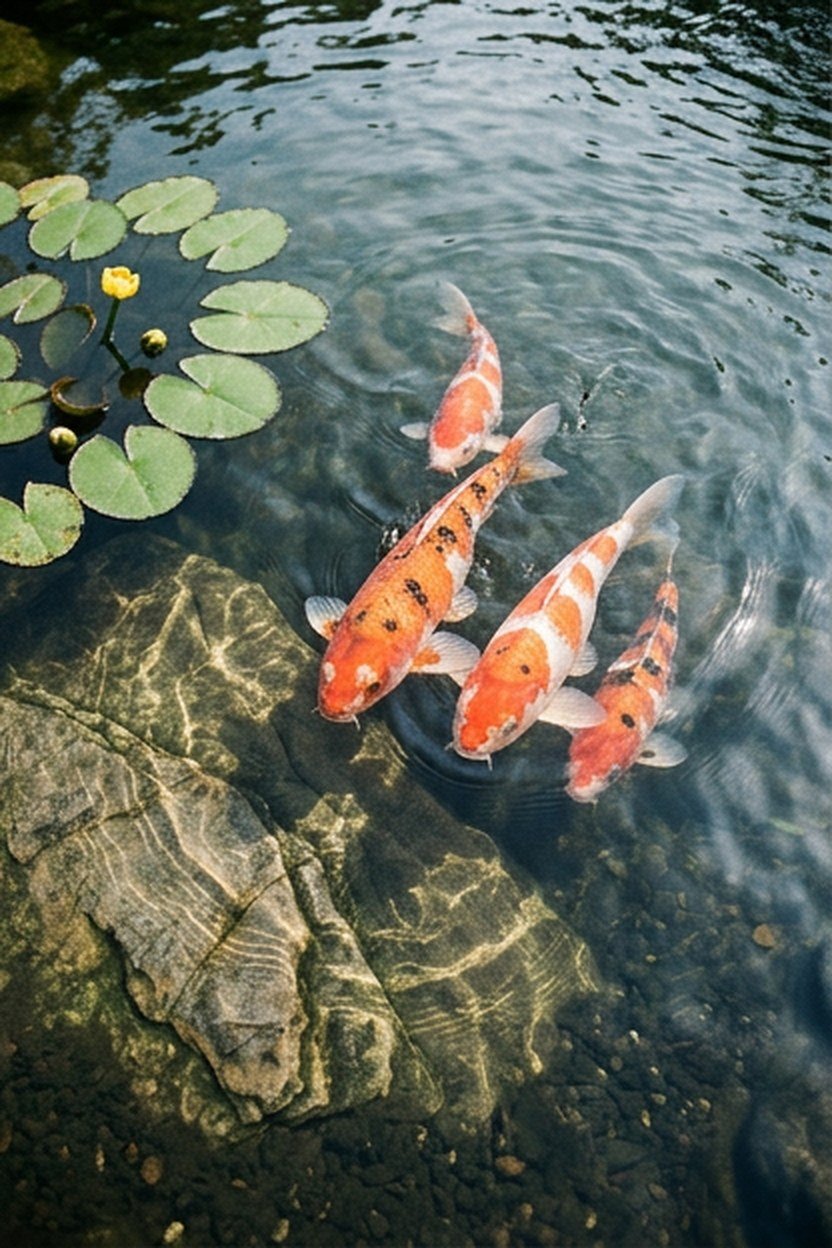
Beyond structure and hardscape, the koi themselves are the pond’s centerpiece, and selecting fish with coordinated or complementary coloring creates a noticeably more striking visual display than a random assortment. Popular high-value varieties like Kohaku (white with red markings), Showa (black with red and white), and Ogon (solid metallic) each bring a distinct visual character. Working with a reputable koi dealer who can advise on coloring combinations elevates the pond’s visual impact considerably.
Quality koi from established breeders command significantly higher prices than generic pond-store stock, with individual show-quality fish sometimes reaching four or five figures for exceptional specimens. Most high end residential ponds mix a smaller number of premium fish with a larger population of more affordable, still-attractive koi, balancing visual impact against budget.
Introducing new koi gradually, and always through a proper quarantine period, protects the existing collection from disease that new fish can carry even when they appear healthy. Skipping quarantine to add a striking new fish immediately is one of the more expensive mistakes an owner can make, since disease can spread through an entire established collection within days.
Cost And Sourcing Guidance
Individual koi from a reputable dealer typically range from $50 for smaller, attractive fish to several thousand dollars for larger show-quality specimens with exceptional coloring and pattern. Building a collection gradually over a few seasons, rather than stocking the entire pond at once, allows the owner to observe how each fish’s coloring develops as it matures.
Buying koi from an unverified or low-quality source is the most common sourcing mistake, since these fish often carry disease or parasites that can devastate an established pond. Sourcing exclusively from dealers who maintain proper quarantine and health certification protects the investment already made in filtration, structure, and the existing collection.
10. Zen Garden Surround With Raked Gravel And Boulders
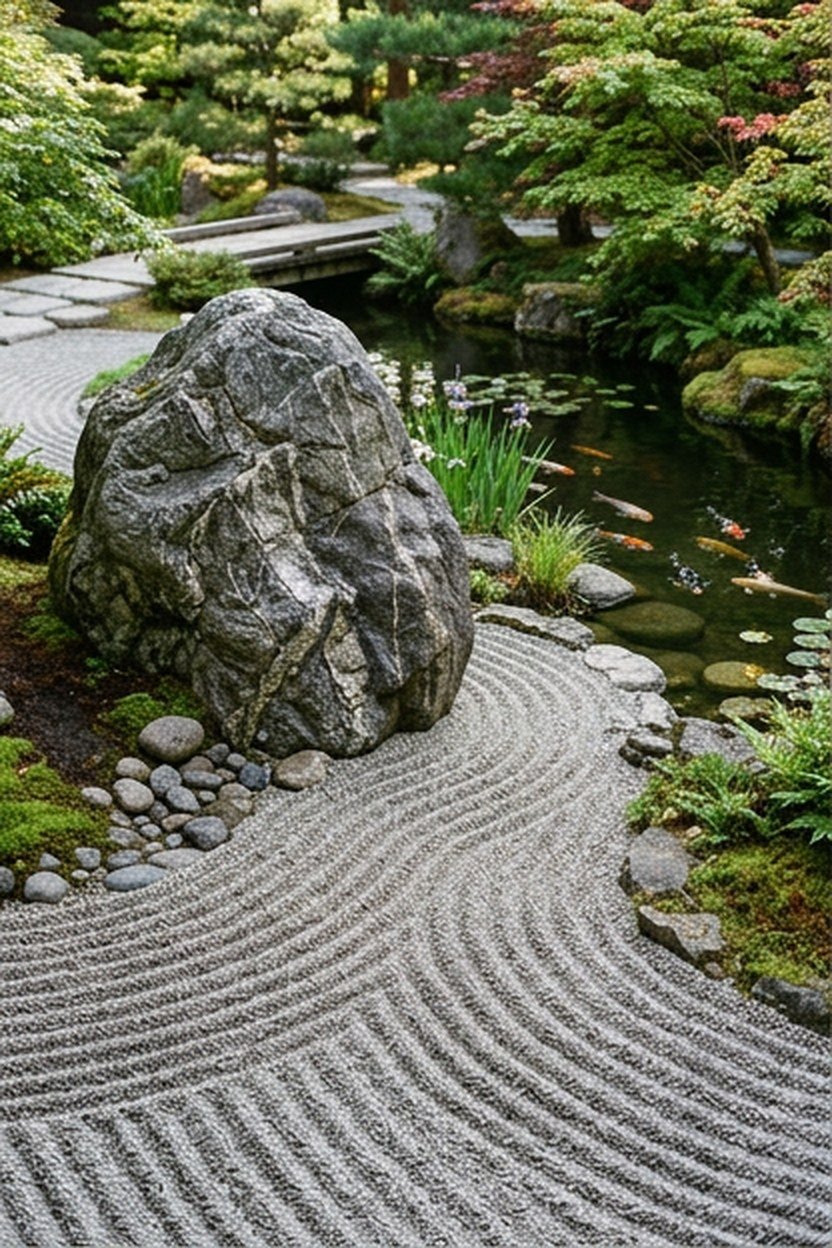
Surrounding the pond with a zen garden treatment, using raked gravel, carefully placed boulders, and minimal planting, reinforces the meditative quality that gives high end koi ponds their “zen luxury” reputation. This style pairs particularly well with a formal pond outline, since the geometric precision of raked gravel patterns echoes the pond’s own clean lines. The overall effect reads as considered and intentional rather than simply landscaped.
Boulder placement in this style follows traditional principles of asymmetric balance, typically grouping stones in odd numbers and varying heights rather than evenly spaced identical stones. A skilled landscaper familiar with Japanese garden principles can place boulders that feel naturally settled rather than obviously arranged.
Maintaining the raked gravel pattern requires periodic re-raking, typically weekly for an owner who wants the pattern crisp, though a more relaxed maintenance schedule still keeps the overall effect intact. This maintenance rhythm becomes a meditative task in itself for many owners, adding a personal ritual element to pond ownership beyond simply viewing the fish. Many owners report this raking practice as an unexpected favorite part of pond ownership.
Cost And Design Considerations
A zen garden surround typically costs $3,000 to $8,000 depending on boulder size, gravel quantity, and the complexity of the surrounding hardscape. Sourcing boulders locally reduces transport costs significantly compared to importing specific stone types from distant quarries. This local sourcing decision can meaningfully affect the overall budget without compromising the design’s visual impact.
Overplanting within a zen garden surround undermines the style’s minimalist intent, since the aesthetic depends on negative space and restraint rather than dense greenery. A common mistake is treating this area like a standard garden bed and filling it with the same plant density used elsewhere in the yard. Resisting this urge, and trusting the restraint, is what makes the zen style actually read as zen.
11. Pergola Or Shade Structure Positioned Over Seating
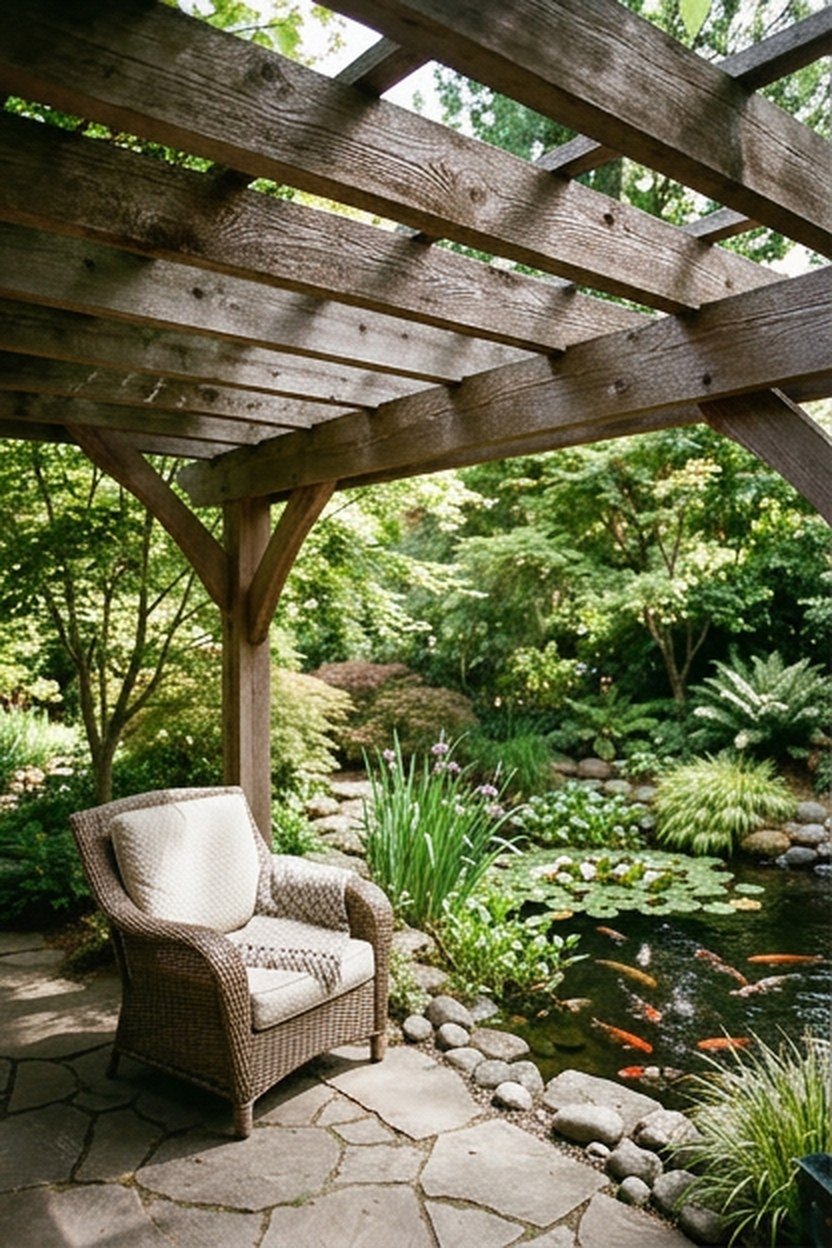
A pergola or shade structure positioned beside the pond, ideally shading the primary seating area rather than the water itself, gives owners a comfortable vantage point to view the pond throughout the day without direct sun exposure. Positioning the structure to avoid excessive shade over the water matters too, since koi ponds benefit from partial sun for both fish health and any aquatic planting. This balance between shaded seating and sunlit water takes some careful siting.
Material choice for the pergola should complement the pond’s existing hardscape, with cedar or teak pairing naturally with stone edging, while a painted or powder-coated metal structure suits a more formal, modern pond design. Climbing vines trained across a wood pergola add a softening, established look within a few growing seasons.
Integrating outdoor lighting into the pergola structure extends usable evening hours around the pond considerably, particularly when paired with the underwater lighting discussed earlier. String lighting or integrated fixtures along the pergola’s beams create a layered lighting effect that reads as considerably more finished than a single light source.
Cost And Siting Guidance
A cedar or teak pergola sized for a small seating area typically costs $4,000 to $10,000 installed, with metal structures often running somewhat higher depending on custom fabrication. Positioning the structure during the pond’s initial design phase, rather than adding it afterward, avoids conflicts with existing plumbing, electrical conduit, or planting beds installed earlier.
A common mistake is positioning the pergola too close to the pond’s edge, resulting in excessive leaf litter falling directly into the water from any structure planting. Setting the structure back enough to keep falling debris clear of the water surface, typically several feet beyond the pond’s edge, avoids this ongoing maintenance headache.
12. Integrated Sound System For Ambient Water Enhancement
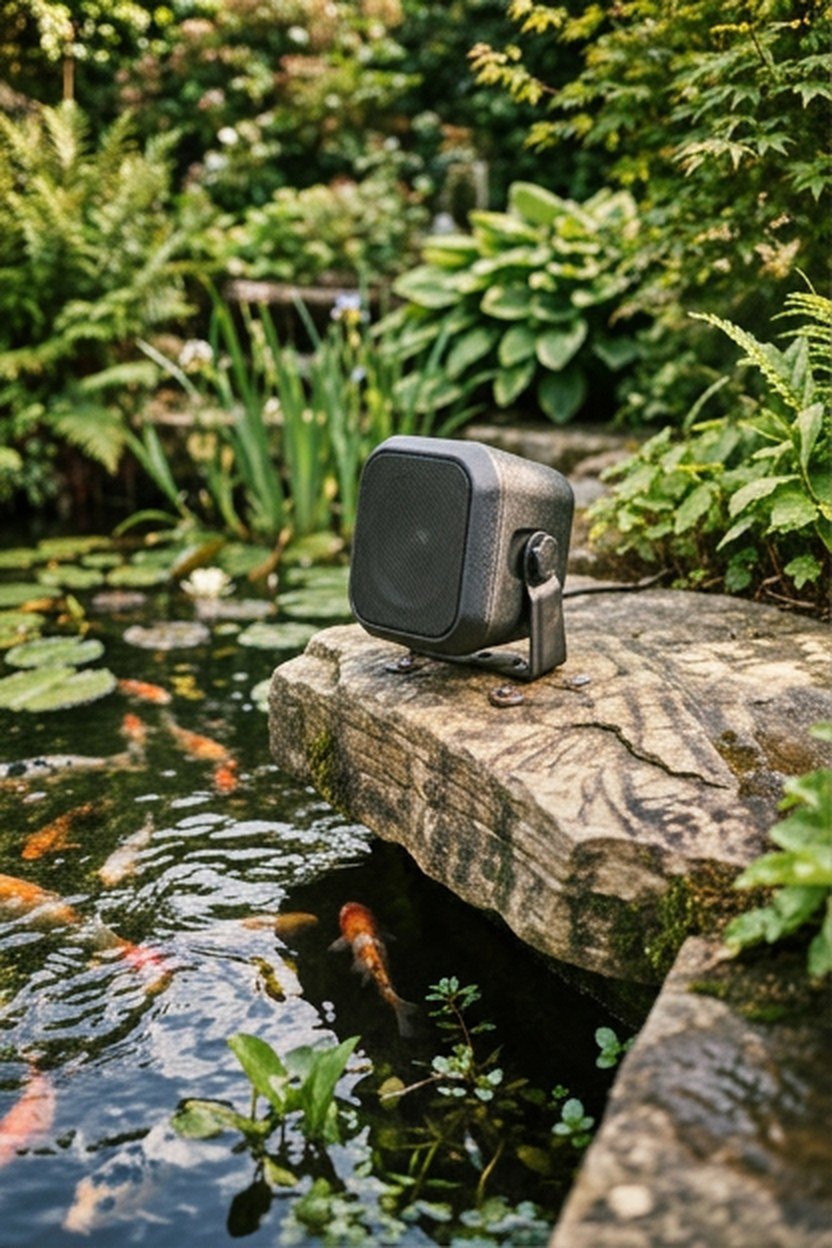
An integrated outdoor sound system, positioned discreetly around the pond area, layers ambient music or nature sounds beneath the pond’s own water sounds without overwhelming the natural waterfall or stream feature. Weatherproof speakers designed specifically for outdoor installation withstand the humidity and temperature swings common near open water. This feature, while not directly related to the pond’s function, meaningfully enhances the overall zen atmosphere the space is designed to create.
Speaker placement matters considerably for sound quality, with most installers recommending speakers positioned away from the water’s direct edge to avoid moisture damage while still projecting sound clearly across the seating area. Volume calibration should keep the sound subtle enough that the pond’s natural water sounds remain the dominant audio experience. Overpowering the natural water sound with music undermines the very atmosphere the feature is meant to enhance.
Running the sound system on the same low-voltage transformer circuit as the pond’s lighting simplifies both installation and future maintenance, since a single accessible control point manages both features. This integration decision is worth discussing with your electrician during the initial planning phase rather than as separate systems installed at different times. Combining these systems typically saves on both material and labor cost.
Cost And Speaker Placement
A basic weatherproof outdoor sound system with two to four speakers typically costs $800 to $2,500 including installation, a relatively modest addition relative to the rest of a high end pond build. Choosing speakers rated specifically for direct outdoor exposure, rather than indoor speakers adapted for outdoor use, prevents premature failure from moisture and temperature cycling.
Positioning speakers too close to the water’s edge is the most common installation mistake, since splash and humidity shorten speaker lifespan considerably even with weatherproof ratings. Keeping speakers at least several feet back from the water’s edge, while still angling them toward the seating area, balances sound quality against long-term durability.
13. Seasonal Netting System For Leaf And Debris Control
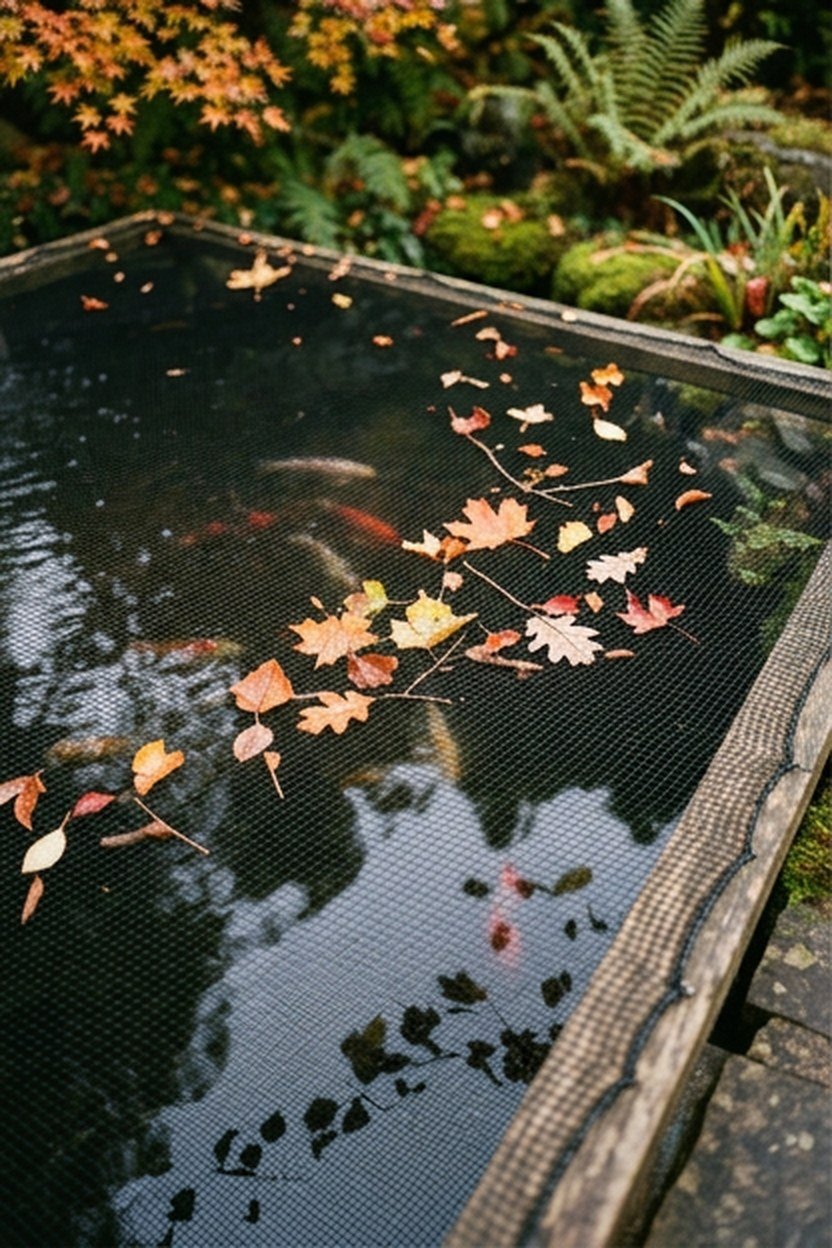
A seasonal netting system, installed over the pond during fall leaf drop, prevents the labor-intensive task of fishing decomposing leaves out of the water by hand throughout autumn. Retractable or removable netting frames allow the pond to remain fully visible during the rest of the year while still providing protection when needed most.
Netting also serves a secondary predator-deterrent function during the season it is installed, since herons and other predatory birds struggle to access fish beneath a taut net. This dual benefit, debris control and predator protection, makes netting one of the more worthwhile additions on this entire list relative to the problems it solves. Most experienced owners consider this a near-mandatory rather than optional feature.
Choosing a properly framed netting system, rather than simply draping loose netting over the water, prevents the net from sagging into the pond and creating a trap hazard for fish or wildlife. A framed system typically uses a low-profile metal or PVC frame that suspends the netting several inches above the water surface.
Cost And Seasonal Timing
A properly framed netting system for a mid-size pond typically costs $300 to $900, making it one of the more affordable additions relative to its practical benefit. Installing the netting a week or two before peak leaf drop in your region, and removing it once the bulk of leaf fall has finished, maximizes its usefulness without leaving the pond covered longer than necessary. Checking regional leaf drop timing with a local extension office helps nail this timing correctly.
Leaving netting in place through winter unnecessarily obscures the pond’s view during a season many owners specifically want to observe overwintering fish. Removing the net once leaf drop finishes, and relying on the deep zone discussed earlier for winter protection instead, keeps the pond visually accessible year-round.
14. Custom Stone Signage Or Water Feature Nameplate
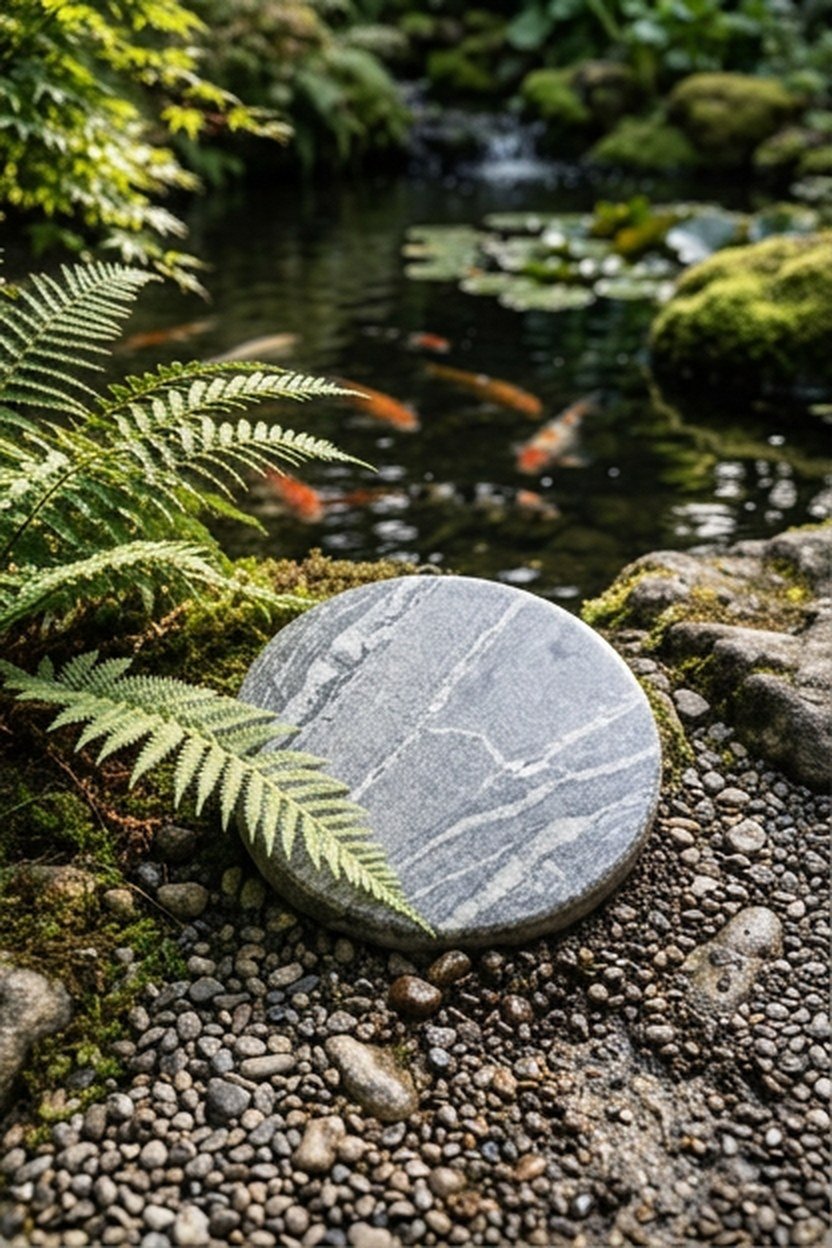
A small custom stone or metal nameplate, set discreetly near the pond’s edge, gives the feature a sense of permanence and personal identity that a purely functional installation lacks. This detail, while purely aesthetic, is a small touch that several high end pond owners specifically mention as adding a surprising amount of personal satisfaction to the finished project. The cost relative to its impact makes it one of the easier additions to justify.
Material choice for signage should match the pond’s existing hardscape, with a cut stone plaque suiting a natural-style pond and a brushed metal plate suiting a more formal, modern design. Positioning the sign at a height and angle visible from the primary seating area, without becoming a visual distraction from the water itself, takes a bit of trial placement. Most owners find the right spot within a single afternoon of experimentation.
Commissioning custom signage from a local stone mason or metal fabricator, rather than ordering a generic pre-made plaque, produces a result that feels genuinely integrated into the pond’s overall design language. This custom approach costs modestly more than an off-the-shelf option but avoids the slightly generic look that mass-produced garden signage often has. The difference is subtle but noticeable to anyone who spends real time in the space.
Cost And Placement Guidance
A custom stone or metal nameplate typically costs $200 to $600 depending on material and the complexity of any engraved lettering or imagery. Commissioning this piece toward the end of the pond’s construction, once the final hardscape layout is settled, avoids having to relocate or replace signage that no longer fits the finished design.
Placing signage where it competes visually with the waterfall or bridge feature undermines both elements, since a cluttered focal point reads as less considered than a single clear one. Keeping the nameplate modest in scale and tucked slightly to the side of the pond’s primary sightline preserves the water itself as the clear visual priority.
15. Professional Water Testing And Maintenance Contract
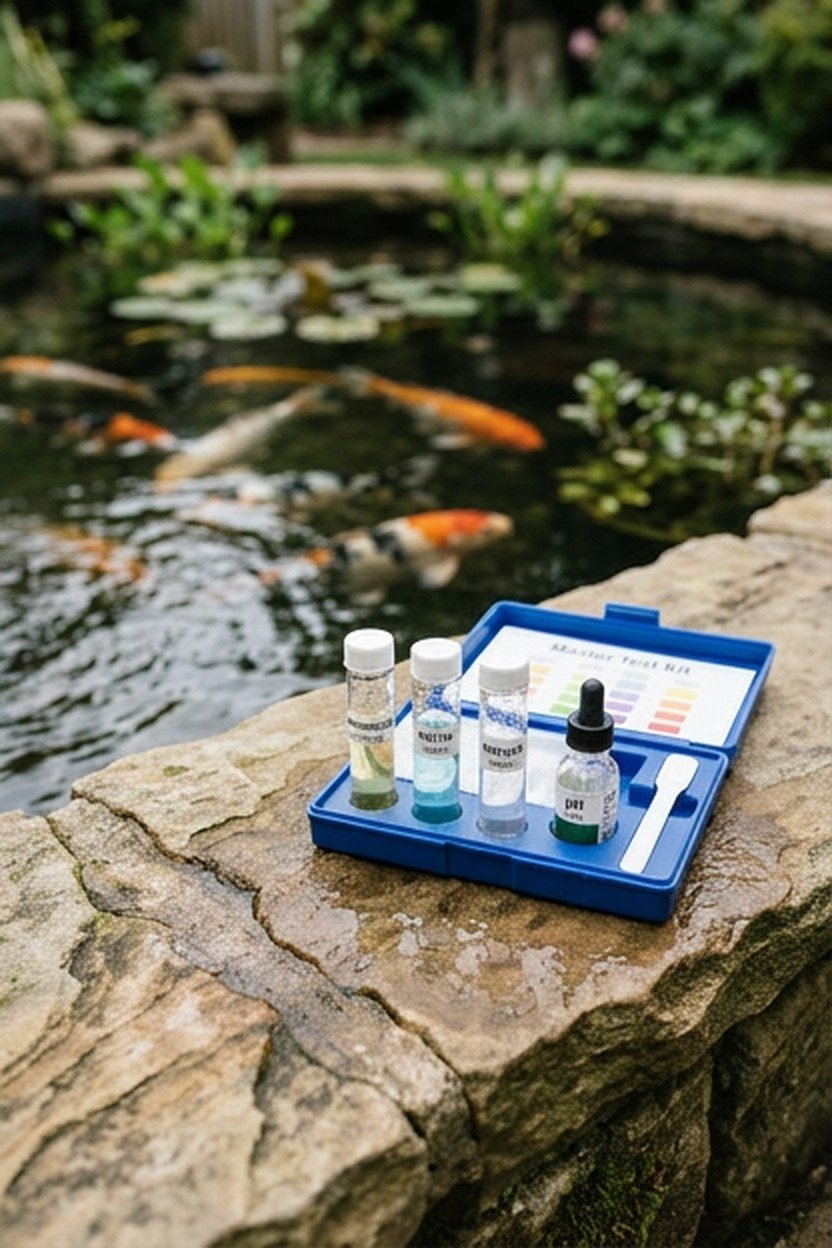
A professional water testing and maintenance contract, typically covering monthly visits from a koi pond specialist, catches water quality issues before they become visible problems that stress or harm the fish. This service checks parameters like ammonia, nitrite, nitrate, and pH that are difficult to monitor accurately without specialized test kits and experience interpreting the results. Many high end pond owners consider this contract nearly as important as the filtration system itself.
A maintenance contract typically also includes seasonal tasks like filter media replacement, pump inspection, and adjusting feeding schedules as water temperature changes throughout the year. Outsourcing these tasks to a specialist frees the owner to simply enjoy the pond rather than managing its technical upkeep personally. This trade-off, cost against convenience and expertise, is one each owner needs to weigh against their own available time and technical comfort.
Choosing a maintenance provider with specific koi pond experience, rather than a general pool or landscaping service, matters considerably given how different koi pond chemistry is from a swimming pool’s chlorinated water. Asking for references from other koi pond clients, not just general landscaping clients, is worth the extra step during provider selection.
Cost And What A Contract Typically Covers
A monthly koi pond maintenance contract typically costs $150 to $400 per visit depending on pond size and the scope of services included, adding up to $1,800 to $4,800 annually for full-service coverage. This ongoing cost is worth weighing against the potential cost of a preventable water quality crisis, which can run into thousands of dollars in emergency intervention and fish replacement. Most owners who have experienced a water quality emergency once choose to maintain a contract afterward.
A contract that excludes emergency response, only covering scheduled monthly visits, can still leave an owner without help during a sudden algae bloom or equipment failure between visits. Confirming whether emergency response is included, and at what additional cost, avoids an unpleasant surprise during an actual crisis.
What A High End Koi Pond Actually Costs
A complete high end koi pond project, incorporating several of the features above, typically ranges from $25,000 to $60,000 depending on size, hardscape complexity, and how many premium features like a stone bridge or integrated sound system are included. Excavation, liner, and basic filtration typically represent 40 to 50 percent of this total, with hardscape, lighting, and specialty features making up the remainder. Understanding this rough breakdown helps prioritize which features matter most for a specific budget.
Ongoing costs beyond the initial build include electricity for pumps and lighting, periodic filter media replacement, koi food, and any maintenance contract chosen, typically totaling $2,500 to $6,000 annually for a fully-featured pond. This ongoing cost is worth factoring into the decision from the start, since a beautiful pond that becomes a financial burden to maintain properly often ends up neglected. Budgeting realistically for both build and ongoing cost prevents this common outcome.
| Cost Category | Typical Range | Notes |
|---|---|---|
| Excavation and liner | $8,000 to $15,000 | Scales with pond size and depth |
| Filtration system | $4,000 to $10,000 | Three-stage systems cost more upfront |
| Hardscape and features | $10,000 to $30,000 | Varies widely by feature selection |
Financing a project at this scale in phases, building the core pond and filtration first and adding features like a bridge or sound system in subsequent years, is a reasonable approach many owners take. This phased strategy spreads the financial commitment across a longer timeframe while still ensuring the core filtration and structural elements are built correctly from the start. Discussing a phased plan with your builder upfront makes future additions considerably easier to integrate.
Common Mistakes That Undermine A High End Koi Pond
The most common mistake across nearly every failed koi pond project is undersizing the filtration system relative to the fish load, a decision that seems to save money upfront but leads to chronic water quality problems within the first year. Filtration should be sized for the pond’s mature fish population, not the smaller starting population, since koi grow substantially over their first several years. This single miscalculation causes more owner regret than any other decision on this list.
A second frequent mistake is neglecting the deep zone discussed earlier, particularly in colder climates where inadequate depth risks a fully frozen pond surface and catastrophic fish loss. Skipping quarantine when introducing new fish is a third recurring mistake, one that can undo years of careful collection building in a single disease outbreak. Each of these mistakes shares a common thread: they save money or time upfront while risking a much larger cost later.
Recovering From These Setbacks
Recovering from inadequate filtration typically means adding a secondary filter unit or upgrading to a larger biological media chamber, a retrofit that is more expensive than building correctly the first time but still far cheaper than repeatedly losing fish to poor water quality. Consulting with a koi-specific pond professional before attempting this retrofit avoids sizing the replacement incorrectly a second time. This professional consultation, while an added upfront cost, usually pays for itself in avoided repeat mistakes.
Recovering from a winter fish loss due to inadequate depth requires accepting the loss, then correctly deepening the pond before restocking, since restocking into an unfixed shallow pond simply repeats the same risk the following winter. This deepening retrofit, while disruptive, is a one-time investment that permanently resolves the underlying problem. Making this fix before restocking, rather than after, is the harder but ultimately correct order of operations.
Conclusion
A high end koi pond earns its reputation for zen luxury through oversized filtration, adequate depth, and hardscape that treats the water as the garden’s genuine centerpiece. The fifteen concepts here, from a bottom drain system to a maintenance contract, each address a piece of what separates a forgettable backyard pond from one that functions beautifully for decades. Prioritizing filtration and depth first, then layering in hardscape and lighting as budget allows, gives the most reliable path to real luxury.
Whether you are planning a full custom build or upgrading an existing pond one feature at a time, the underlying principles here stay the same: build for the mature fish population, plan for winter from day one, and never skip quarantine when adding new koi. These fundamentals matter more than any single decorative feature on this list. Get them right, and the decorative choices become the enjoyable part of an already sound investment.
Frequently Asked Questions
How deep should a high end koi pond be? Most experienced builders recommend a minimum depth of 3 to 4 feet in the deepest zone, particularly in climates with cold winters. This depth protects fish from both winter freezing and summer heat stress.
How much does a high end koi pond cost to build? A complete high end koi pond project typically ranges from $25,000 to $60,000 depending on size and the specific features included. Excavation, liner, and filtration usually represent close to half of this total.
What filtration system do high end koi ponds use? Most high end ponds use a three-stage system combining mechanical filtration, biological filtration, and a UV clarifier. This redundancy keeps water clear even if one stage underperforms temporarily.
How many koi can a high end pond support? A general guideline is roughly one adult koi per 250 to 500 gallons of water, depending on filtration capacity. A 1,500 gallon pond with strong filtration can comfortably support a modest, healthy collection.
Do koi ponds need a bottom drain? A bottom drain is not strictly required but dramatically reduces manual cleaning by automatically pulling settled debris toward the filtration system. Most high end pond builds include one for exactly this reason.
How often should koi ponds be professionally maintained? Many owners choose a monthly maintenance contract, which typically costs $150 to $400 per visit and covers water testing, filter checks, and seasonal adjustments. This schedule catches most issues before they affect fish health.
What is the biggest mistake people make with koi ponds? Undersizing the filtration system relative to the pond’s eventual mature fish population is the most common and costly mistake. Planning filtration capacity around future fish size, not the current smaller population, avoids this problem entirely.