
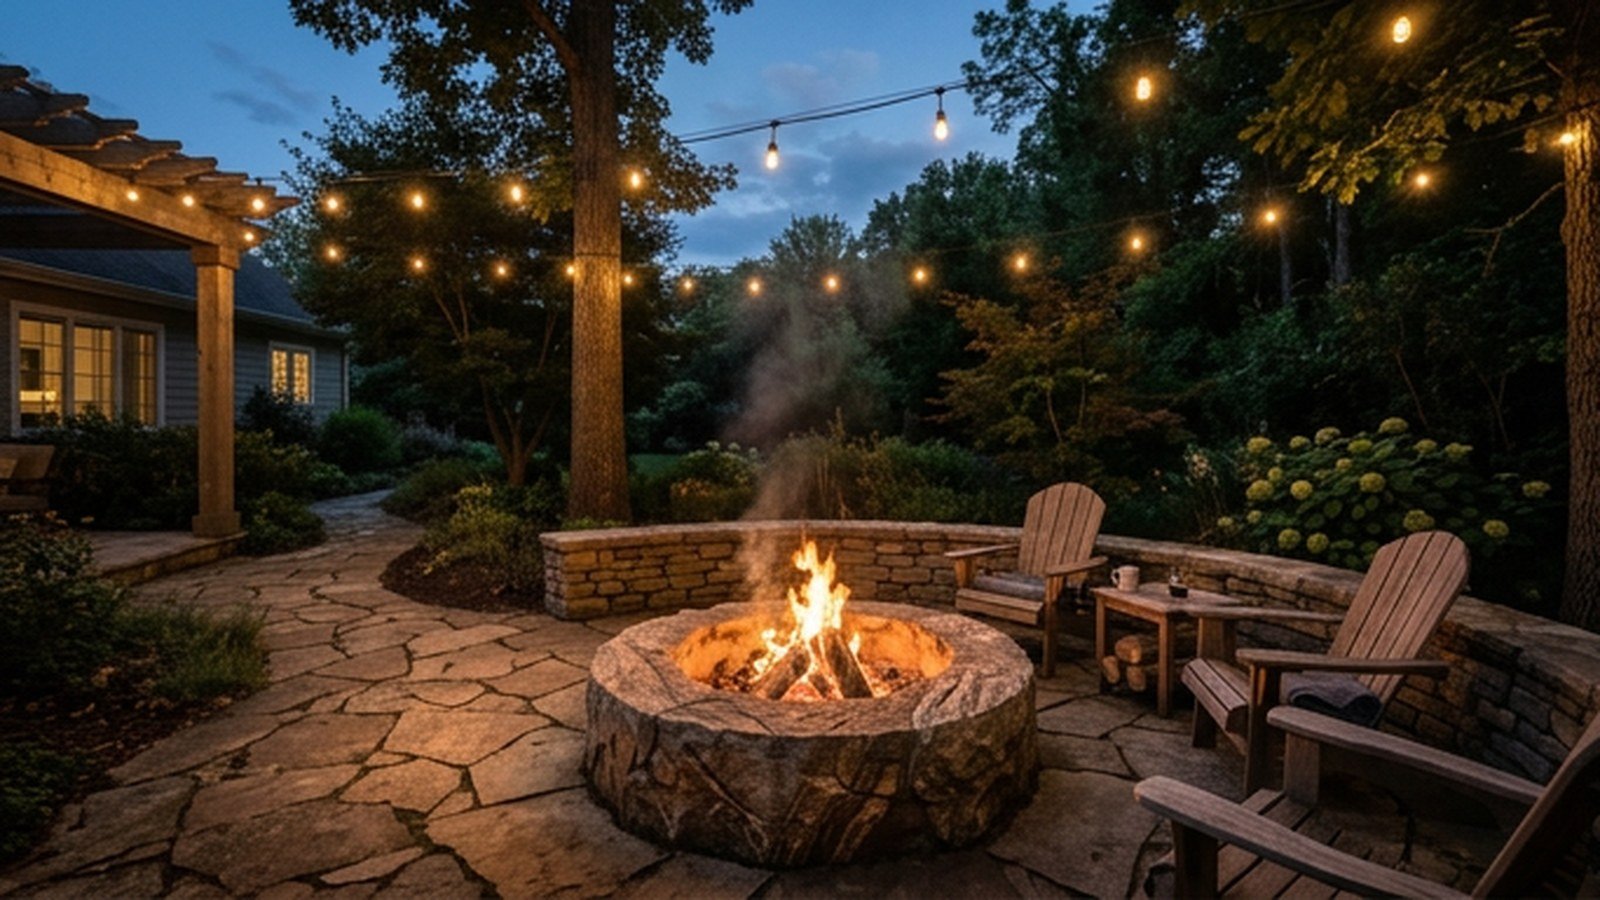
A good fire pit turns a backyard into the one spot everyone actually wants to sit, even after the sun goes down and the air turns cold. The setup around the fire matters as much as the fire pit itself, since seating, surface, and shelter decide whether people linger or head back inside after ten minutes. This guide walks through fifteen real fire pit setups, from a simple gravel circle to a full built-in stone bench.
I have sat around more backyard fire pits than I can count, and the ones that get used every week share the same traits: comfortable seating within easy reach of the heat, a hard surface underfoot that does not track ash indoors, and enough light to see your drink. A beautiful fire pit surrounded by uncomfortable chairs empties out fast. Getting the setup right matters more than the fire pit’s own price tag.
By the end of this piece you will know which setups suit a weekend budget and which call for a real contractor, along with the safety clearances that keep a fire pit legal in most backyards. I have included a comparison table and a cost breakdown, since prices swing enormously between a portable steel bowl and a built-in gas installation. Read through all fifteen before deciding what your backyard actually needs.
Why The Setup Matters More Than The Fire Pit Itself
A fire pit is only ever as good as what surrounds it, since the seating, surface, and wind protection determine how long people actually stay outside once it gets dark. Two backyards with the identical fire pit model can feel completely different depending on whether the seating faces the flame at a comfortable distance or is scattered too far back to feel any warmth. The setup is the part worth planning first.
Distance from the flame is the detail most people get wrong, since seating placed too close feels uncomfortably hot while seating placed too far away misses the point of a fire pit entirely. A ring of chairs roughly three to four feet from the fire’s edge tends to hit the right balance for most fire pit sizes.
| Setup Type | Typical Cost | Best For |
|---|---|---|
| Portable steel bowl | $100 to $400 | Renters, small yards |
| Gravel fire circle | $300 to $800 | DIY weekend projects |
| Built-in gas fire pit | $1,500 to $4,000 | Permanent, low-maintenance use |
| Stacked stone surround | $800 to $2,500 | A rustic, custom look |
| Fire pit table | $400 to $1,200 | Small patios and decks |
Wind exposure changes which setup actually works in your specific yard, since an open, unprotected backyard needs more shelter planning than a fenced, tree-lined one. A pergola, a low wall, or even strategic hedge placement cuts wind enough to keep a fire pit usable on breezier evenings. Testing your yard’s wind pattern on a few different evenings before committing to a permanent installation saves a real headache later.
Planning A Fire Pit Setup Around Safety And Local Rules
Before building anything, check your local fire code and any homeowners association rules, since many areas restrict wood-burning fire pits or require a minimum distance from structures and property lines. Gas fire pits typically face fewer restrictions than wood-burning ones, which is worth knowing if your area has seasonal burn bans. This single check can save you from building something you later have to remove.
Standard safety guidance calls for at least ten feet of clearance from any structure, fence, or overhanging tree branch, though local codes sometimes require more. A noncombustible surface directly under and around the fire pit, whether gravel, stone, or concrete, is worth installing even where it is not strictly required. This surface protects your lawn or deck from heat damage regardless of what your local code demands.
Keep a hose or fire extinguisher within easy reach of any fire pit setup, and never leave a lit fire unattended even briefly. This basic precaution matters more with a wood-burning pit, where wind can carry embers further than people expect. A few minutes of planning here prevents the kind of accident that ends a backyard fire pit habit permanently.
Choosing Between Wood And Gas Before You Build
Wood-burning fire pits deliver a genuine crackling fire and real wood smoke smell that many people specifically want, but they demand more supervision, produce more smoke, and leave ash to clean up after every use. Gas fire pits light instantly, produce no smoke or ash, and can be turned off the moment you are ready to head inside. Choosing between the two before building anything permanent avoids retrofitting a gas line into a stone surround built for wood.
1. In-Ground Gas Fire Pit With A Stone Surround
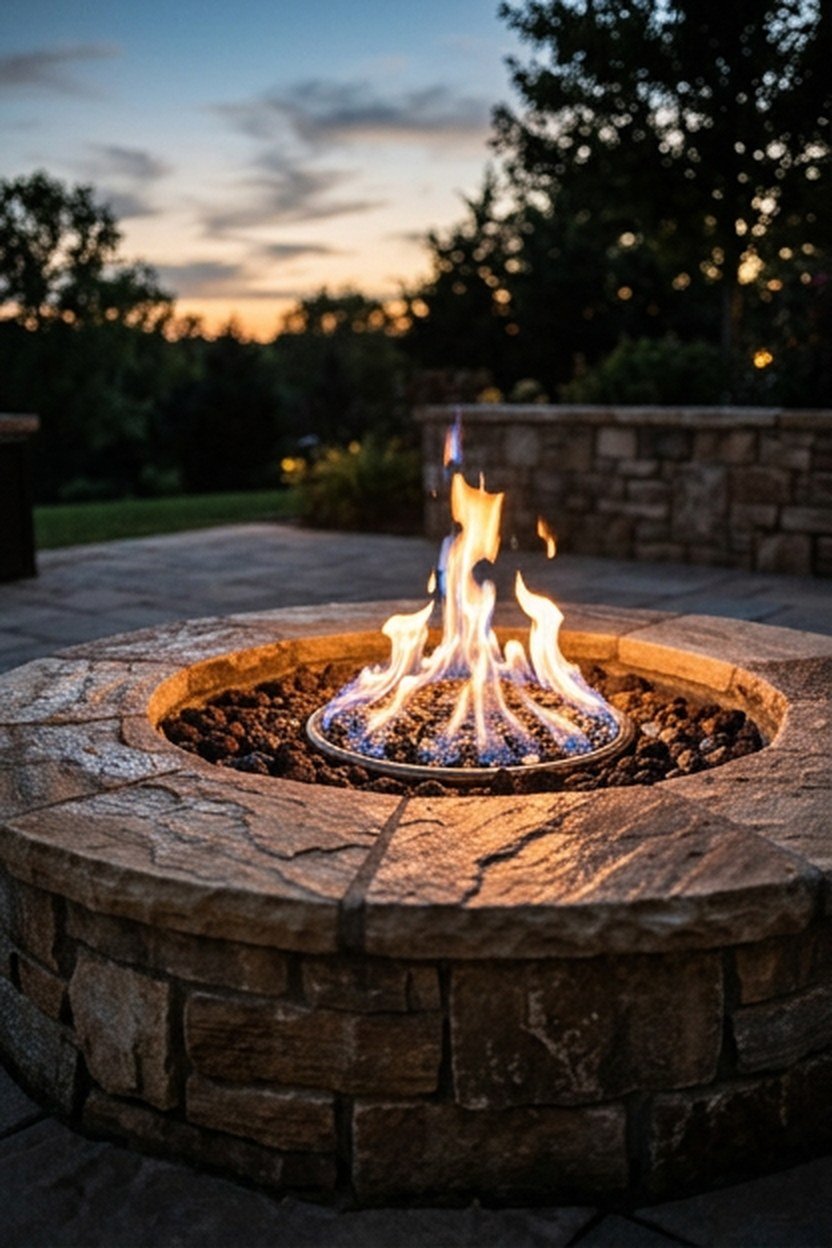
An in-ground gas fire pit with a stone surround delivers the cleanest, lowest-maintenance fire experience available, lighting instantly at the turn of a knob and leaving no ash behind. The stone surround, typically a low circular wall built from natural stone or manufactured pavers, doubles as informal extra seating when the main chairs fill up.
A buried gas line connects the fire pit to your home’s gas supply or a hidden propane tank, and this connection work is where hiring a licensed professional matters most. The stone surround itself can be a DIY project once the gas line and burner are professionally installed, giving you some control over labor costs. Choosing a stone that matches your existing patio or house exterior ties the fire pit into the yard’s material story.
Because a gas fire pit produces no ash and needs no wood storage, it suits a smaller yard or a patio where storing firewood is impractical. The instant on-off control also makes it a better fit for households with young children or pets, since there is no lingering ember risk after the flame is switched off.
Gas Line Installation Costs To Expect
Running a new gas line to an outdoor fire pit typically costs more than the fire pit hardware itself, especially if the line has to travel a long distance from an existing gas meter or requires trenching through an existing patio. Get a quote from a licensed gas contractor before committing to a specific fire pit location, since moving the location later means redoing this most expensive part of the project. Budgeting for this line work upfront prevents an unpleasant cost surprise partway through.
2. Portable Wood-Burning Fire Pit On A Paver Pad
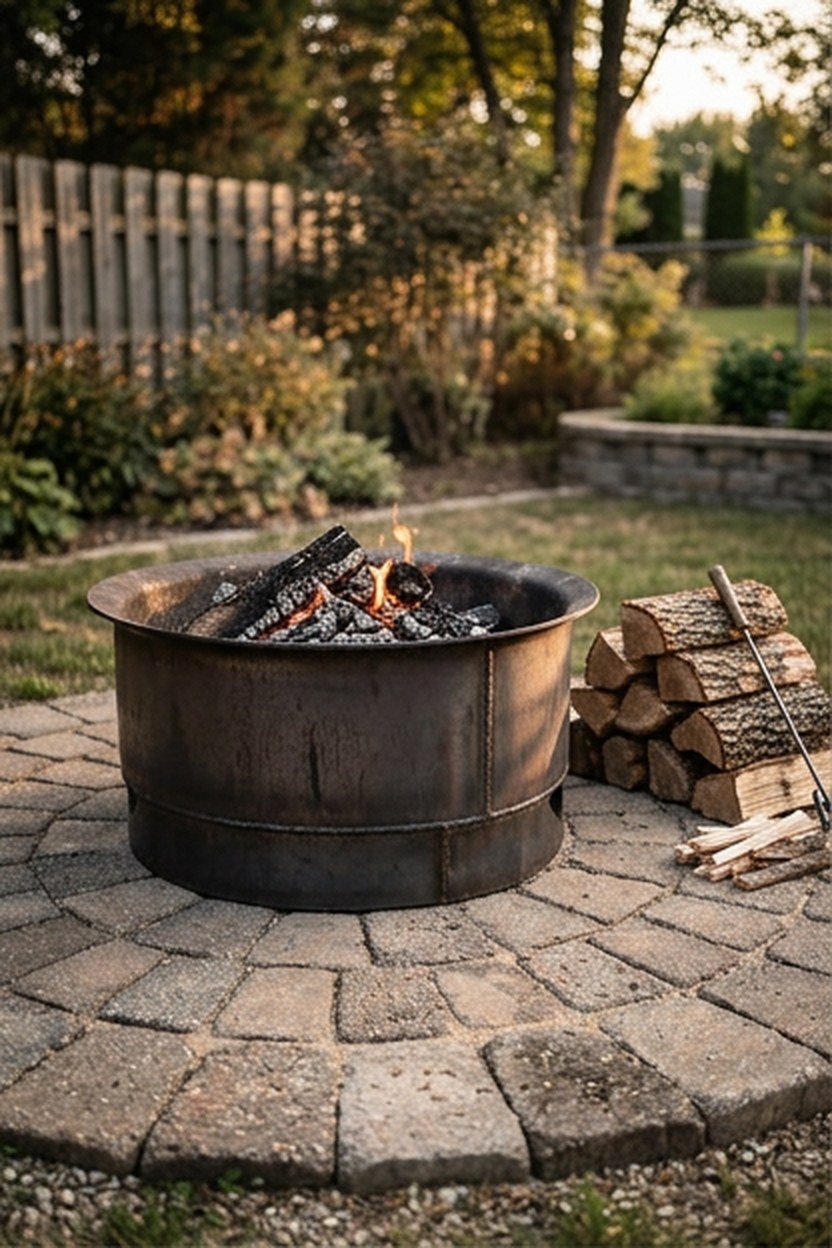
A portable steel or cast iron fire pit set on a paver pad is the lowest-commitment way to add real fire to a backyard, since both the fire pit and the pad can move if your landscaping plans change. The paver pad protects your lawn from scorching and gives the portable unit a stable, level surface to sit on.
Choosing a paver pad sized generously beyond the fire pit’s own footprint, typically a six to eight foot circle or square, gives you room for nearby chairs without anyone sitting directly on grass or dirt. Concrete pavers, natural stone, or even compacted gravel all work as the pad surface, with gravel being the cheapest and fastest option to install over a weekend. This flexibility in surface material makes the project scalable to almost any budget.
Because the fire pit itself is portable, you can reposition it seasonally to chase shade in summer or shelter from wind in winter, a flexibility a permanent built-in installation cannot offer. Storing the portable unit in a garage or shed during the off-season also extends its lifespan considerably compared to leaving it exposed to weather year-round.
Choosing A Paver Pattern For A Fire Pit Pad
A simple circular paver pattern echoes the fire pit’s own round shape and reads as intentional rather than an afterthought, while a square or rectangular pad suits a more modern, geometric backyard layout. Matching the paver material to your existing patio or walkway ties the fire pit area into the rest of the yard rather than making it feel like a separate addition.
3. Built-In Concrete Fire Pit Bench Seating
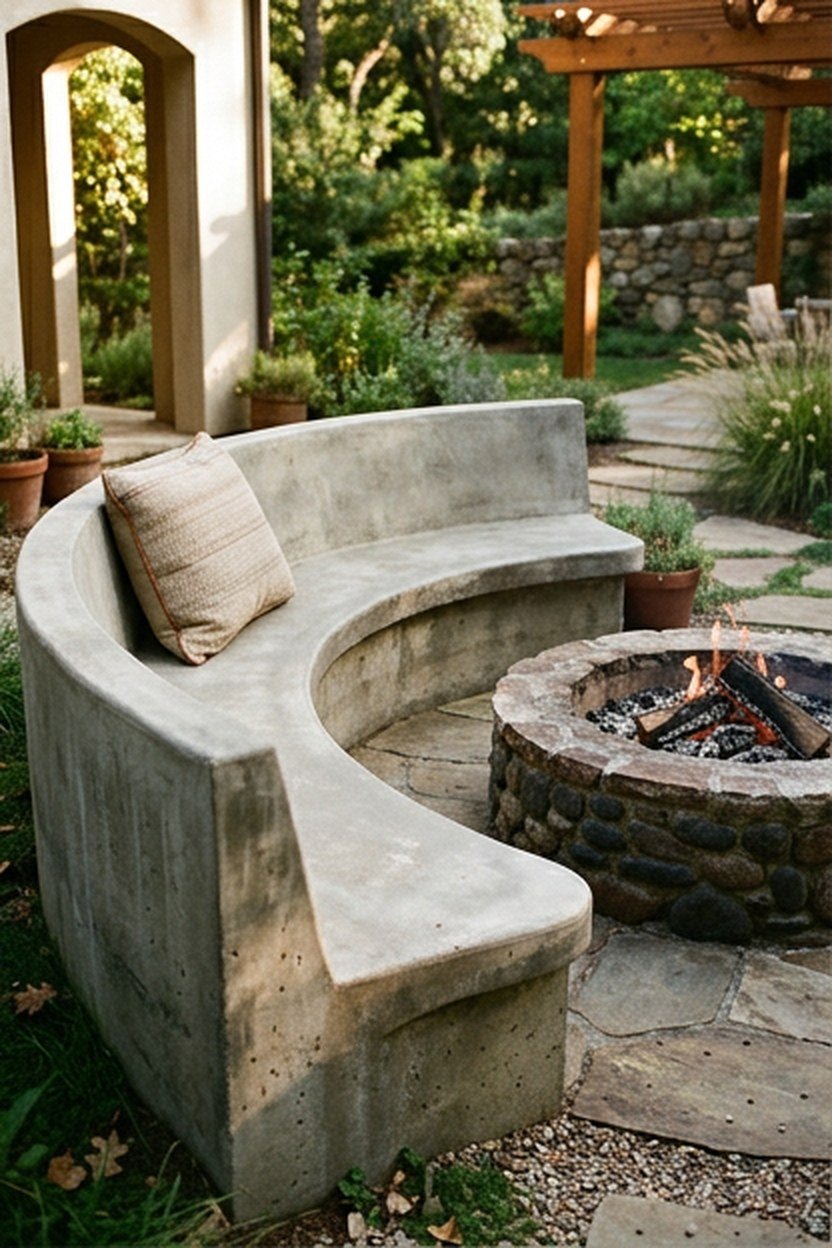
Pouring a curved concrete bench directly into the ground around a fire pit creates permanent, generous seating that never needs to be dragged out of storage or replaced after a few seasons outdoors. The bench can be topped with outdoor cushions for comfort or left bare for a more architectural, minimal look.
Concrete’s thermal mass means the bench absorbs and holds warmth from the fire throughout the evening, making the seating itself pleasantly warm to sit on rather than cold stone. This is a genuine functional advantage over portable chairs, which stay at ambient temperature regardless of the fire’s heat. Sizing the bench with a comfortable eighteen-inch seat depth and back support, if included, matters as much as the material choice.
Because poured concrete is a genuinely permanent installation, this setup is worth committing to only once you are confident about the fire pit’s exact location and your long-term plans for the yard. Hiring a concrete contractor for the pour ensures proper reinforcement and drainage, both of which matter for a structure meant to last decades outdoors.
Adding Cushions To A Concrete Bench
Weatherproof outdoor cushions transform a bare concrete bench from a purely functional seat into genuinely comfortable evening seating, and storing them indoors between uses protects the fabric from unnecessary sun and moisture exposure. Choosing cushions in a color that complements your stone or concrete tone ties the whole fire pit area together visually. This small addition costs little relative to the concrete work itself but changes how often people actually choose to sit there.
4. Copper Fire Bowl As A Modern Focal Point
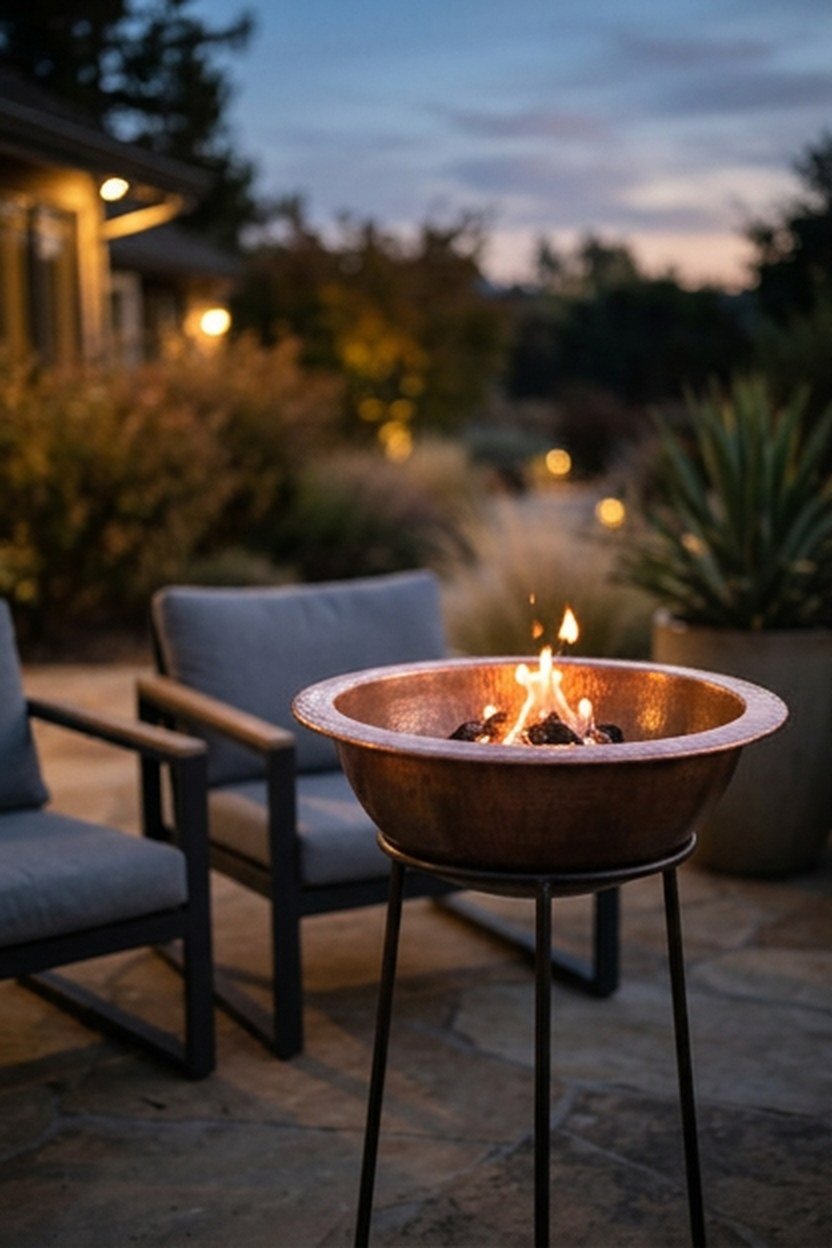
A copper fire bowl brings a genuinely modern, sculptural quality to a backyard fire pit setup, its polished or hammered surface catching firelight in a way that stone or steel cannot replicate. Copper also develops a natural patina over years of outdoor exposure, shifting from bright orange-gold toward a soft greenish tone that many people find appealing rather than something to prevent.
A copper bowl typically sits on a simple metal or stone pedestal base, keeping the design clean and letting the bowl itself carry the visual weight. Pairing it with equally modern, low-profile outdoor furniture, rather than rustic Adirondack chairs, keeps the whole setup feeling cohesive rather than mismatched.
Because copper is a genuine investment material, protecting the bowl from prolonged standing water and choosing a model with proper drainage holes extends its lifespan considerably. A copper fire bowl left constantly wet can develop unwanted staining faster than one allowed to dry between uses.
Copper’s Patina Over Time
The natural patina copper develops outdoors is a chemical reaction with air and moisture, and most people who choose copper specifically want this aged look rather than trying to prevent it. A clear protective coating can slow the patina process if you prefer copper’s original bright finish for longer, though this coating needs periodic reapplication. Deciding upfront whether you want the patina or want to fight it shapes your maintenance routine going forward.
5. Fire Pit Table Doubling As Outdoor Furniture
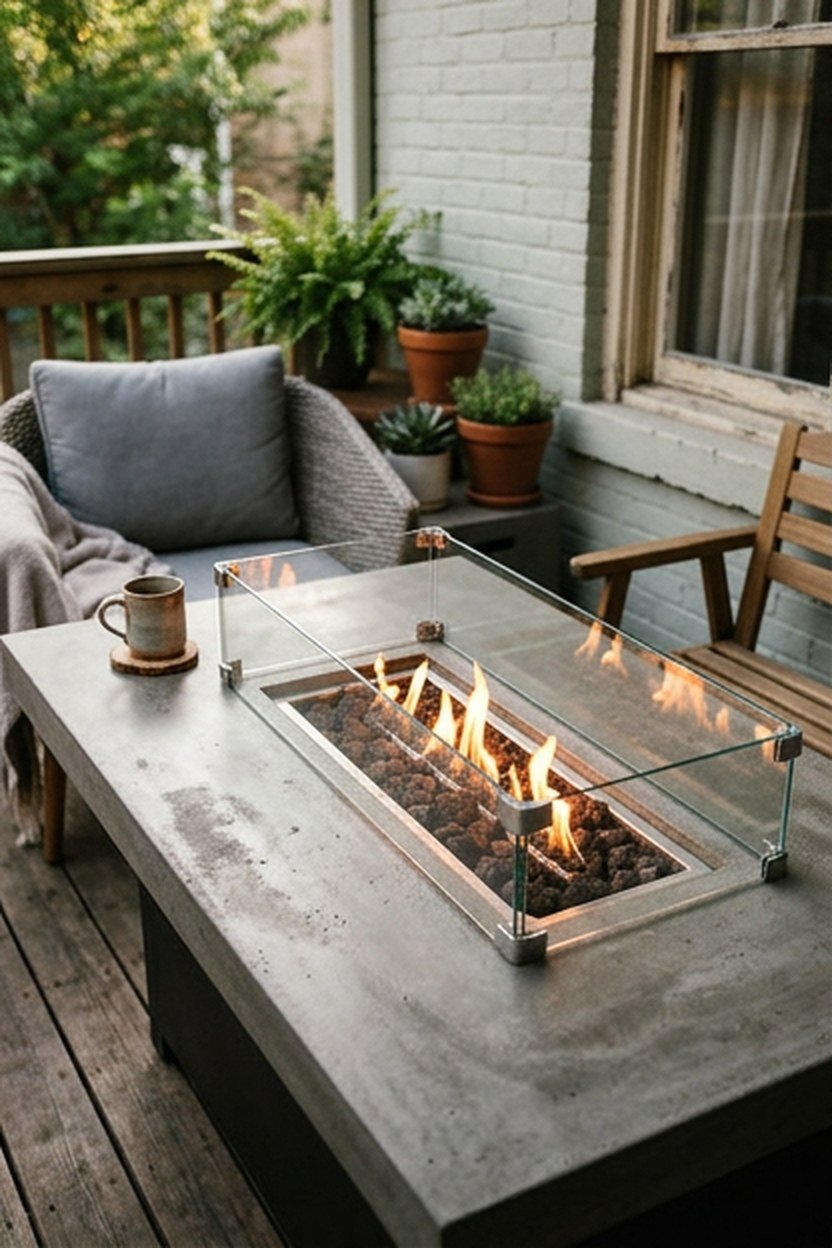
A fire pit table combines a functional tabletop surface with a central fire feature, letting the same piece of furniture serve drinks and snacks while also providing warmth and ambiance. Many models use a removable glass or metal lid that covers the fire feature entirely when not in use, turning the whole piece into an ordinary side table.
Propane-powered fire pit tables are the most common configuration, connecting to a standard propane tank hidden inside the table’s base rather than requiring a permanent gas line. This portability without sacrificing convenience makes fire pit tables a strong middle ground between a fully portable fire pit and a permanent built-in installation. Choosing a table height that matches your existing outdoor seating keeps the whole arrangement feeling proportional and comfortable.
Because the tabletop surface sits close to the flame, materials matter more here than on a standalone fire pit, and most quality fire pit tables use tempered glass, concrete, or metal specifically rated for heat exposure. Checking a table’s specific heat rating before setting drinks or food directly on the surface near the flame protects both the furniture and anyone using it.
Propane Tank Placement In A Fire Pit Table
Most fire pit tables hide the propane tank inside a cabinet base accessed through a small door, keeping the tank concealed while still allowing easy swaps when it runs empty. Checking that this cabinet has adequate ventilation, as most quality models do, matters for safe propane storage.
6. Adirondack Chairs Circling A Classic Wood Fire Pit
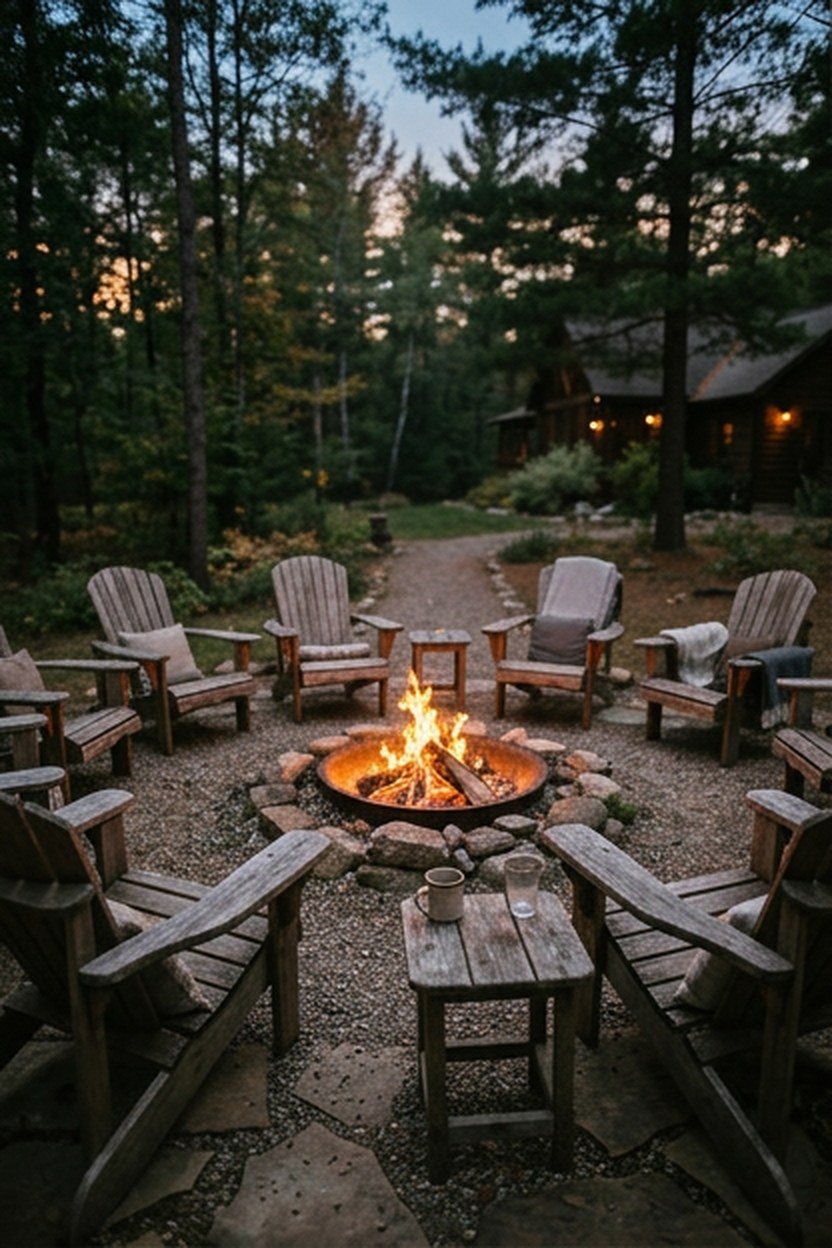
A circle of Adirondack chairs around a classic wood-burning fire pit is the setup most people picture when they imagine a backyard fire, and it remains popular because the low, reclined seating position genuinely suits gazing at a fire for hours. The chairs’ wide armrests hold drinks steadily even on uneven ground, a practical detail that more modern outdoor furniture sometimes overlooks. This combination reads as classic and welcoming rather than trend-driven.
Wood Adirondack chairs, typically cedar or teak, weather naturally outdoors and can be left unfinished for a silvery gray patina or stained to maintain their original color. Painted versions in a solid color add a pop of personality to an otherwise natural, rustic fire pit area. Either finish choice works well with the classic wood-burning fire pit this setup is built around.
Spacing the chairs in a slightly open circle, rather than a tight ring, makes conversation easier and gives people room to get up and tend the fire without climbing over furniture. Leaving one gap in the circle for easy access to the fire pit itself is a small practical detail that improves how the whole setup actually functions during use.
Maintaining Wood Adirondack Chairs Outdoors
Wood Adirondack chairs left outdoors year-round benefit from an occasional sealant or oil treatment, particularly for softer woods like cedar, to slow natural weathering and prevent splitting. Choosing a hardwood like teak reduces how often this maintenance is needed, though at a higher upfront cost than cedar or pine. This tradeoff between maintenance frequency and initial price is worth weighing based on how much yard upkeep you realistically want to do each season.
7. Elevated Fire Pit On A Raised Deck
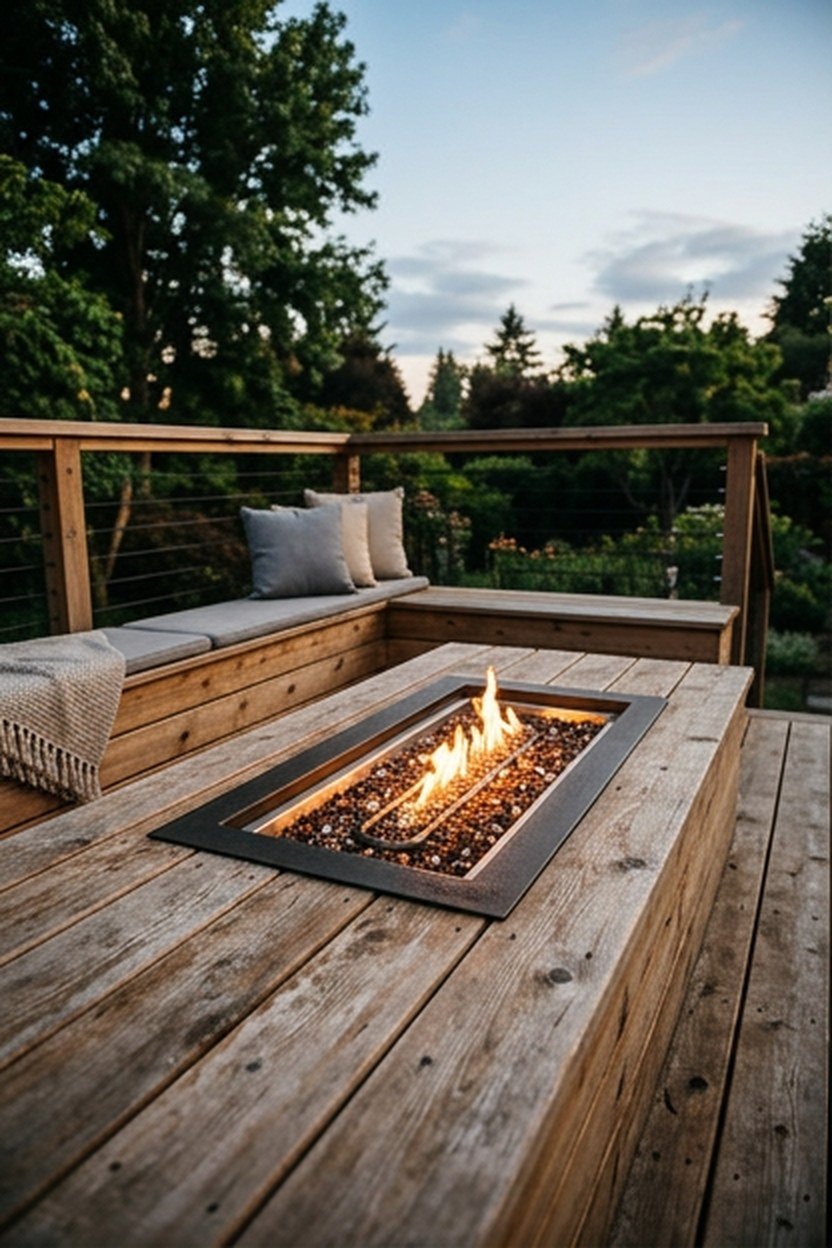
An elevated fire pit built directly into a raised deck brings fire ambiance to a backyard where ground-level installation is not practical, whether due to sloped terrain or an existing deck structure. This setup requires careful attention to fire-rated materials and proper clearance from the deck’s own wood structure. A gas-powered unit is strongly preferred here over wood-burning, given the risk of an open flame on an elevated wood structure.
A metal or concrete fire-rated insert sits within the deck’s framing, creating a barrier between the flame and the surrounding wood decking. Hiring a contractor experienced specifically in deck-integrated fire features is worth the added cost, since this installation carries real safety stakes if the fire-rated barrier is not installed correctly.
Once properly installed, an elevated fire pit brings the same gathering-spot quality to a deck that a ground-level pit brings to a backyard, with the added benefit of a view if your deck sits at a height above the surrounding landscape. Surrounding the fire pit with built-in bench seating that matches the deck’s own railing material creates a cohesive, considered look.
Fire-Rated Materials For Deck Installations
Only materials specifically rated for direct flame exposure, like certain concrete products or specialized metal inserts, are safe for a deck-integrated fire pit, and standard decking lumber anywhere near the flame zone is a genuine fire hazard. Consulting your local fire code and a licensed contractor before any deck fire pit project is not optional given the stakes involved.
8. Gravel Fire Pit Area For Easy Drainage
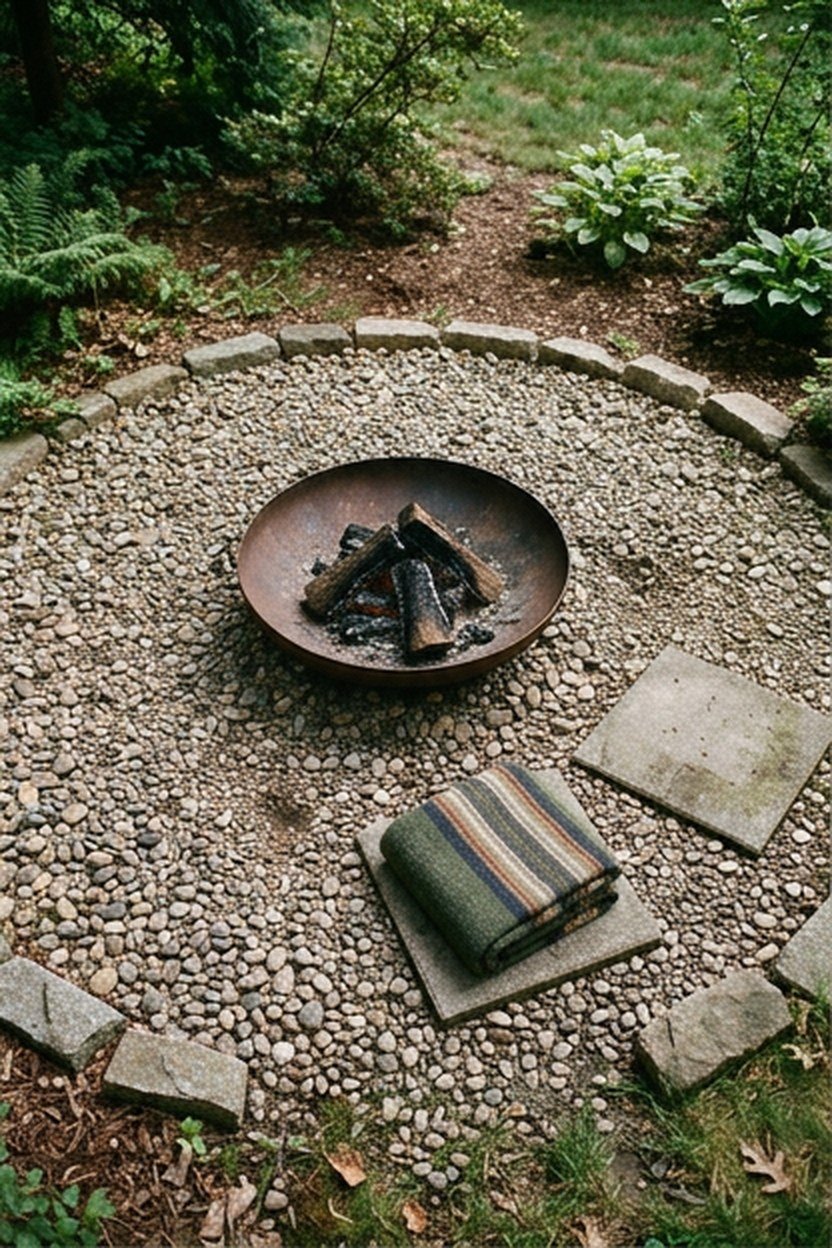
A fire pit area surrounded by gravel rather than grass, pavers, or concrete solves drainage problems that plague fire pits installed directly on lawn, since gravel lets rainwater pass through rather than pooling around the fire pit’s base. This setup is also one of the more affordable options on this list, since gravel costs considerably less per square foot than pavers or poured concrete. A gravel fire pit area suits a backyard prone to standing water after rain.
Choosing a crushed gravel with angular edges, rather than smooth river rock, helps the material lock together and stay in place better underfoot rather than shifting and scattering with foot traffic. A landscape fabric barrier beneath the gravel prevents weeds from growing up through the stone over time, a maintenance detail worth including from the start rather than fixing later. This combination of proper gravel type and weed barrier keeps the area looking tidy for years.
Because gravel is loose material rather than a fixed surface, furniture placed directly on it can shift slightly over time, which some people find bothersome for chairs meant to stay in a fixed arrangement. Placing furniture on small paver pads set into the gravel solves this while keeping most of the area in the more affordable loose stone.
Choosing Gravel Size For A Fire Pit Area
A smaller gravel size, generally in the quarter-inch to half-inch range, feels more comfortable underfoot and is less likely to shift dramatically with regular foot traffic compared to larger decorative stone. Larger gravel can look more dramatic but tends to roll underfoot in a way that some people find genuinely uncomfortable to walk on regularly. Testing a small sample of your chosen gravel size before ordering a full delivery helps confirm it suits how the area will actually be used.
9. Fire Pit With A Built-In Wood Storage Rack
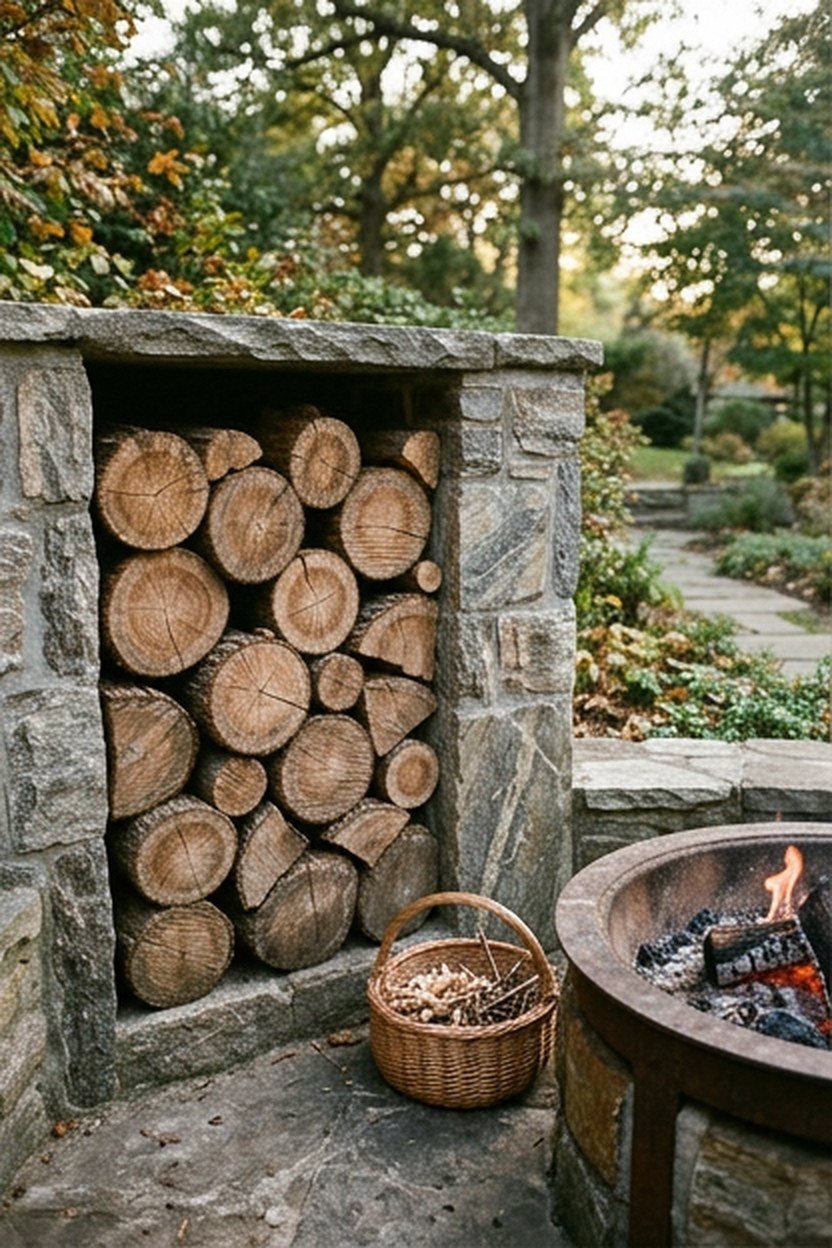
Building a wood storage rack directly into a fire pit’s surround keeps fuel within easy reach without a separate trip to a woodpile elsewhere in the yard, and it keeps split firewood looking intentional rather than a random stack against a fence. This setup suits anyone genuinely committed to wood-burning fires, since the rack only earns its place if you regularly burn through stored wood. A well-built rack also keeps wood up off the ground, away from moisture and pests.
Positioning the rack on the side of the fire pit surround away from prevailing wind keeps sparks from an active fire away from the stored wood, an important safety consideration for this specific setup. Sizing the rack to hold roughly a week’s worth of wood, rather than an entire season’s supply, keeps the visible stack looking curated rather than like an overflow woodpile.
A simple rack built from the same stone or brick as the fire pit surround reads as a unified, planned feature rather than an afterthought bolted onto an existing design. Covering the top of the rack, even with a simple slanted cap, protects the wood from rain and keeps it drier and easier to light.
Seasoning Wood For A Backyard Fire Pit
Properly seasoned firewood, dried for at least six months to a year depending on species, burns considerably cleaner and hotter than green or freshly cut wood, producing less smoke and fewer sparks. Storing wood off the ground and under cover, as this built-in rack does, is exactly what proper seasoning requires.
10. Tabletop Bioethanol Fire Bowl For Small Patios
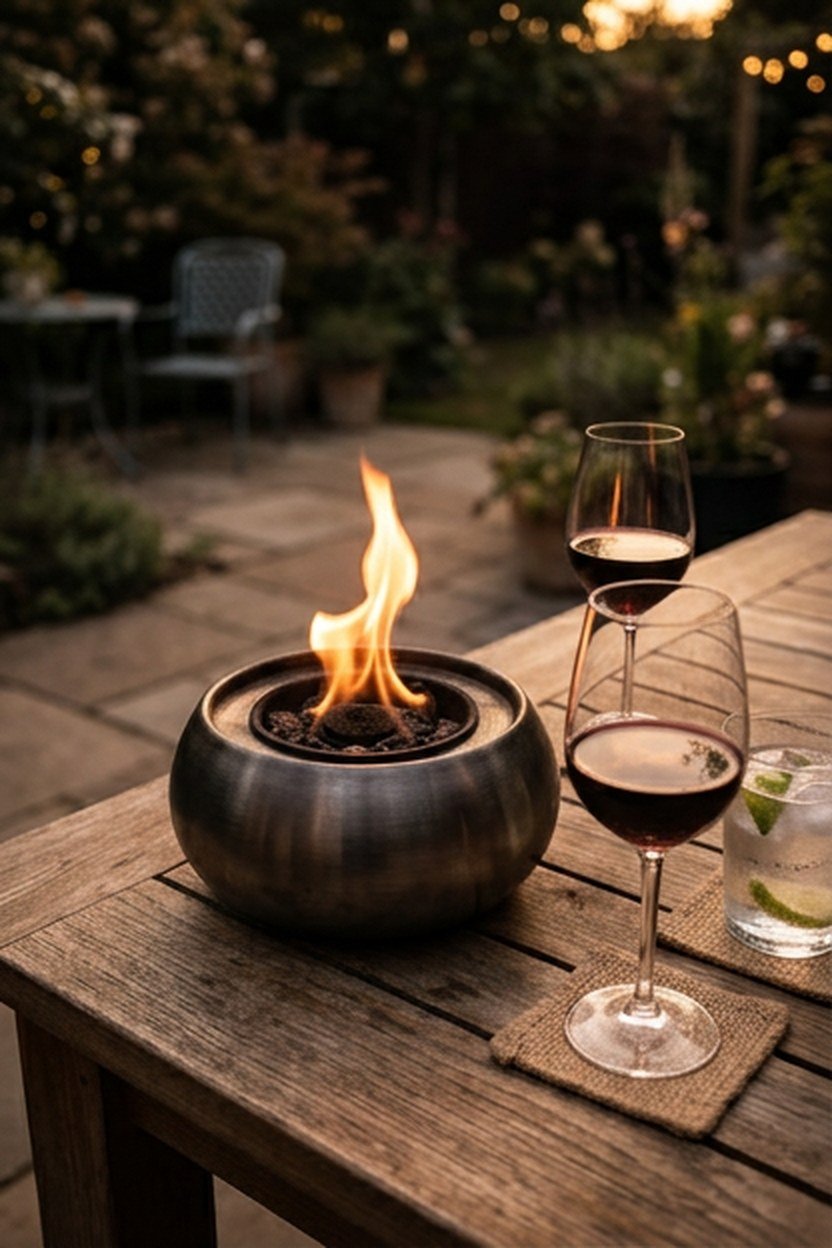
A tabletop bioethanol fire bowl brings a genuine, if small, open flame to a space too limited for any of the larger fire pit setups on this list, making it one of the more practical options for an apartment balcony or a compact patio. Bioethanol fuel burns cleanly without smoke, ash, or the need for a gas line connection, refilling simply from a bottle.
Because the flame on a bioethanol tabletop bowl is genuinely small, it works better as an ambiance feature alongside other outdoor lighting than as a primary source of warmth on a cold evening. Positioning it as a centerpiece on an outdoor dining table, rather than expecting it to heat a whole seating area, matches its actual scale and function.
Refilling a bioethanol bowl requires letting the flame extinguish completely and the bowl cool before adding more fuel, since pouring fuel near an active flame is a real fire risk. Storing bioethanol fuel bottles away from the fire bowl itself, in a cool location out of direct sun, keeps the fuel stable and safe.
Bioethanol Versus Propane For Small Spaces
Bioethanol produces a genuine visible flame with no smoke, while propane tabletop units, though also clean-burning, typically use a different burner design that can look less like an open flame and more like a gas stove element. Choosing bioethanol over propane for a small space often comes down to wanting that visible, dancing flame quality specifically. Either fuel type is safe for a well-ventilated outdoor space when used according to the manufacturer’s instructions.
11. Fire Pit Paired With A Pergola Overhead
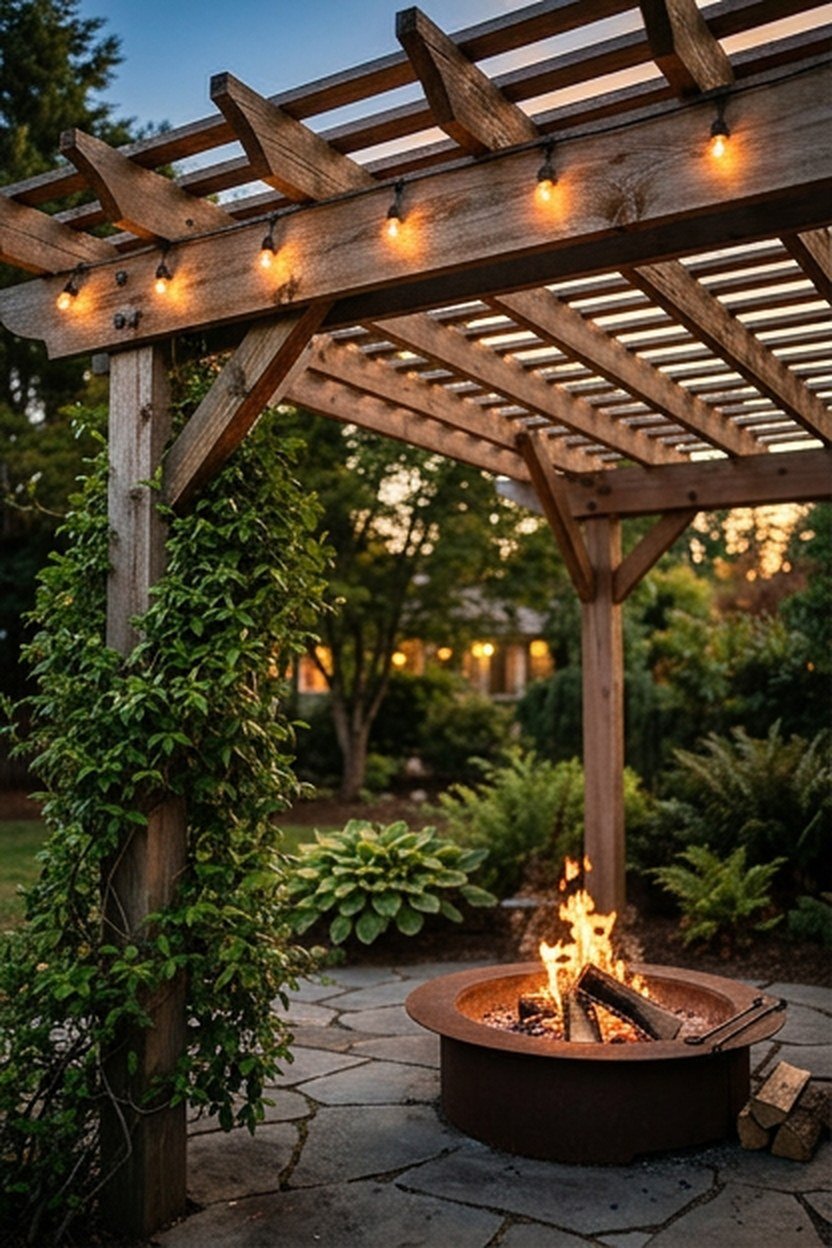
Positioning a fire pit beneath a pergola creates architectural definition around the fire area, framing the space with an overhead structure the way a room’s ceiling defines an indoor space. A pergola also provides some shelter from wind, helping keep a fire from being blown around on breezier evenings, and it can support string lights or hanging lanterns for evening ambiance. This combination of shelter and structure makes it one of the more complete setups on this list.
Choosing an open-lattice pergola design, rather than a solid roof, is important for safety with any wood-burning fire pit, since a solid overhead structure traps smoke and heat in a way that becomes both uncomfortable and genuinely hazardous. A gas fire pit produces less smoke and can sometimes work safely under a more substantial overhead structure, though checking manufacturer clearance guidance still matters regardless of fuel type.
A pergola built from cedar or another naturally weather-resistant wood pairs well with either a stone or gravel fire pit surround below, tying the vertical and horizontal elements of the space together in matching natural materials. Climbing vines trained up the pergola’s posts add a living, seasonal element that develops over the years the structure stands. This combination of hardscape and living green softens what could otherwise feel like a purely built environment.
Clearance Requirements Between A Fire Pit And A Pergola
Manufacturer guidelines for a specific fire pit model specify a minimum vertical clearance to any overhead structure, and this number varies considerably between a small tabletop unit and a large built-in gas installation. Measuring your actual pergola height against your fire pit’s stated clearance requirement before finalizing either purchase prevents a mismatch that forces an expensive redesign later.
12. Stacked Stone Fire Pit Wall For A Rustic Look
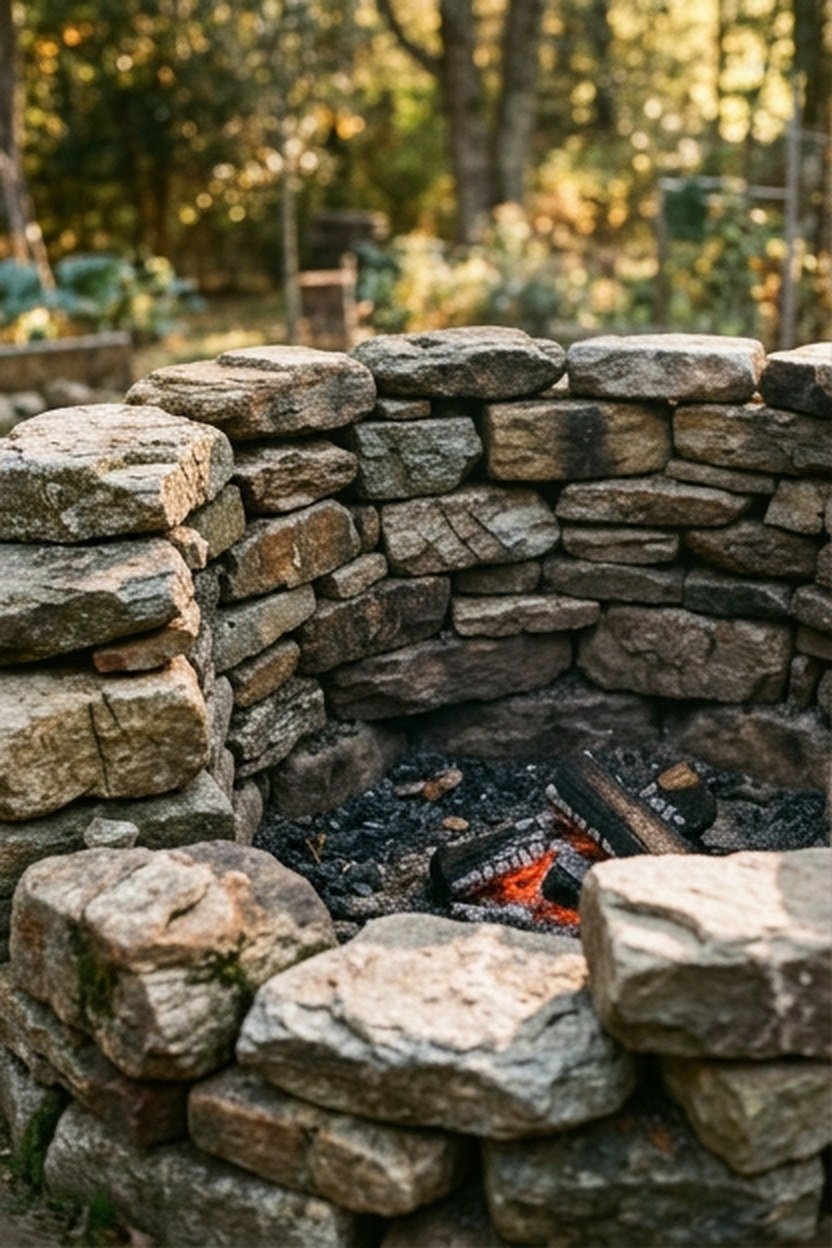
A fire pit surround built from dry-stacked natural stone, without visible mortar joints, creates a genuinely rustic, organic look that reads as though it has always belonged in the landscape. This technique requires real skill to build a stable, lasting wall, since dry stacking relies entirely on the stones’ own weight and careful placement rather than mortar holding everything together. Hiring an experienced stone mason for this specific technique is worth the investment if the rustic aesthetic matters to you.
Choosing a local, regionally quarried stone rather than an imported variety keeps the fire pit feeling genuinely connected to its surrounding landscape rather than like an imported design element. Varying the stone sizes within the wall, rather than using uniform blocks, is part of what gives dry-stacked stone its natural, organic character.
Because a dry-stacked wall has no mortar sealing the joints, it drains naturally and handles freeze-thaw cycles in cold climates better than a mortared equivalent, which can crack under the same conditions. This practical durability advantage is part of why the technique has persisted for centuries in stone construction generally. A well-built dry-stacked fire pit surround can genuinely last a lifetime with minimal maintenance.
Finding A Mason Experienced In Dry Stacking
Dry stacking is a specific, less common skill compared to standard mortared masonry, and not every general contractor or landscaper has real experience with the technique. Asking to see photos of a mason’s previous dry-stacked work, rather than just their general stonework, helps confirm they can deliver the specific rustic look this setup is built around.
13. Fire Pit Surrounded By Built-In Planters
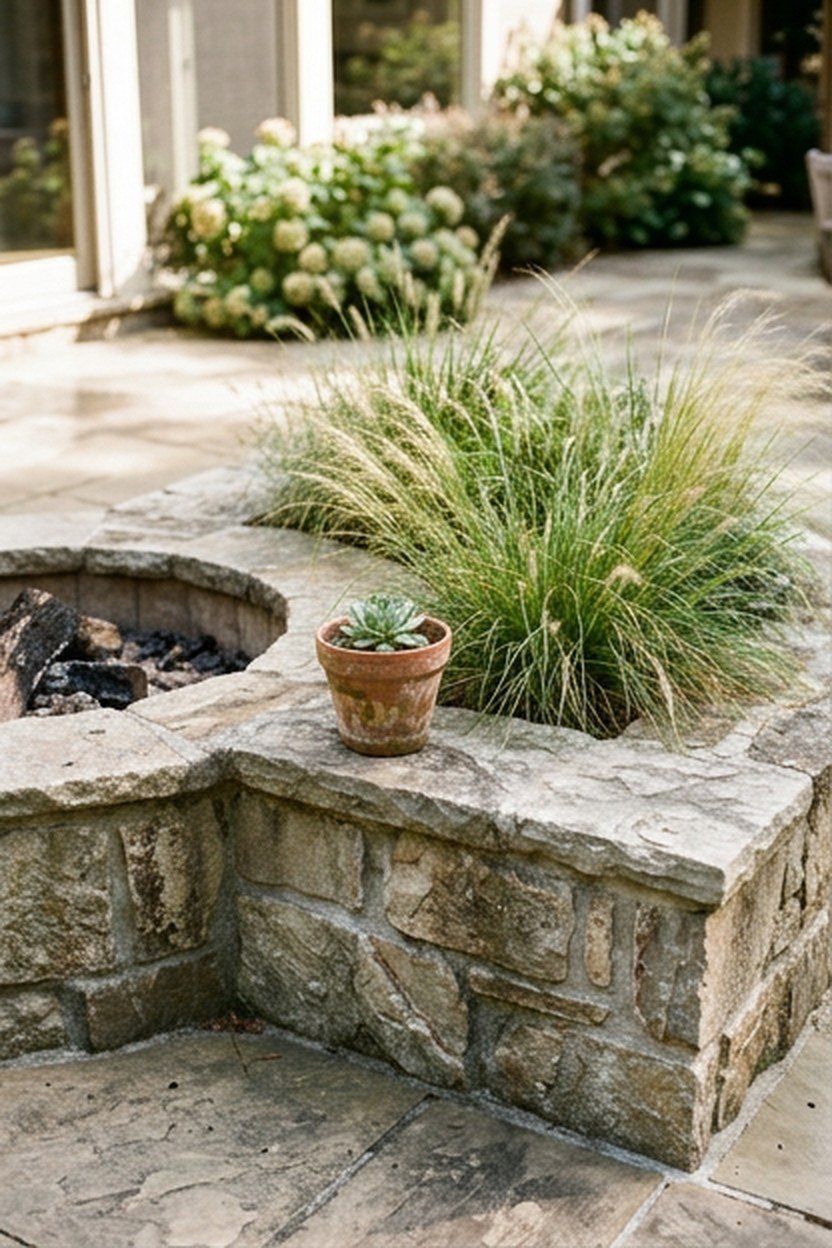
Incorporating built-in planters directly into a fire pit’s surrounding hardscape brings living greenery right up against the fire area, softening what can otherwise be an entirely hard, stone-and-gravel space. This setup works particularly well in a backyard that wants the fire pit to feel integrated into a broader garden rather than sitting as a separate hardscape feature. The planters can hold anything from small shrubs to seasonal flowers depending on your climate and maintenance preference.
Choosing heat-tolerant plants for any planter positioned close to the fire pit matters, since even indirect heat exposure can stress or damage plants not suited to warmer microclimates. Ornamental grasses, lavender, and many succulents tolerate this warmer zone considerably better than more delicate flowering plants.
Building the planters at the same height as any seating wall around the fire pit creates a cohesive, considered look rather than mismatched heights competing for attention. Using the same stone or concrete material for both the planters and the fire pit surround reinforces this unified design.
Watering Planters Near A Heat Source
Plants positioned close to a fire pit’s heat, even when the heat is indirect and infrequent, tend to dry out faster than the same plants elsewhere in the yard, so checking soil moisture more frequently during the fire-burning season matters. Drip irrigation built into the planters simplifies this maintenance considerably compared to hand watering.
14. Smokeless Fire Pit For Cleaner Backyard Air
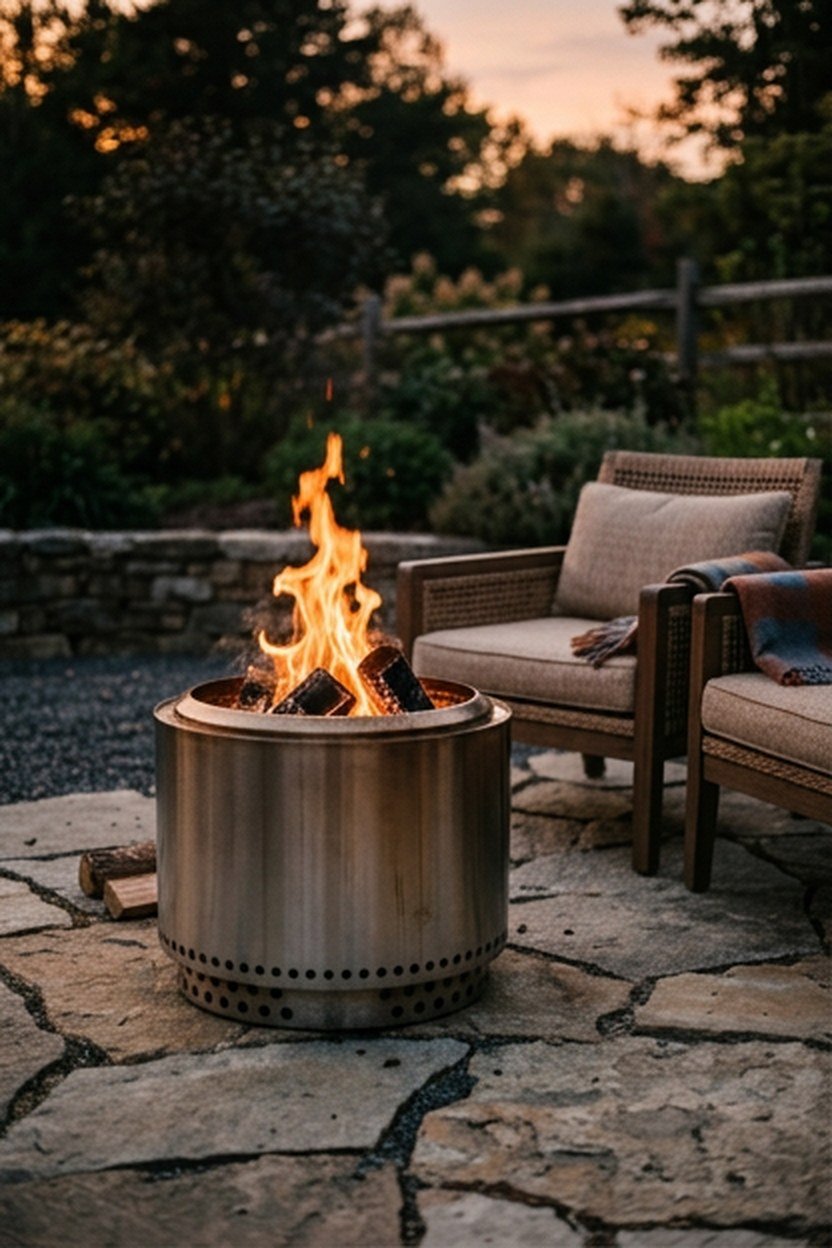
A smokeless fire pit design uses a secondary combustion system, drawing air through vents in the pit’s double wall to burn off smoke particles before they escape, resulting in a noticeably cleaner-burning wood fire than a traditional open pit. This technology has become increasingly popular for anyone who wants genuine wood-burning ambiance without the smoke smell clinging to clothing and furniture afterward.
These units typically come as a complete portable design rather than a built-in installation, making them one of the easier upgrades on this list to simply purchase and set up without construction. Choosing a size appropriate to your typical group size matters, since a smokeless design that is too small for regular larger gatherings limits how the fire pit actually gets used. Reading real capacity reviews, rather than relying on manufacturer marketing alone, helps match the unit to your actual needs.
Because the reduced smoke output is the entire point of this technology, positioning the fire pit exactly as you would any other wood-burning unit, with the same safety clearances, still applies fully. The smokeless design reduces smoke, not fire risk, and standard precautions around flammable materials and unattended flames remain just as important.
How Smokeless Technology Actually Works
The double-wall design pulls in fresh air through vents near the base, heating it as it rises through the wall cavity before releasing it near the top of the fire, where it ignites the smoke and unburned particles for a secondary combustion. This process is what produces the noticeably cleaner burn compared to a traditional single-wall fire pit. Understanding this mechanism helps explain why these units burn wood more efficiently, using less fuel for a comparable amount of heat.
15. Fire Pit Lighting With String Lights Above
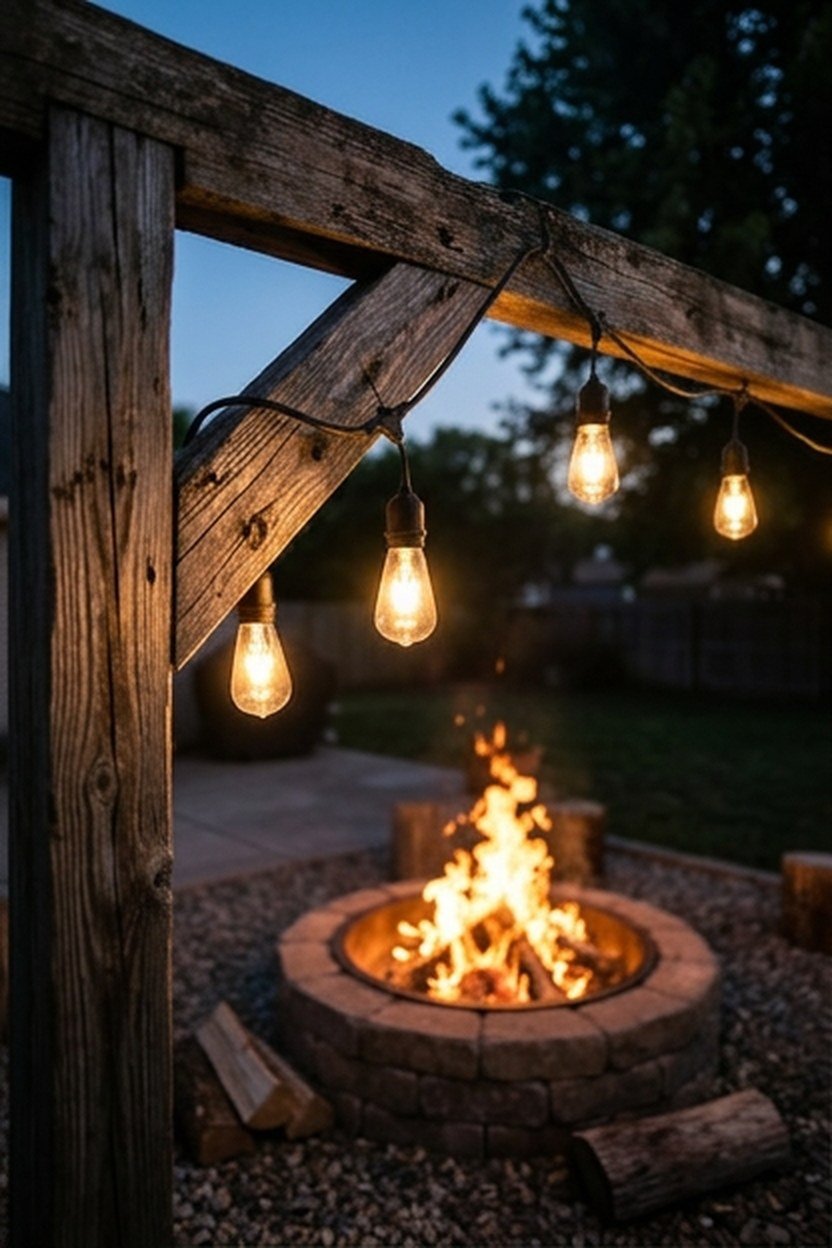
String lights hung above a fire pit area extend its usability into full darkness without competing with the fire’s own light, providing enough ambient illumination to see faces, pour drinks, and navigate the space safely. This lighting layer matters especially once the fire itself has burned down to embers later in the evening, when the flame alone no longer provides adequate light.
Warm white LED string lights, rather than cooler blue-white tones, complement a fire’s own warm glow rather than clashing with it, keeping the overall lighting feeling cohesive. Running the lights along a pergola structure, between trees, or on a dedicated post system all work depending on what overhead framework your specific fire pit area already has. This flexibility means string lighting can be added to virtually any of the other fourteen setups on this list.
Positioning the lights high enough to stay clear of rising heat and smoke from the fire pit protects both the lights themselves and prevents an odd visual clash between string light glow and fire smoke passing directly through it. A simple pulley system or dedicated posts on either side of the fire pit area makes taking the lights down for storage or maintenance considerably easier.
Choosing Weatherproof String Lights
Not all string lights are rated for permanent outdoor installation, and choosing a genuinely weatherproof, UL-listed product prevents the kind of electrical failure a cheaper indoor-rated product can develop after one season of rain. Checking the specific IP rating on the packaging, ideally IP44 or higher for a partially sheltered installation, confirms the product can handle real outdoor conditions. This small check protects both the investment and genuine electrical safety near an area that already involves open flame.
What A Fire Pit Setup Actually Costs
The price of a complete fire pit setup ranges enormously depending on whether you choose a portable steel bowl on a gravel pad or a full built-in gas installation with a stone surround and matching seating. Portable and gravel-based setups represent the most affordable entry point, while poured concrete, built-in gas lines, and custom stonework represent the most expensive end of this list. Understanding where your budget fits helps narrow down which of the fifteen setups above genuinely make sense for you.
Labor costs, particularly for gas line installation and stone or concrete masonry, typically exceed the cost of the fire pit hardware itself for any of the more permanent setups. A DIY approach on a gravel pad or portable unit keeps costs to materials alone, while any project involving gas lines should always include professional installation regardless of budget. This distinction between DIY-friendly and professional-only work matters as much as the raw dollar figures.
| Setup | Typical Total Cost | DIY Friendly |
|---|---|---|
| Portable fire bowl + gravel pad | $300 to $700 | Yes |
| Fire pit table | $400 to $1,200 | Yes |
| Stacked stone surround | $800 to $2,500 | Partially |
| Built-in gas fire pit | $1,500 to $4,000 | No, needs a professional |
| Concrete bench seating | $2,000 to $5,000+ | No, needs a contractor |
Starting with a portable or gravel-based setup lets you confirm how often you actually use a fire pit before committing to a more expensive permanent installation. Many backyards evolve from a simple portable bowl toward a built-in feature once the household confirms the fire pit genuinely gets regular use.
Common Mistakes With Backyard Fire Pit Setups
The most common mistake is skipping local fire code research entirely and building or buying a wood-burning fire pit only to learn afterward that local rules restrict or ban it, particularly in dry climates prone to wildfire risk. Checking your specific municipality and any homeowners association rules before purchasing prevents this costly discovery after the fact. This single check protects both your investment and your neighborhood standing.
A second common error is placing seating too far from the fire pit, either from overly cautious safety instincts or simply misjudging distance during planning, which leaves people cold and disengaged from the fire’s actual warmth. Testing the seating distance with an actual lit fire before finalizing any permanent surround or paving prevents this mismatch. A too-generous safety margin defeats much of the fire pit’s purpose.
The third mistake is choosing wood-burning when gas would suit the household’s actual habits better, or the reverse, without honestly weighing how much time anyone wants to spend tending a wood fire. Being honest about those habits before committing to either fuel type prevents an expensive fire pit that ends up rarely lit.
Recovering From A Fire Pit That Never Gets Used
If an existing fire pit setup has fallen out of regular use, the reasons are usually specific and fixable: uncomfortable seating, inadequate lighting for after-dark use, or wood-burning fuel demands nobody wants to keep up with. Identifying which specific friction point is keeping people away, then addressing that one thing, often revives a fire pit’s use more effectively than any larger renovation. A small fix, like adding string lights or switching to gas, sometimes solves the whole problem.
Conclusion
A great backyard fire pit setup comes down to more than the fire pit itself, since seating comfort, surface material, wind protection, and lighting together decide whether the space gets used regularly. The fifteen setups here range from a simple portable bowl on gravel to a fully built-in gas installation with stone and concrete seating. Start with the setup that matches how you actually want to use the space, not the one that photographs best.
Whichever direction you choose, prioritize safety clearances and local code compliance before anything else, since these are the details that protect both your household and your ability to actually keep and enjoy the fire pit long-term. Build gradually if budget requires it, starting with a portable setup and upgrading toward a permanent installation once you have confirmed real, regular use. A fire pit that genuinely gets used every week beats a more elaborate one that sits cold most of the year.
Frequently Asked Questions
How far should a fire pit be from my house? Most local codes require at least ten feet of clearance from any structure, fence, or overhanging branch, though checking your specific municipality’s rules is worth doing before building.
Is a gas fire pit better than a wood-burning one? Gas fire pits offer instant on-off convenience with no smoke or ash, while wood-burning pits deliver a more traditional crackling fire experience that demands more attendance and cleanup.
What is the cheapest way to add a fire pit to my backyard? A portable steel fire bowl placed on a gravel pad is typically the most affordable complete setup, often achievable for a few hundred dollars total.
Do I need a permit to install a fire pit? Many areas require a permit for a permanent built-in fire pit, particularly one involving a gas line, while portable fire pits usually do not need one, so checking locally matters.
How do smokeless fire pits actually reduce smoke? A double-wall design draws in and heats fresh air that ignites unburned smoke particles near the top of the fire, burning off much of what a traditional pit would release as visible smoke.
Can I put a fire pit on a wood deck? Only with a properly fire-rated insert and correct clearance from the surrounding decking, and this project should always involve a contractor experienced specifically in deck fire installations.
How close should seating be to a fire pit? Roughly three to four feet from the fire’s edge tends to balance comfortable warmth against excessive heat for most fire pit sizes and most seating types.