
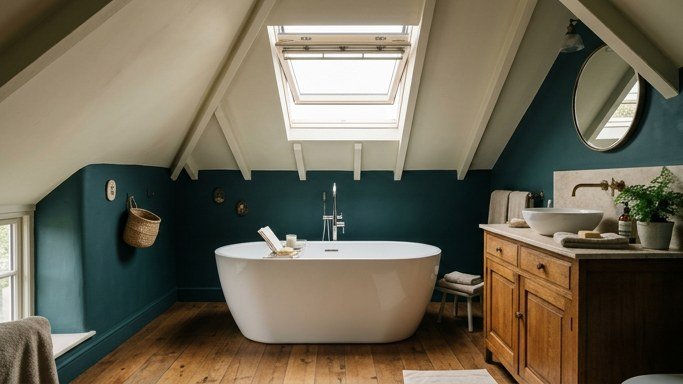
A sloped attic ceiling scares most homeowners away from a bold bathroom color, but teal actually works better up there than almost anywhere else in the house. I helped a friend convert her cramped attic storage space into the calmest bathroom in her home, and the teal palette against those angled walls turned what looked like a limitation into the room’s best feature. The color makes the low ceiling feel intentional rather than apologetic.
An attic bathroom comes with real constraints, limited headroom, awkward angles, and often tricky plumbing runs, that a standard bathroom never has to consider. Working with those constraints instead of fighting them is the difference between a room that feels cramped and one that feels like a genuine spa retreat. Teal, with its calming, water adjacent associations, happens to suit this kind of intimate, cocoon like space particularly well.
This guide walks through fifteen specific design decisions for building a spa style teal attic bathroom, covering everything from ventilation to fixture placement under sloped ceilings. Expect honest talk about the plumbing and structural realities specific to attic conversions. By the end you will have a real plan for turning an awkward attic space into a genuine retreat.
Why Teal Works So Well In An Attic Bathroom
Teal sits at the point between blue and green on the color wheel, carrying blue’s calming quality alongside green’s natural, grounding effect. This combination reads as spa like almost automatically, which is exactly the mood most homeowners want from a bathroom that already feels tucked away and private due to its attic location. Few colors achieve that spa feeling as reliably as teal does.
The color also handles limited natural light better than many alternatives, since attic bathrooms often rely on a single skylight or a small dormer window rather than a full sized window. A deeper teal on lower walls paired with lighter tile or paint higher up prevents the room from feeling cave like despite the reduced light. This layered approach matters more in an attic than in a standard bathroom with normal window placement.
The table below compares teal against two other popular bathroom color choices specifically for attic spaces with limited light and sloped ceilings. None of the three options is universally correct, since the right pick depends on your specific light levels and personal taste. Use this comparison as a starting point rather than a final answer.
| Factor | Teal | All white | Deep navy |
|---|---|---|---|
| Works with limited light | Good, especially layered with lighter tones | Excellent | Poor without strong lighting |
| Spa like feeling | Strong | Moderate, feels more clinical | Strong but can feel heavy |
| Hides scuffs and wear | Good | Poor, shows every mark | Excellent |
Planning Your Attic Bathroom Before Choosing Colors
Confirm your attic’s actual headroom at every point in the room before committing to fixture placement, since building codes typically require a minimum ceiling height, often around seven feet, over key fixtures like the toilet and shower. A structural survey early in planning prevents discovering a code violation after tile is already installed. This step matters more in an attic conversion than almost any other bathroom project.
Address ventilation early, since attic spaces trap heat and humidity more aggressively than a standard bathroom below the roofline. A quality exhaust fan rated for the room’s actual square footage, vented properly to the exterior rather than just into the attic space itself, prevents mold and moisture damage that can be expensive to fix once it takes hold in a finished space. A few minutes of planning here saves a bigger headache once everything is in place.
Plan your plumbing runs before finalizing any layout decisions, since running new supply and drain lines up into an attic is one of the more expensive parts of this type of conversion. Position the toilet and shower as close as practical to existing plumbing stacks below to minimize the length of new pipe runs needed. Most homeowners only notice this after living with the room for a few months.
1. Deep Teal Lower Walls With Light Upper Walls
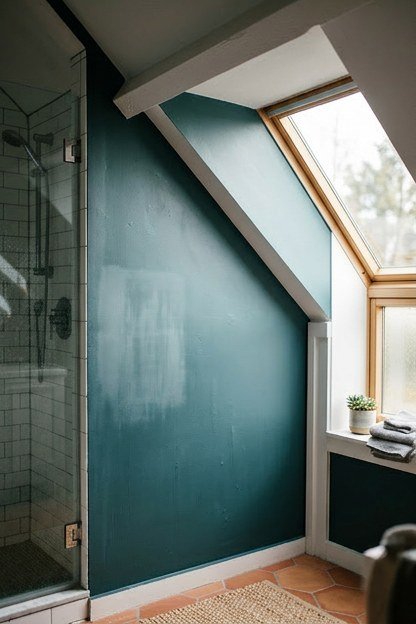
Painting or tiling the lower portion of sloped attic walls in a deep teal while keeping the upper slopes and ceiling in a lighter shade prevents the room from feeling closed in despite the low ceiling height. This layered color approach follows a similar logic to a chair rail treatment in a traditional room, just adapted to the angled geometry an attic presents. The transition point typically sits around four feet up the sloped wall.
Choose a paint finish with at least a satin sheen for the teal lower section, since bathroom humidity handles a slight sheen better than a flat matte finish that can absorb moisture and stain more easily over time. The lighter upper color can stay in a flatter finish since it sees less direct moisture and splashing. Keep this in mind before finalizing the decision, since it is easy to overlook at first.
The paint on the lower teal section will show a soft, uneven sheen change near the shower area after a year or two of steam exposure, a gentle dulling that happens gradually across the humid zone rather than in any damaging way. Repainting this specific zone every several years keeps the sheen looking fresh if the change bothers you visually. This is one of those details that seems minor until you are the one dealing with it.
Choosing The Right Transition Height For Your Ceiling
Measure your specific sloped ceiling’s angle before deciding on a transition height, since a steeply pitched roof needs a lower transition point than a gently sloped one to avoid an awkward, uneven looking line. Stand in the room and visually test a few painter’s tape lines at different heights before committing to paint. Factor this into your plan early rather than adjusting for it after construction wraps up.
A transition that follows the room’s existing architectural features, like a knee wall top plate, looks more intentional than an arbitrary height chosen purely by eye. Ask your contractor whether your attic has a knee wall structure that could guide this decision naturally. It is a small consideration, but it makes a real difference in daily use.
2. Teal Hexagon Tile Flooring
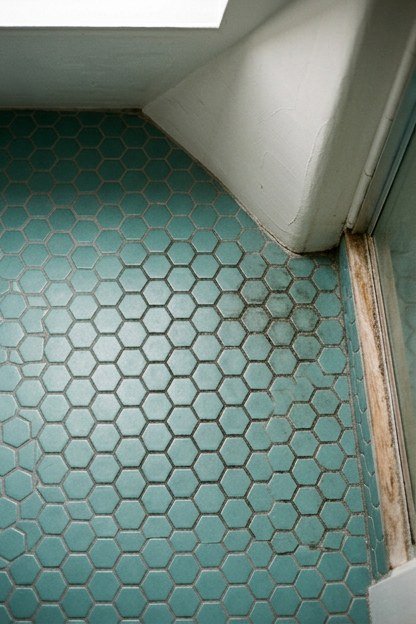
Small format teal hexagon tiles work exceptionally well in an attic bathroom’s often irregular floor footprint, since the small tile size handles angled walls and awkward corners more gracefully than large format tile ever could. The hexagon shape specifically adds visual interest without competing with the room’s already busy angled ceiling lines. Taking the extra step here pays off more than it might seem worth at first.
Grout color matters significantly with hexagon tile, since the grout lines make up a larger percentage of the visible floor than with larger tile formats. A grout color close to the tile’s own teal tone creates a more cohesive, blended look, while a bright white grout makes each individual hexagon pop more distinctly. Discuss this specific point with your contractor before finalizing the design.
The grout lines will develop a faint darkening in the highest traffic areas near the door and shower after a couple years of regular use, a gradual change from foot traffic and cleaning product residue rather than any structural problem. Resealing the grout annually slows this darkening considerably if you want to maintain a fresher look longer. A little extra attention here goes a long way toward the finished room feeling right.
Cutting Hexagon Tile Around Sloped Wall Transitions
Hexagon tile requires more custom cutting than square tile when it meets an angled knee wall or a sloped ceiling transition, adding labor cost to the installation. Budget for this extra labor time specifically when getting quotes, since some installers underestimate the additional cutting an attic’s angles require. This small detail matters more once you actually live with the choice day to day.
Request to see a small sample area installed before the full floor goes in, particularly around any tricky transition points. This preview catches a cutting or pattern issue while it is still cheap to correct. A few minutes of planning here saves a bigger headache once everything is in place.
3. Freestanding Soaking Tub Under The Roofline
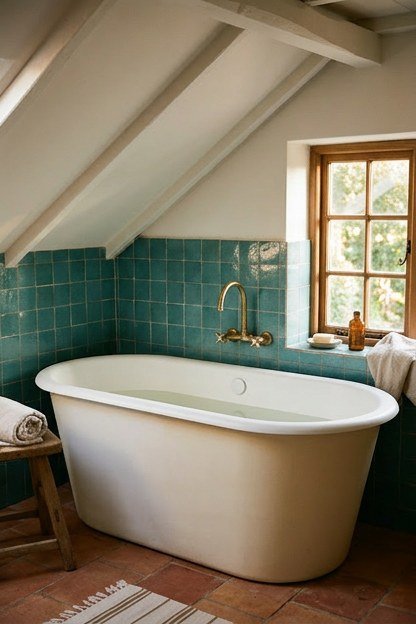
Positioning a freestanding soaking tub under the lowest part of the sloped ceiling, where standing headroom is not needed, makes efficient use of an attic’s most awkward space. This placement turns what would otherwise be dead or storage only space into the room’s most luxurious feature. Confirm the exact height available at this location before ordering a specific tub model.
Choose a tub with a lower overall height if your sloped ceiling clearance is particularly tight, since standard freestanding tub heights vary more than built-in tubs typically do. A tub that is too tall for the available headroom creates an uncomfortable, cramped feeling exactly where you want the room to feel most relaxing. Most homeowners only notice this after living with the room for a few months.
The tub’s exterior finish, if a painted or matte material rather than glossy porcelain, can develop a soft, faded look on the side most exposed to any nearby window light. This gradual, even lightening does not affect the tub’s function and is considered normal aging for painted tub exteriors over many years of use. Keep this in mind before finalizing the decision, since it is easy to overlook at first.
Getting A Heavy Tub Into An Attic Space
Confirm your attic’s access route, staircase width and any turns, can physically accommodate your chosen tub before ordering, since a beautiful tub that cannot make it up the stairs becomes an expensive problem. Some attic conversions require a crane assisted window installation for larger tubs when the stairway will not work. This is one of those details that seems minor until you are the one dealing with it.
Ask your tub supplier for exact crated dimensions rather than just the tub’s finished dimensions, since packaging adds meaningful size that matters for a tight attic access route. This detail is easy to overlook until moving day arrives. Factor this into your plan early rather than adjusting for it after construction wraps up.
4. Skylight Positioned Over The Shower Zone
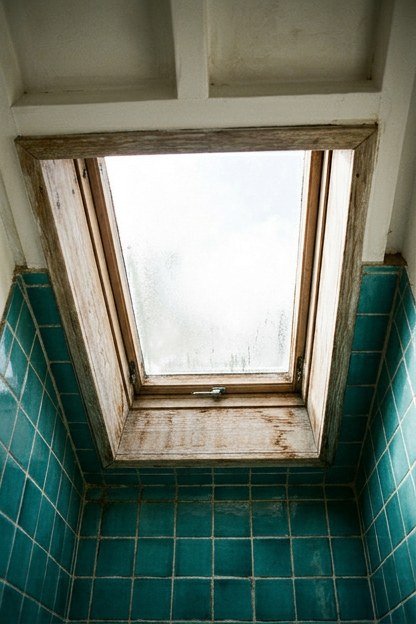
A skylight positioned directly over or near the shower brings natural light into what is often an attic bathroom’s most enclosed feeling area. This placement also provides natural ventilation if the skylight opens, helping manage the steam and humidity a shower generates. Position it carefully to avoid direct water spray reaching the skylight’s operating mechanism if it is an operable model.
Frosted or textured glass on a shower positioned skylight maintains privacy without sacrificing the light benefit a clear skylight would otherwise provide. This detail matters more for a skylight than a regular window, since skylights typically cannot use curtains or blinds as easily. It is a small consideration, but it makes a real difference in daily use.
The skylight’s interior frame will show a faint, even weathering after years of steam and temperature cycling from the shower below, a gradual, normal aging of the frame material that a periodic inspection catches before it becomes a sealing problem. Budget for this inspection every few years as routine attic bathroom maintenance. Taking the extra step here pays off more than it might seem worth at first.
Skylight Placement To Avoid Overheating The Room
A south facing skylight over a shower can turn the space uncomfortably hot during summer months without some form of shading or a solar control glass coating. Discuss glass coating options with your skylight supplier specifically for a bathroom application, where both privacy and heat control matter simultaneously. Discuss this specific point with your contractor before finalizing the design.
Consider an operable skylight with a rain sensor for this location specifically, since the automatic closing feature prevents water damage if a storm rolls in while the skylight is open for ventilation. This upgrade costs more but pays for itself the first time it prevents a rain related mishap. A little extra attention here goes a long way toward the finished room feeling right.
5. Teal Vanity With Brass Hardware
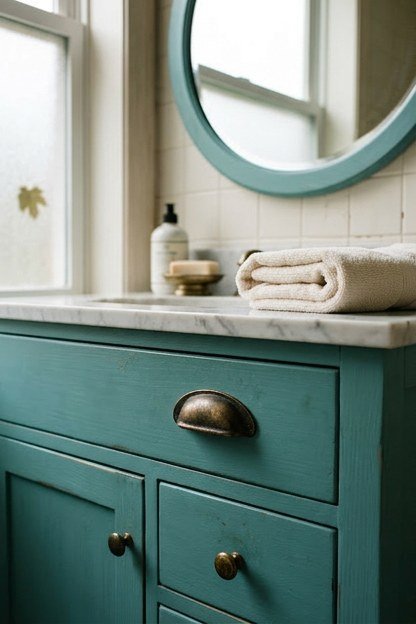
A teal painted vanity with brass hardware creates a warm contrast against the cooler teal tone, preventing the room from feeling one dimensional despite using the same color family throughout. Brushed or satin brass tends to suit this pairing better than a bright, highly polished brass finish, since the matte quality feels more in line with a relaxed spa aesthetic. This small detail matters more once you actually live with the choice day to day.
Choose a vanity depth that accounts for any sloped ceiling above it, since a standard depth vanity positioned under a low slope can make the mirror and lighting above feel cramped or awkwardly close to your head. Measure the specific headroom at the vanity’s exact location before finalizing the cabinet’s dimensions. A few minutes of planning here saves a bigger headache once everything is in place.
The brass hardware will develop a soft tarnish over time from bathroom humidity, deepening from its original bright tone to a warmer, more antique looking finish. Many homeowners specifically choose unlacquered brass to let this aging happen intentionally rather than fighting it with polish. Most homeowners only notice this after living with the room for a few months.
Sealing Painted Cabinetry Against Bathroom Humidity
A quality bathroom rated paint or a clear protective topcoat on the teal vanity prevents moisture damage that standard interior paint cannot withstand over years of daily bathroom humidity exposure. Ask specifically for a moisture resistant formulation when selecting paint for this application. Keep this in mind before finalizing the decision, since it is easy to overlook at first.
Check the cabinet’s interior finish as carefully as the exterior, since unfinished or poorly sealed interior surfaces absorb humidity just as readily and can warp or swell over time. A fully sealed interior protects the cabinet’s structural integrity as much as the visible exterior finish does. This is one of those details that seems minor until you are the one dealing with it.
6. Teal Mosaic Tile Shower Niche
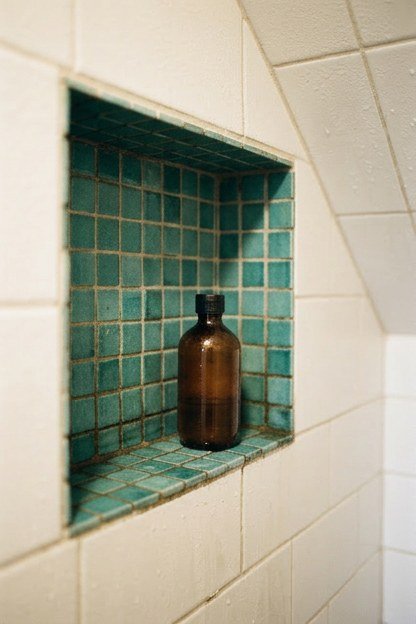
A recessed shower niche lined in small teal mosaic tile adds a genuine design moment within the shower itself, turning a purely functional storage spot into a decorative feature. This works particularly well in an attic shower where the sloped ceiling limits overall shower footprint, since the niche adds visual interest without requiring additional floor space. Factor this into your plan early rather than adjusting for it after construction wraps up.
Position the niche at a height that works with your specific sloped ceiling geometry, typically lower than a standard bathroom niche would sit if the shower occupies a lower headroom zone of the attic. Test the height with a full sized shampoo bottle mockup before the niche is actually built into the wall. It is a small consideration, but it makes a real difference in daily use.
The mosaic tile’s grout will show a gradual darkening in the niche specifically, since this recessed area holds moisture longer than the surrounding flat shower wall after each use. Cleaning the niche specifically during regular bathroom maintenance slows this darkening more than general shower cleaning alone accomplishes. Taking the extra step here pays off more than it might seem worth at first.
Waterproofing Considerations For A Recessed Niche
A niche requires more careful waterproofing than a flat shower wall, since the recessed geometry creates more seams and corners where water can find a path behind the tile if not sealed correctly. Confirm your installer has specific experience with niche waterproofing, not just general tile experience. Discuss this specific point with your contractor before finalizing the design.
Ask to see the waterproofing membrane before tile goes over it, since this is the step that determines whether the niche stays watertight for decades or develops a hidden leak within a few years. A reputable installer should welcome this kind of verification. A little extra attention here goes a long way toward the finished room feeling right.
7. Teal And White Striped Wallpaper On The Ceiling
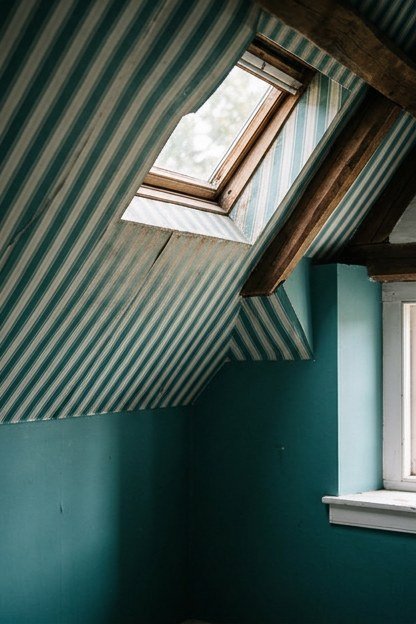
Applying a teal and white striped or patterned wallpaper to the sloped ceiling itself, rather than just the walls, draws the eye upward and makes a low attic ceiling feel like a deliberate design choice rather than a limitation. This treatment works especially well when the walls stay a simpler solid teal, letting the ceiling pattern be the room’s clear focal point. This small detail matters more once you actually live with the choice day to day.
Choose a wallpaper specifically rated for bathroom humidity, typically a vinyl coated option, rather than a standard paper wallpaper that will bubble and peel in a humid environment relatively quickly. This detail matters more for a ceiling application than a wall application, since ceiling humidity exposure in a bathroom tends to run even higher. A few minutes of planning here saves a bigger headache once everything is in place.
The wallpaper’s pattern can show a very faint, even fading nearest any skylight or window after several years of UV exposure, a gradual color shift that affects the whole exposed section evenly rather than in a blotchy or uneven way. Choosing a UV resistant wallpaper formulation slows this fading if the room gets substantial direct light. Most homeowners only notice this after living with the room for a few months.
Installing Wallpaper On An Angled Ceiling Surface
Angled ceiling wallpaper installation requires more skill than flat wall application, since gravity works against the installer differently on a sloped surface than on a vertical wall. Hire an installer with specific experience in ceiling or sloped surface wallpaper application rather than a general wallpaper hanger. Keep this in mind before finalizing the decision, since it is easy to overlook at first.
Budget more time and labor cost for this installation than a comparable flat wall would require, since the angled surface simply takes longer to work with correctly. Rushing this step risks bubbles or seams that become obvious once the light hits the ceiling at an angle. This is one of those details that seems minor until you are the one dealing with it.
8. Compact Corner Shower With Teal Glass Tile
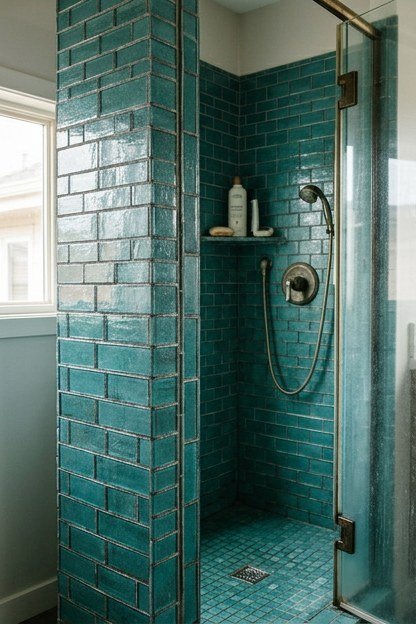
A corner positioned shower makes efficient use of an attic bathroom’s often irregular floor plan, fitting into a space that a rectangular shower could not use as efficiently. Teal glass tile lining this corner shower catches available light differently than matte tile, adding a subtle shimmer that suits the spa aesthetic well. Factor this into your plan early rather than adjusting for it after construction wraps up.
Glass tile requires a slightly different installation approach than ceramic or porcelain, including specific thinset formulated for glass to prevent the tile’s transparency from showing shadowing through from an incompatible adhesive. Confirm your installer has specific glass tile experience before committing to this material choice. It is a small consideration, but it makes a real difference in daily use.
The glass tile itself will not fade or age visibly over decades, but the grout lines between pieces will show the same gradual darkening common to any tiled shower after years of use and cleaning. Sealing the grout specifically, since glass tile grout sealing is sometimes overlooked, protects against this darkening longer than an unsealed installation. Taking the extra step here pays off more than it might seem worth at first.
Sizing A Corner Shower For An Attic’s Available Space
Measure the actual usable floor space at standing height, not just the total floor footprint, since a sloped ceiling can reduce a corner shower’s genuinely usable area significantly compared to its footprint on paper. A shower that looks adequately sized on a floor plan can feel cramped if much of that footprint sits under a low slope. Discuss this specific point with your contractor before finalizing the design.
Consider a neo angle shower door specifically designed for corner installations, since these are engineered for the exact geometry an attic corner shower typically presents. A standard shower door retrofitted into a corner space often fits less precisely than a purpose built neo angle option. A little extra attention here goes a long way toward the finished room feeling right.
9. Teal Painted Beadboard On Knee Walls
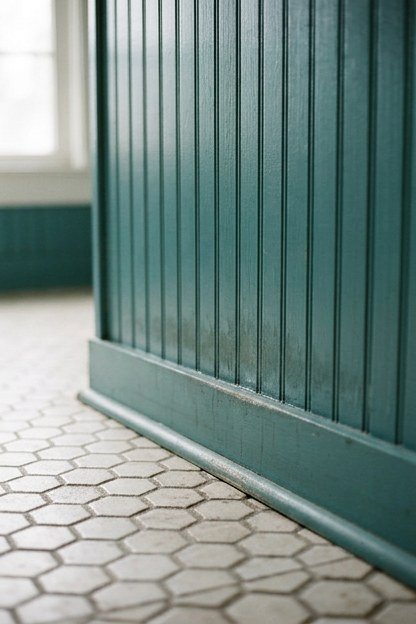
Painting the short knee walls common in attic spaces with teal beadboard adds texture and a slightly more traditional, cottage feeling element that pairs well with the room’s otherwise modern fixtures. Beadboard also handles the transition between floor and sloped ceiling more gracefully than a flat painted surface, since its vertical lines echo the room’s angled geometry. This small detail matters more once you actually live with the choice day to day.
Choose a moisture resistant beadboard material, either a PVC based product or properly primed and sealed real wood, rather than standard interior beadboard not rated for bathroom humidity. This material choice matters significantly for the knee wall’s long term durability in a consistently humid room. A few minutes of planning here saves a bigger headache once everything is in place.
The beadboard’s paint will develop a soft, even sheen change near the floor level after years of mopping and general cleaning contact, a gradual dulling from repeated contact rather than any kind of damage. Repainting this lower zone periodically, separate from the rest of the room, keeps this high contact area looking fresh. Most homeowners only notice this after living with the room for a few months.
Choosing Beadboard Height For Attic Knee Walls
Standard beadboard height runs around three to four feet, but an attic knee wall’s actual height varies significantly by the specific roof pitch and where the wall sits in the room. Measure your specific knee wall height before ordering beadboard panels, since a standard height panel may need trimming for a shorter attic knee wall. Keep this in mind before finalizing the decision, since it is easy to overlook at first.
Consider running the beadboard slightly higher than the knee wall’s actual height onto the beginning of the sloped ceiling for a more finished, intentional looking transition. This small extension prevents an abrupt, awkward stopping point exactly at the roofline. This is one of those details that seems minor until you are the one dealing with it.
10. Matte Black And Teal Fixture Combination
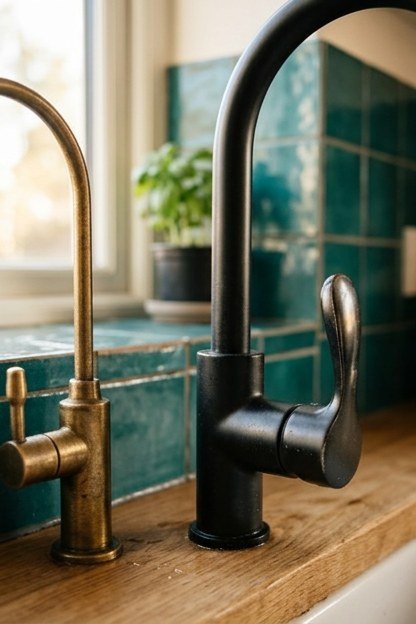
Pairing matte black fixtures, faucets, shower hardware, and towel bars, with the room’s teal color scheme creates a more moody, dramatic spa feeling than an all brass or all chrome approach would achieve. This combination has grown significantly in popularity for bathroom design generally, and it suits a teal attic bathroom’s slightly more dramatic, cocoon like character particularly well. Factor this into your plan early rather than adjusting for it after construction wraps up.
Confirm all your matte black fixtures come from finishes that are actually compatible in tone, since matte black varies more between manufacturers than people expect, some running slightly warmer and others cooler. Order samples or small hardware pieces from your chosen suppliers before committing to a full fixture package. It is a small consideration, but it makes a real difference in daily use.
Matte black fixtures can show a faint, even softening of their coating’s texture in high touch areas like faucet handles after years of daily use, a gradual smoothing from repeated contact rather than any kind of finish failure. This is normal wear for matte finishes generally and does not affect the fixture’s function. Taking the extra step here pays off more than it might seem worth at first.
Matching Matte Black Finishes Across Different Manufacturers
Request finish samples from every manufacturer supplying fixtures for your project before finalizing any order, since a faucet from one brand and a towel bar from another can show a surprisingly noticeable tone mismatch once installed together. This comparison step takes minimal time but prevents a costly finish mismatch discovery after installation. Discuss this specific point with your contractor before finalizing the design.
Consider sourcing all matte black fixtures from a single manufacturer’s coordinated collection if tone matching feels too risky to manage across multiple brands. Coordinated collections guarantee a consistent finish across every piece, removing this particular risk entirely. A little extra attention here goes a long way toward the finished room feeling right.
11. Teal Terrazzo Countertop On The Vanity
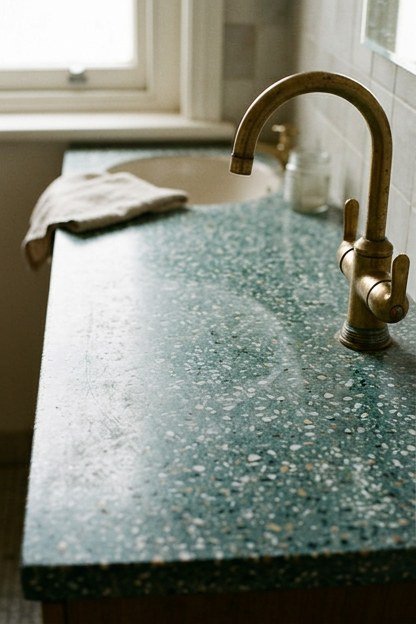
A teal flecked terrazzo countertop on the bathroom vanity adds pattern and visual interest without introducing an entirely separate color into the room’s palette. Terrazzo’s speckled, aggregate based appearance also hides water spots and minor daily wear better than a solid color stone or quartz countertop would. This small detail matters more once you actually live with the choice day to day.
Terrazzo comes in both natural stone and engineered versions, with the engineered version typically offering more consistent teal fleck distribution and a lower price point than a natural stone equivalent. Most attic bathroom projects on a moderate budget do well with the engineered option without a noticeable quality compromise. A few minutes of planning here saves a bigger headache once everything is in place.
The terrazzo surface will develop a very faint, even dulling of its polished sheen after years of regular cleaning product contact, a gradual softening of the original glossy finish rather than any damage to the material itself. Periodic professional resealing restores much of the original sheen if this dulling bothers you visually. Most homeowners only notice this after living with the room for a few months.
Choosing Terrazzo Fleck Size And Density For A Small Bathroom
A finer, smaller fleck pattern generally suits a compact attic bathroom vanity better than a large, chunky fleck pattern, since the smaller scale does not overwhelm a limited countertop surface area. Request physical samples at actual scale rather than judging fleck size from a small marketing swatch. Keep this in mind before finalizing the decision, since it is easy to overlook at first.
Balance the terrazzo’s fleck density against the room’s existing tile pattern, since two busy, high contrast patterns in the same small room can compete for visual attention rather than complementing each other. A busier tile choice pairs better with a calmer, lower density terrazzo pattern. This is one of those details that seems minor until you are the one dealing with it.
12. Recessed Lighting Angled For Sloped Ceilings
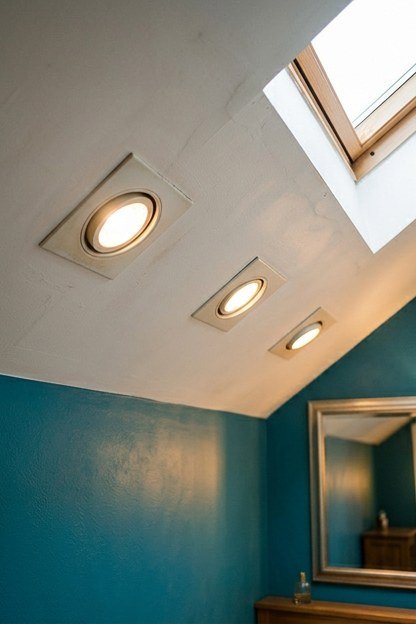
Standard recessed lighting fixtures are not designed for sloped ceiling installation, and using the wrong fixture type in an angled ceiling creates an odd, uneven light pattern across the room. Sloped ceiling specific recessed fixtures adjust their internal housing to project light straight down despite the ceiling’s angle, avoiding this problem entirely. Factor this into your plan early rather than adjusting for it after construction wraps up.
Position these angled fixtures with extra attention around the shower and vanity areas specifically, since these are the zones where even, adequate lighting matters most for daily bathroom tasks. A lighting layout plan reviewed before installation catches gaps that are expensive to fix once the ceiling is finished. It is a small consideration, but it makes a real difference in daily use.
The fixture trim’s finish, if a painted or powder coated material rather than raw metal, can show a very faint, even fading if positioned near a skylight receiving significant direct sun exposure over many years. This gradual, cosmetic change does not affect the fixture’s electrical function or safety at all. Taking the extra step here pays off more than it might seem worth at first.
Layering Light Sources Beyond Just Recessed Fixtures
Recessed lighting alone often creates a flat, shadowless quality that undersells a spa style bathroom’s intended mood, so layering in a dimmable vanity light and perhaps a small accent fixture adds necessary depth and warmth. Consider your lighting plan in layers rather than relying on one fixture type to do every job in the room. Discuss this specific point with your contractor before finalizing the design.
Install all bathroom lighting on dimmer switches where the fixture type allows it, since the ability to lower light levels for a relaxing bath differs enormously from the bright, even light needed for grooming tasks. This flexibility costs little extra during installation but adds significant daily usability. A little extra attention here goes a long way toward the finished room feeling right.
13. Teal Textile Layers For Softness

Balancing the hard surfaces common in a bathroom, tile, stone, glass, with soft teal textiles, bath mats, towels, and a shower curtain if applicable, prevents the spa aesthetic from feeling cold or overly clinical. This textile layering is one of the most affordable and easily updated elements in the entire room’s design. This small detail matters more once you actually live with the choice day to day.
Choose a mix of teal shades rather than one single uniform tone across all textiles, since slight variation between a towel’s teal and a bath mat’s teal reads as intentionally layered rather than as a mismatched attempt at matching. This subtle variation approach mirrors the same eclectic principle that makes many successful color schemes feel curated rather than purchased as a matched set. A few minutes of planning here saves a bigger headache once everything is in place.
Textiles will show a soft, faded look after repeated washing over a year or two of regular use, a gradual and expected color shift for any dyed cotton or linen textile exposed to regular laundering. Rotating textiles into and out of use evens out this fading if you own more than one set. Most homeowners only notice this after living with the room for a few months.
Choosing Textile Materials That Handle Bathroom Humidity Well
Turkish cotton or a cotton linen blend handles the repeated wetting and drying cycle of bathroom use better than many synthetic alternatives, drying faster and resisting a musty smell developing over time. Spend slightly more on quality textile materials specifically for this humidity heavy application. Keep this in mind before finalizing the decision, since it is easy to overlook at first.
Wash new teal textiles separately for the first several washes, since teal dye can bleed slightly onto lighter colored textiles during this initial period before the dye fully sets. This small precaution prevents an unwanted color transfer onto white towels or bath mats. This is one of those details that seems minor until you are the one dealing with it.
14. Live Plants Suited To Attic Bathroom Humidity
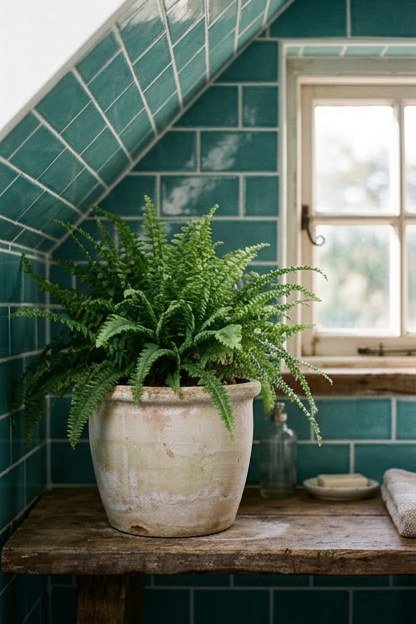
Adding live plants that genuinely thrive in high humidity, like a Boston fern or a peace lily, brings a natural element that complements teal’s already nature adjacent color association. Attic bathrooms, if properly ventilated, often provide exactly the humid, warm microclimate these specific plant varieties prefer over a drier standard room environment. Factor this into your plan early rather than adjusting for it after construction wraps up.
Position plants away from direct exposure to hot shower steam even though they tolerate general humidity well, since a direct blast of hot steam differs from the ambient humidity these plants are actually adapted to handle. A few feet of distance from the shower head typically provides enough buffer. It is a small consideration, but it makes a real difference in daily use.
Ceramic planters in this humid environment can develop a light, even mineral bloom on their surface from watering runoff, a pale, chalky texture rather than any kind of damage to the ceramic itself. Wiping planters down periodically during regular bathroom cleaning keeps this bloom from building up too visibly. Taking the extra step here pays off more than it might seem worth at first.
Choosing Plants That Will Not Struggle In Limited Attic Light
Match your plant selection to your specific attic bathroom’s actual light levels honestly, since a plant needing bright indirect light will struggle in a windowless attic bathroom relying only on artificial lighting. Snake plants and ZZ plants tolerate lower light situations better than ferns or peace lilies do. Discuss this specific point with your contractor before finalizing the design.
Rotate plants between the bathroom and a brighter room periodically if your attic bathroom’s natural light is genuinely limited, giving them recovery time in better light conditions. This rotation habit keeps plants healthier long term than leaving them permanently in an underlit space. A little extra attention here goes a long way toward the finished room feeling right.
15. Custom Teal Stained Glass Window Accent
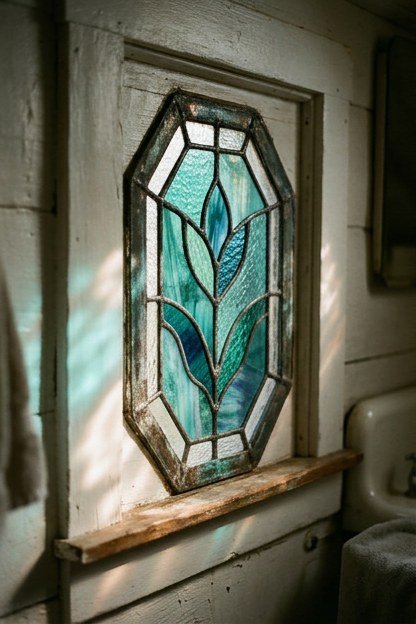
A small custom stained glass window incorporating teal glass pieces, whether a functional window or a purely decorative accent panel, adds a genuinely unique focal point that few other bathrooms feature. This works particularly well in an attic bathroom’s often small, awkwardly shaped window openings, where custom glass can be fitted to an unusual size more easily than standard window products. This small detail matters more once you actually live with the choice day to day.
Commission this piece from a local stained glass artisan rather than ordering a mass produced version, since a custom piece can be sized exactly to your attic window’s specific dimensions and angle. Expect to pay a genuine premium for this level of customization compared to a standard window treatment. A few minutes of planning here saves a bigger headache once everything is in place.
The lead came framing traditional stained glass uses will develop a soft, even tarnish over years of exposure to bathroom humidity, deepening from its original silvery tone to a darker, antique looking patina. Many stained glass artisans consider this aging a desirable characteristic that adds authenticity rather than something to prevent. Most homeowners only notice this after living with the room for a few months.
Protecting A Custom Glass Feature During Construction
Schedule the stained glass installation as one of the final steps in your bathroom renovation, after other trades have completed dusty or potentially damaging work like tile cutting and drywall sanding. Installing this fragile element too early risks damage from other construction activity happening around it. Keep this in mind before finalizing the decision, since it is easy to overlook at first.
Confirm your contractor has a specific plan for protecting the glass feature during any remaining work after its installation, such as temporary covering during painting or final cleanup. This small coordination step protects a significant investment from an avoidable accident. This is one of those details that seems minor until you are the one dealing with it.
What A Spa Teal Attic Bathroom Actually Costs
A full attic bathroom conversion incorporating the teal spa elements covered in this guide typically costs more than a comparable standard bathroom remodel, largely due to the structural and plumbing challenges specific to attic spaces. Budget conversations with your contractor should account for these attic specific costs separately from the decorative choices like tile and paint color. Factor this into your plan early rather than adjusting for it after construction wraps up.
Custom elements like stained glass, terrazzo countertops, and glass tile add meaningfully to the budget compared to more standard material choices, so prioritize which custom touches matter most to you if the full wish list exceeds your available budget. I recommend choosing one or two genuine splurge items rather than spreading a limited budget thinly across every custom element on this list. It is a small consideration, but it makes a real difference in daily use.
The table below breaks down rough cost ranges for a full attic bathroom conversion, acknowledging that structural complexity varies enormously between different attic spaces. Treat these ranges as a planning starting point rather than a firm quote for your specific project. Your actual costs will shift based on your region and your attic’s particular structural challenges.
| Cost tier | What it typically includes | Notes |
|---|---|---|
| $15,000 to $25,000 | Basic fixtures, standard tile, simple layout | Assumes existing plumbing stack is nearby |
| $25,000 to $45,000 | Custom tile, upgraded fixtures, skylight | Most spa style projects land here |
| $45,000 and up | Full custom elements, stained glass, terrazzo | Reflects extensive customization |
Common Mistakes When Designing An Attic Bathroom
Underestimating ventilation needs is the most common and most costly mistake in attic bathroom projects specifically. Attic spaces trap heat and humidity more than a standard bathroom location, and inadequate ventilation leads to mold and structural moisture damage that can be far more expensive to repair than the ventilation upgrade would have cost initially. Always oversize your exhaust fan slightly relative to standard bathroom sizing guidelines for this reason.
Choosing fixtures without confirming actual headroom clearance is the second frequent mistake, since attic ceiling heights vary dramatically across even a few feet of floor space. A fixture that looked fine on a floor plan can create an uncomfortable, cramped feeling once installed under an unexpectedly low slope. Physically mock up fixture positions with tape or cardboard before finalizing any order.
Ignoring the structural load capacity of the attic floor for heavy elements like a stone countertop or a large soaking tub is the third mistake, since not every attic floor structure was designed to support a full bathroom’s weight without reinforcement. A structural engineer’s assessment before finalizing heavy fixture choices prevents a serious problem discovered too late in the project. Discuss this specific point with your contractor before finalizing the design.
Working With Contractors Experienced In Attic Conversions
Ask specifically about a contractor’s attic conversion experience rather than just general bathroom remodeling experience, since the structural, ventilation, and access challenges specific to attics require particular expertise general bathroom work does not always cover. Request references specifically from past attic conversion clients. A little extra attention here goes a long way toward the finished room feeling right.
Get a detailed structural assessment in writing before signing any contract, covering both floor load capacity and ceiling height compliance with local codes. This document protects you if unexpected structural issues surface once construction begins. This small detail matters more once you actually live with the choice day to day.
Conclusion
Designing a spa teal attic bathroom comes down to working with the space’s natural constraints, sloped ceilings, limited light, and tricky access, rather than fighting against them. Teal’s calming, spa like quality pairs naturally with an attic’s already intimate, tucked away character, and the fifteen ideas covered here show how far that pairing can go with thoughtful execution. Prioritize ventilation and structural planning early, since these unglamorous decisions determine whether the beautiful finishes you choose later actually last.
Choose one or two genuine splurge elements, whether that is custom stained glass, a terrazzo countertop, or a striking hexagon tile floor, rather than spreading your budget thin across every idea on this list. A well planned attic bathroom rewards the extra planning effort with a genuinely unique retreat that a standard bathroom layout could never quite replicate. A few minutes of planning here saves a bigger headache once everything is in place.
Frequently Asked Questions
Is an attic bathroom conversion more expensive than a standard bathroom remodel? Yes, typically due to the additional structural assessment, plumbing runs, and ventilation work an attic space requires. Budget accordingly and get a specific attic conversion quote rather than comparing against a standard bathroom remodel estimate.
What is the minimum ceiling height needed for an attic bathroom? Most building codes require around seven feet of clearance over key fixtures like the toilet and shower, though exact requirements vary by location. Check your specific local code before finalizing any fixture layout.
Does teal make a small attic bathroom feel smaller? Not when used thoughtfully, particularly when paired with a lighter color on the upper walls and ceiling to prevent the room from feeling closed in. A layered color approach actually helps a small space feel more intentional rather than cramped.
How do I manage humidity in an attic bathroom effectively? A properly sized exhaust fan vented to the exterior, not just into the attic space, matters most for managing the higher humidity levels attic spaces tend to trap. Pair this with humidity tolerant materials throughout the room for the best long term results.
Can I add a skylight to any attic bathroom? Most attic spaces can accommodate a skylight, though the specific roof structure and any existing framing may limit exact placement options. Consult a contractor experienced in skylight installation to confirm what your specific roof structure allows.
What is the most budget friendly teal element to start with? Paint is by far the most affordable way to introduce teal into an attic bathroom, whether on walls, a vanity, or beadboard. Textiles come in a close second, offering an easy and affordable way to test the color before committing to anything permanent.