
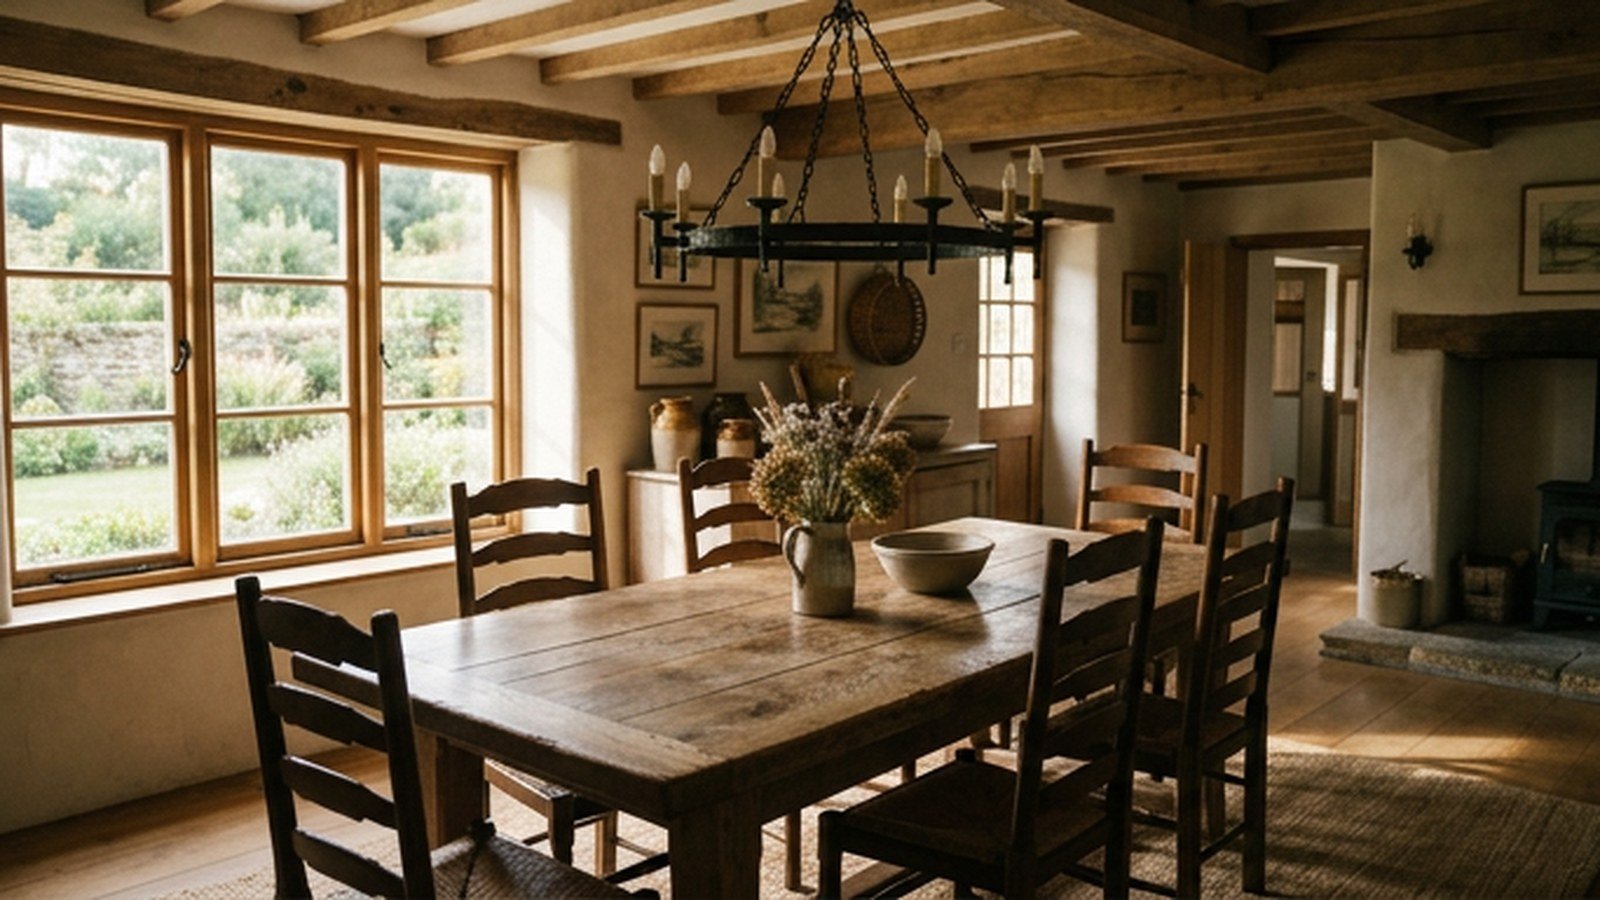
A farmhouse dining room earns its warmth from a handful of specific rustic features, not from piling on every trend at once. The style leans on solid wood, simple metal hardware, and materials that show their own honest character rather than a polished, showroom finish. I have furnished three farmhouse dining rooms now, and the rooms that worked best always built around two or three strong features rather than a dozen small ones.
This guide covers fifteen specific rustic farmhouse dining room features, what each one actually costs, and where the style choices commonly go wrong. Expect honest notes about durability, seating comfort, and the small details that separate a genuinely warm farmhouse room from a cluttered one. By the end you will have a real plan matched to your own space and budget.
Rustic does not mean rough or uncomfortable, and a farmhouse dining room still needs to function as a genuinely usable eating space for daily meals and holiday gatherings alike. I will flag where a rustic choice trades away practicality throughout this guide. The best farmhouse dining rooms balance real character with real comfort.
Why Rustic Farmhouse Features Suit A Dining Room So Well
A dining room hosts some of a home’s most memorable gatherings, and rustic farmhouse materials carry a warmth that suits that role better than a colder, more formal dining style. Reclaimed wood, forged iron hardware, and simple woven textiles all read as inviting rather than precious, which takes real pressure off keeping the room in showroom condition. This forgiving quality matters in a room that sees spilled wine, dropped forks, and years of daily family meals.
The style also ages into the room rather than out of it, since genuine wood and iron both develop character over time instead of simply wearing out. A farmhouse dining table bought today can reasonably serve a family for decades, gaining rather than losing appeal as it collects its own history. This durability is a real practical argument for the style beyond its obvious visual warmth.
The table below compares a rustic farmhouse dining room against a modern and a traditional formal approach on the factors that matter most for this specific room. None of the three is objectively better, since the right choice depends on how your family actually uses the room. Use it as a starting point before reading the planning section that follows.
| Factor | Rustic farmhouse | Modern minimalist | Traditional formal |
|---|---|---|---|
| Tolerance for daily wear | High, ages well | Low, shows marks easily | Moderate |
| Typical cost | Low to moderate | Moderate to high | High |
| Feels welcoming for daily use | Strong | Weaker, feels formal | Weaker, feels formal |
Planning A Rustic Farmhouse Dining Room Before You Buy
Measure your actual dining space and typical guest count honestly before choosing furniture, since a farmhouse table sized for eight looks awkward and cramped in a room that comfortably seats six. Walk through how you actually use the room, everyday quick meals versus larger holiday gatherings, before committing to a single fixed table size. I sized my own first farmhouse table too large for the room and regretted it within the first month.
Check your existing flooring and wall colors before building a rustic scheme around them, since a warm wood toned floor pairs differently with farmhouse features than a cool gray or white floor would. A room with existing cool tones may need lighter or more neutral wood choices to avoid an unintentional color clash. Bring wood or fabric samples into the actual room before finalizing larger purchases.
Set a realistic budget that separates the table and seating, typically the largest expense, from smaller accent features like lighting and hardware. Both a modest and a more generous budget can achieve genuine rustic character, so match your plan to what you can actually spend. The features below are ordered roughly from more accessible to more involved.
1. Reclaimed Wood Dining Table
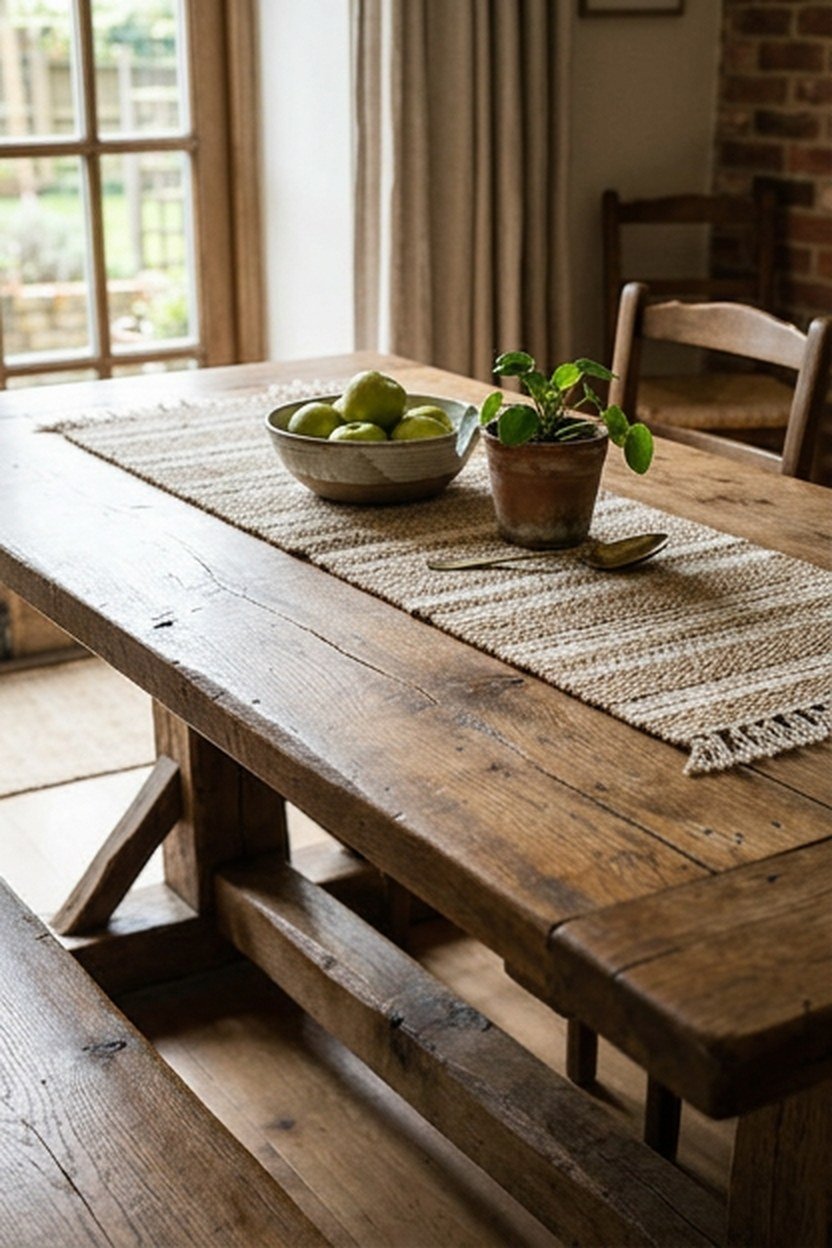
A dining table built from reclaimed wood is the single most defining feature a rustic farmhouse dining room can have, since the table sits at the visual and functional center of the room. Expect to pay 800 to 2000 dollars for a quality reclaimed wood table, depending on size and the specific wood species used. This is usually the largest single investment in the whole room, and it is worth prioritizing over smaller accent pieces.
Choose a table with a sturdy trestle or turned leg base rather than a delicate design, since reclaimed wood tables see genuinely heavy daily use and benefit from a robust structural foundation. Ask your supplier directly about the wood’s specific source and any prior use, since genuine reclaimed material carries more character than a new board simply distressed to look old. This distinction matters for both authenticity and long term durability.
The tabletop will show its natural grain pattern becoming more pronounced over time as the protective finish wears slightly and the wood’s own history continues to show through daily use. This visible grain deepening is exactly the appeal most people choose reclaimed wood specifically to achieve. A fresh coat of oil or wax every year or two maintains the protective finish without hiding this natural character.
Sealing A Reclaimed Table For Daily Dining Use
Choose a food safe sealant specifically rated for dining surfaces rather than a general purpose wood finish, since a dining table needs to handle spills, hot dishes, and regular cleaning without breaking down. A properly sealed table resists staining far better than an unsealed or improperly finished one. Ask your supplier which sealant they used and how often it needs reapplication for your specific climate.
Test any new cleaning product on an inconspicuous corner of the table before using it across the full surface, since some cleaners can strip or dull a reclaimed wood finish faster than a gentler alternative would. A small test patch takes only a minute and prevents a visible mistake on the main surface. This habit is worth keeping even years after the table is first sealed.
2. Exposed Ceiling Beams Over The Dining Area
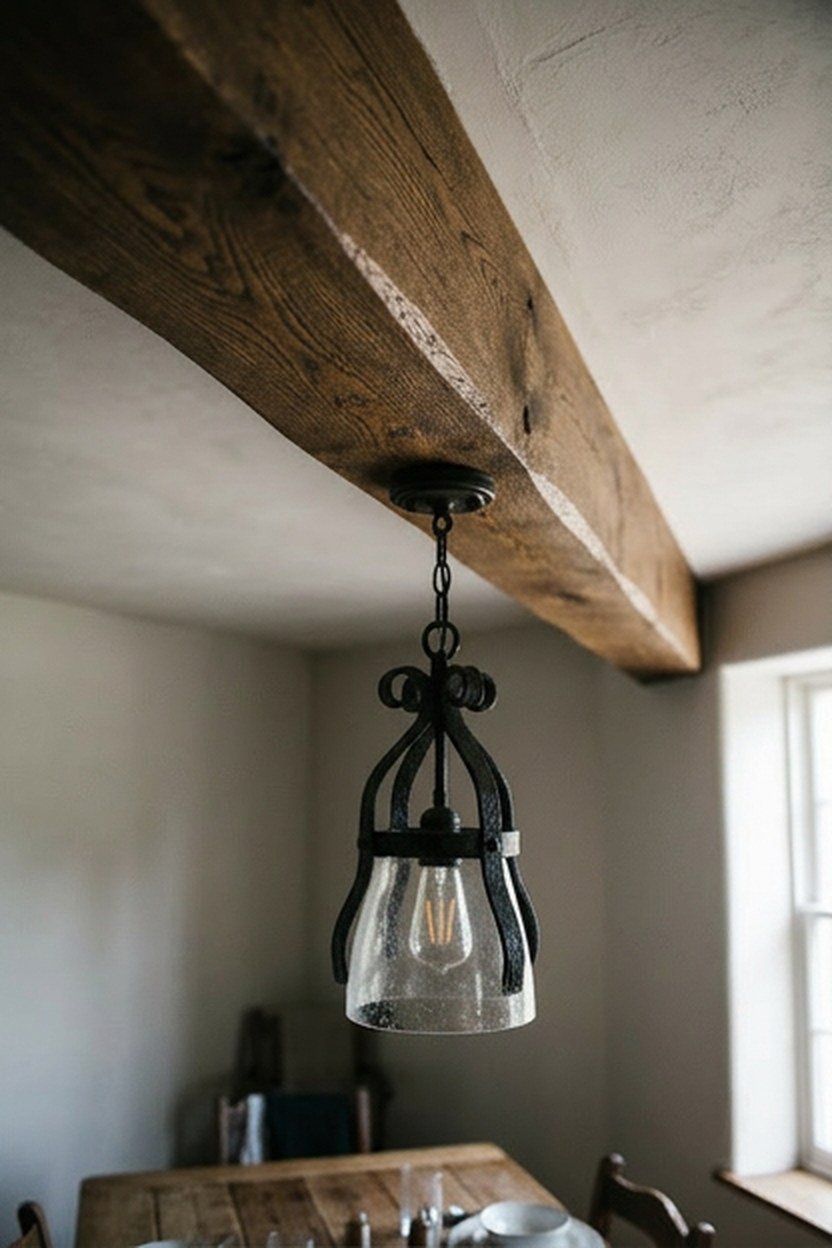
Exposed wood beams running across the ceiling directly above the dining table add genuine architectural weight to the room without requiring any changes to the furniture itself. Faux beams made from lightweight polyurethane cost considerably less than structural wood, typically 100 to 300 dollars per beam, and install without load bearing considerations. This makes faux beams a practical choice for most homes regardless of the ceiling’s original construction.
Position beams running perpendicular to the table’s longest dimension for the strongest visual anchor, rather than parallel beams that can feel less connected to the table below. One or two well placed beams usually reads as more intentional than a ceiling covered edge to edge. Measure your specific ceiling height before committing, since a lower ceiling loses noticeable headroom with any beam addition.
The beam’s surface will show a visible natural grain pattern becoming more textured as dust settles into the material’s molded details over months of normal use. This is a cosmetic characteristic of textured beams and does not affect their lightweight mounting at all. Occasional dusting with a long handled duster keeps the beams looking fresh.
Real Wood Versus Faux Beams For A Dining Ceiling
Real wood beams add genuine structural weight and typically require confirming the ceiling can support that load before installation. Faux polyurethane beams skip this consideration entirely since they weigh a fraction of real wood while looking convincingly similar from normal dining room viewing distance. Most homeowners choose faux beams for this practical reason rather than any real difference in appearance from below.
Paint or stain a faux beam to match your room’s existing wood tones rather than trusting the manufacturer’s default finish, since faux beams typically ship in a base color meant to be customized during installation. Bring a sample of your other wood tones when choosing the beam’s final color. This extra step avoids an obvious mismatch once the beam is mounted overhead.
3. Wrought Iron Chandelier Or Pendant Lighting
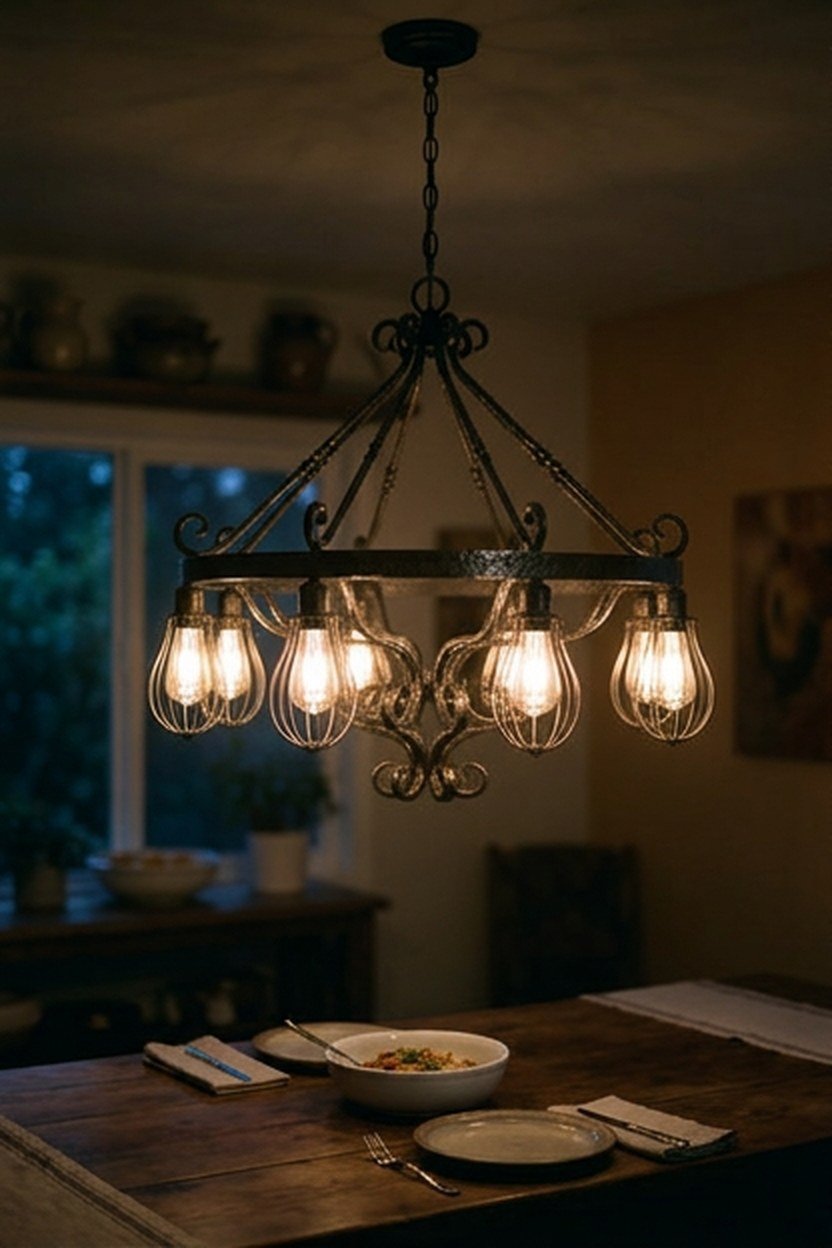
A wrought iron chandelier or a cluster of pendant lights hanging above the table brings genuine farmhouse character to the room’s most important light source. Expect to pay 150 to 400 dollars for a quality wrought iron fixture sized appropriately for a standard dining table. This single fixture often does more to set the room’s overall tone than any other single feature on this list.
Size the fixture to your table’s actual width, generally choosing a chandelier roughly one half to two thirds the table’s length for proper visual proportion. An undersized fixture looks lost above a large table, while an oversized one can dominate the room and interfere with sightlines across the table. Bring your table’s exact dimensions when shopping for lighting to avoid this common mismatch.
The wrought iron will develop a soft natural sheen change over years of exposure to cooking steam and ambient humidity from the adjacent kitchen. This gradual textured change in the iron’s original finish is expected for unlacquered wrought iron and many people choose this finish anticipating this natural aging. A lacquered finish resists this change if you prefer the fixture to look more consistent over time.
Hanging Height For A Dining Room Fixture
Standard installation hangs a dining chandelier so its bottom edge sits roughly 30 to 36 inches above the table surface, though a room with a lower ceiling may need to adjust this height to maintain safe clearance. Measure your specific ceiling height before ordering a fixture with a fixed chain length that cannot be shortened easily. Many chandelier styles include adjustable chain length specifically to accommodate different ceiling heights.
Confirm the fixture does not block sightlines across the table when seated, since a chandelier hung too low can make conversation across a wide table feel obstructed regardless of how good it looks from a standing position. Sit at the table yourself before finalizing the mounting height. This quick check catches a problem no showroom display reveals.
4. Ladder Back Or Windsor Style Dining Chairs
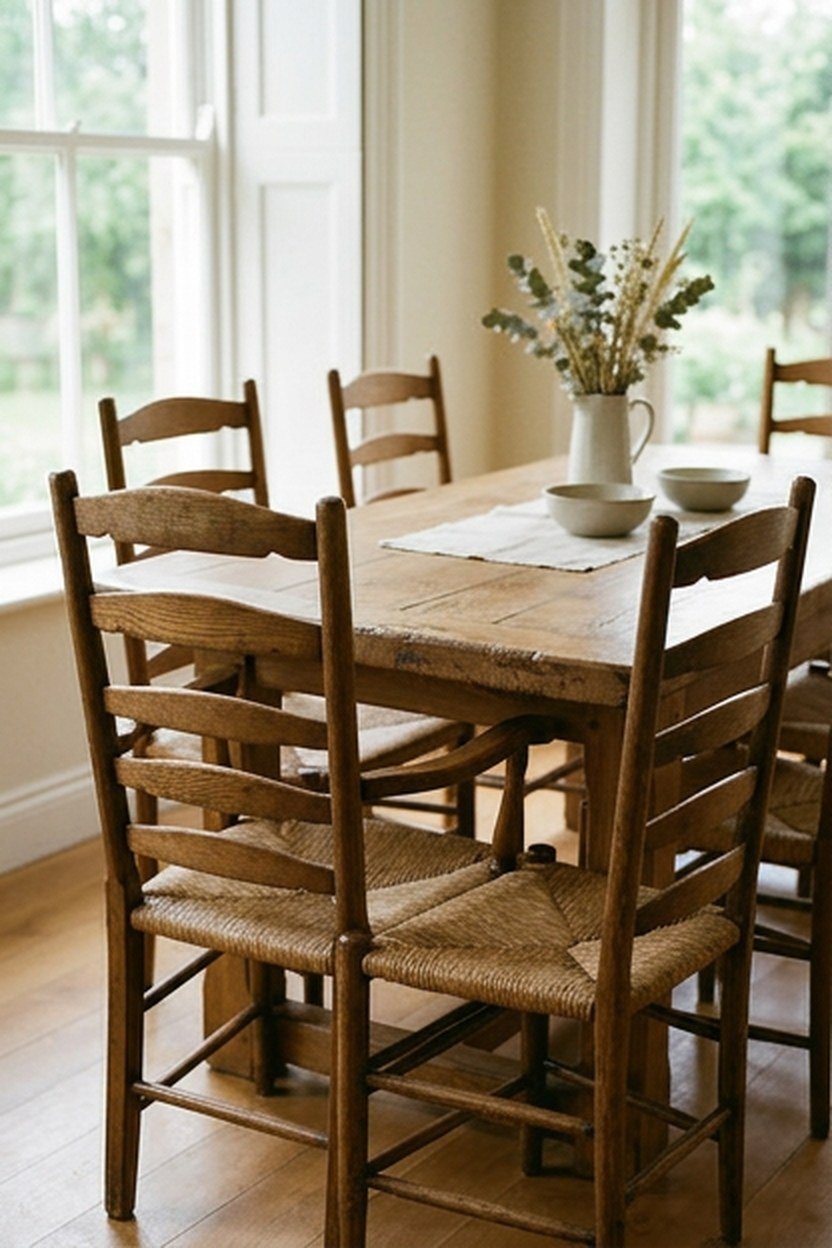
Ladder back or Windsor style wood dining chairs bring a specifically farmhouse silhouette that pairs naturally with a reclaimed wood table without looking overly matched or showroom coordinated. Expect to pay 80 to 180 dollars per chair depending on the wood species and construction quality. Mixing chair styles slightly, rather than an exactly matched set, often reads as more genuinely collected over time.
Test chair comfort for extended seating before committing to a full set, since a chair that looks charming can still be genuinely uncomfortable for a two hour holiday meal. Sit in a sample chair for at least several minutes in a showroom before ordering six or eight of the same design. This small test prevents an expensive mistake that affects every future meal in the room.
The chair’s wood surface will show a visible natural grain pattern becoming more pronounced at the seat and armrest areas from years of regular contact and handling. This gradual textured change at the highest contact points is normal for wood dining chairs under sustained daily use. A protective wax or oil finish applied periodically slows this change if you prefer a more consistent surface appearance.
Mixing Chair Styles For A Collected Look
Pair a matched set of side chairs with two different, slightly more substantial captain’s chairs at the table’s head positions, a common farmhouse styling choice that adds visual interest without full mismatching. This approach costs little extra if you are already buying chairs individually rather than as a single matched set. The slight variation reads as intentional rather than accidental when done with two coordinated wood tones.
Confirm all chairs, even visually different ones, sit at a compatible height with your specific table, since a captain’s chair with arms sometimes sits higher than a standard side chair and can create an uneven look around the table. Measure seat height before ordering rather than assuming all styles match. This small check keeps the finished table looking intentional.
5. Open Shelving With Displayed Dishware
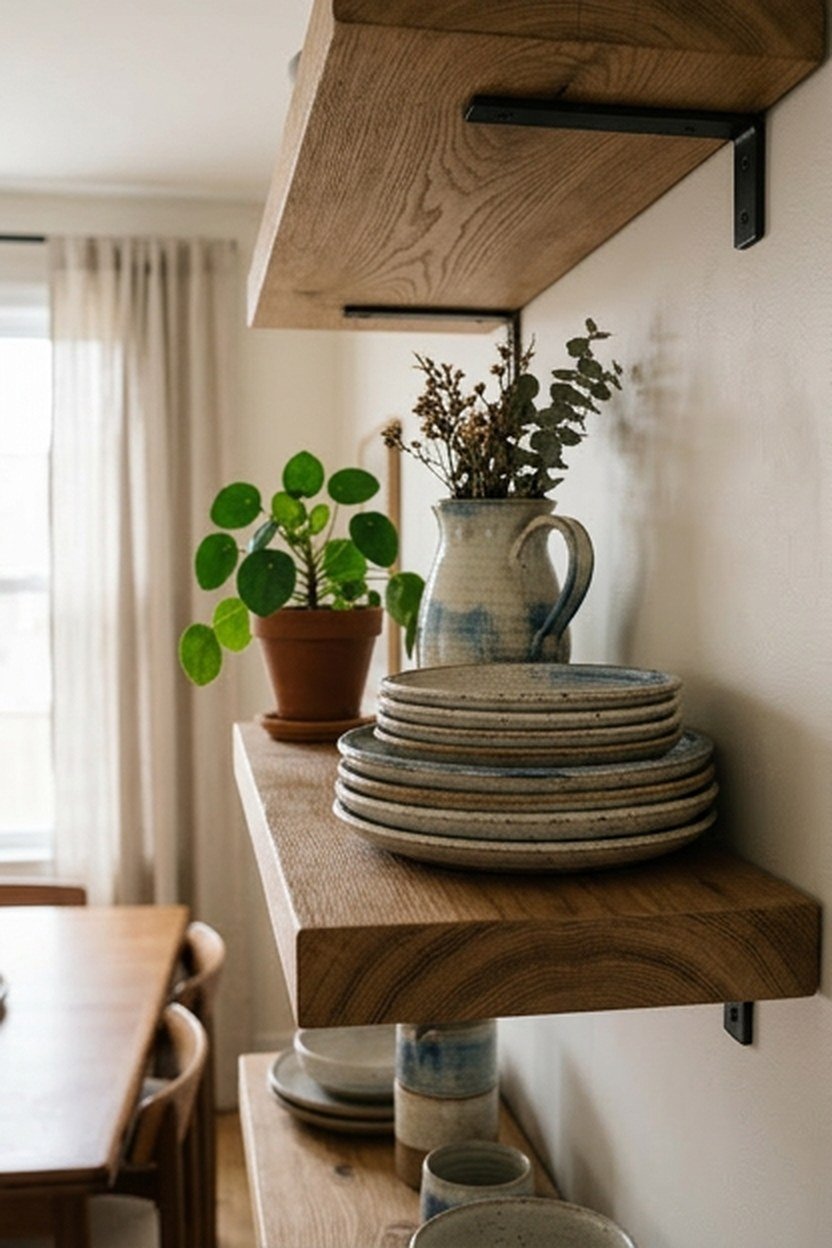
Open wood shelving along one dining room wall, displaying stacked plates, pitchers, and glassware, replaces closed cabinetry with a farmhouse style display that keeps everyday dishware genuinely accessible. Expect to pay 100 to 300 dollars for quality shelving brackets and boards, considerably less than built-in cabinetry would cost. This approach also makes a dining room feel more lived in and personal than a room with everything hidden behind closed doors.
Style shelves with a mix of stacked plates, a few pitchers or jugs, and some greenery or a small plant rather than displaying every piece of dishware you own. An overstuffed shelf looks cluttered rather than intentionally curated. I rotate what I display seasonally, which keeps the shelving feeling fresh without needing to buy new items regularly.
The wood shelving will show its natural grain pattern becoming more visible over time as the surface finish wears slightly from the weight and handling of displayed items. This gradual textured change is a normal characteristic of open wood shelving under regular use and adds to rather than detracts from its farmhouse character. A protective finish reapplied every few years maintains the shelf’s structural surface.
Weight Limits For Loaded Display Shelving
Check the weight rating on any shelf bracket before loading it with a genuine collection of stoneware or glassware, since dishware adds up in weight faster than people expect from looking at it. A bracket rated for light decorative use will sag under a fully loaded shelf of stacked plates over time. Choose brackets rated at least twice your expected load for a real safety margin.
Anchor shelving brackets into wall studs rather than drywall anchors alone whenever possible, since a dining room shelf holding genuine dishware carries more sustained weight than a purely decorative shelf elsewhere in the home. A stud finder costs little and removes the guesswork from this step. Skipping it is the most common reason a loaded shelf eventually pulls away from the wall.
6. Board And Batten Wall Treatment
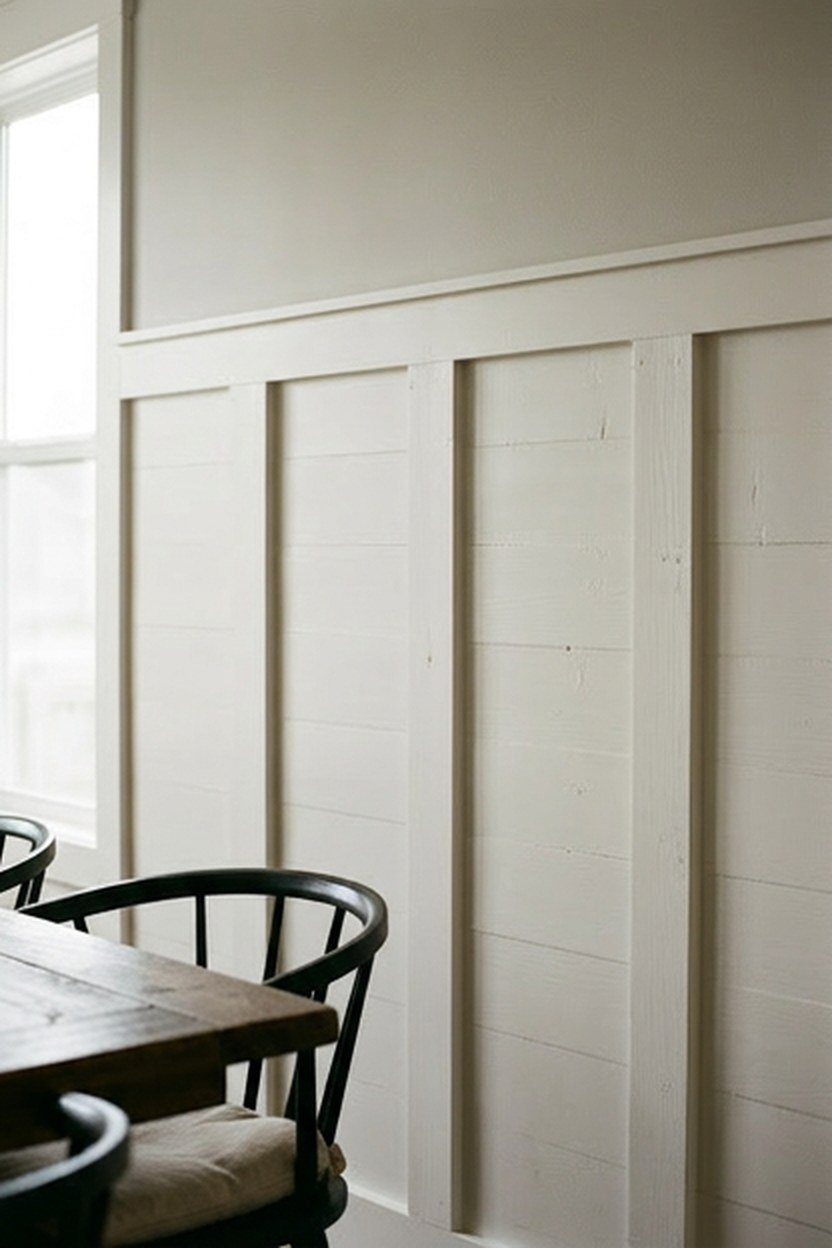
Board and batten paneling installed on the lower portion of a dining room wall adds textural depth and a classic farmhouse architectural detail without covering the entire wall in wood. Expect to pay 300 to 700 dollars in materials for a standard sized dining room, with the cost climbing if you hire installation. This treatment pairs especially well with a simpler painted wall above it.
Paint board and batten in a soft white or warm cream rather than leaving it in raw wood, since the painted finish reads as more classically farmhouse and creates a cleaner contrast with the room’s furniture. Choose a durable, washable paint finish specifically for this application, since a dining room wall sees more contact and occasional splashes than most other rooms. A satin or semi gloss finish handles this better than a flat paint would.
The painted board and batten will develop a soft matte texture across the surface within the first year or two of normal room use and cleaning. This gradual textured change in the paint’s original sheen is expected for painted wood trim and does not affect its structural integrity. A touch up kit matched to your paint color keeps high traffic areas looking fresh between full repaints.
Choosing Batten Spacing For Your Room Size
Wider spacing between vertical batten strips suits a larger dining room, while tighter spacing suits a smaller room since the more frequent vertical lines can make a compact space feel taller. Measure your specific wall dimensions and sketch a few spacing options before committing to a final layout. This planning step matters more to the finished look than most people initially expect.
Confirm your chosen batten height coordinates well with any chair rail or existing trim already in the room, since a mismatched height between new and existing trim elements looks unintentional rather than deliberately layered. Measure existing trim heights before finalizing the new installation plan. This coordination step matters more to the finished look than the batten spacing itself.
7. Woven Jute Or Sisal Area Rug
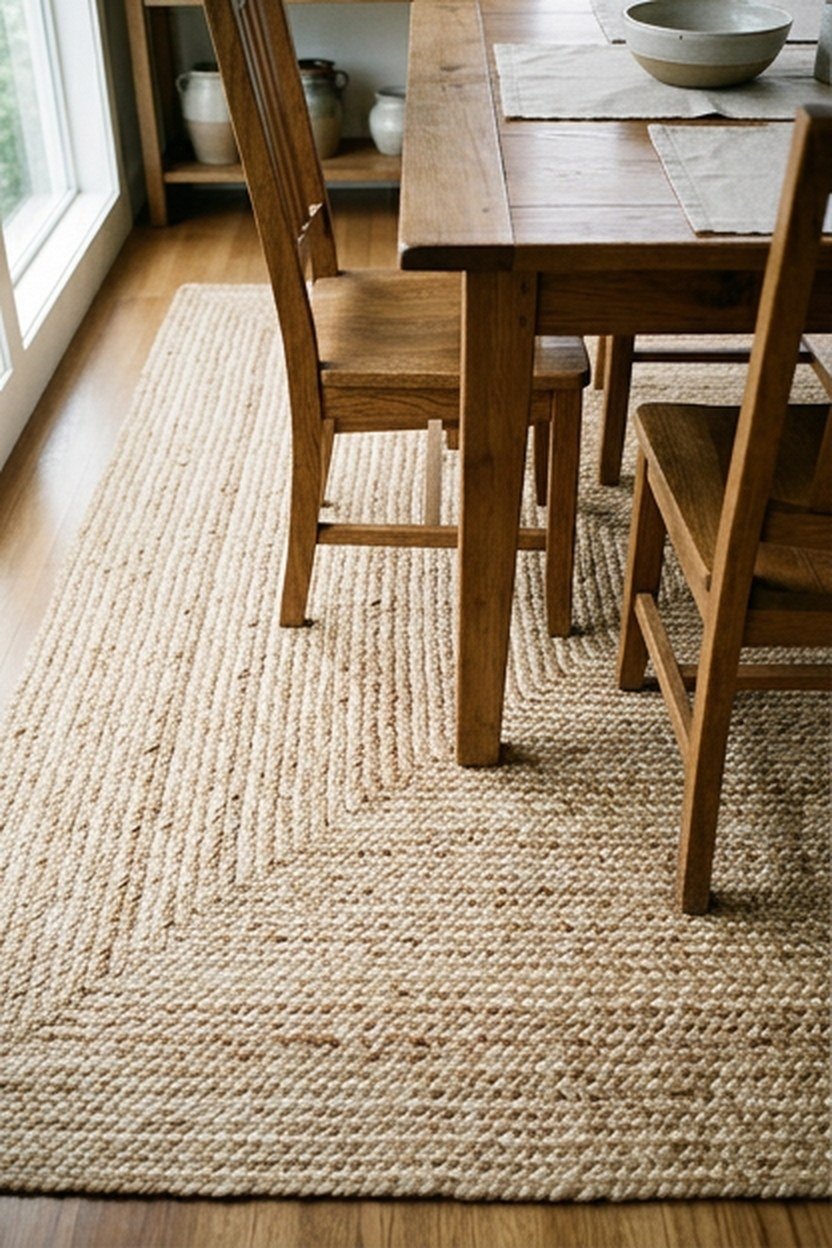
A woven jute or sisal area rug beneath the dining table anchors the seating area and adds genuine natural texture underfoot that a hard floor alone cannot provide. Expect to pay 100 to 250 dollars for a quality rug sized appropriately for your table and chair footprint. This single addition often makes a dining room feel considerably more finished for a relatively modest cost.
Size the rug so all chairs remain fully on the rug even when pulled out from the table, a common styling guideline that prevents chair legs from catching on the rug’s edge during regular use. Measure your table with chairs pulled out, not just the table’s own footprint, before ordering a rug size. This detail matters more for daily usability than most people realize when shopping purely by look.
The natural fiber rug will develop a soft natural fiber texture becoming more pronounced as the material settles and the fibers loosen slightly with regular foot traffic. This gradual textured change is completely normal for jute and sisal rugs under sustained use and many people consider it part of the material’s authentic character. Rotating the rug periodically evens out this wear across the full surface.
Protecting A Natural Fiber Rug From Spills
Choose a rug pad specifically compatible with natural fiber materials, since some rug pads can trap moisture against jute or sisal fibers in a way that encourages mold in a room prone to spills. Address any liquid spill on a natural fiber rug immediately rather than letting it sit, since these materials absorb moisture more readily than synthetic alternatives. A blotting cloth used promptly prevents most spills from becoming a lasting mark.
Consider a smaller, more affordable natural fiber runner under just the table’s center if a full sized rug exceeds your current budget, adding the larger piece later once funds allow. This staged approach still adds real texture underfoot immediately. Most people upgrade to the full sized rug within a year or two.
8. Vintage Style Corbels And Brackets
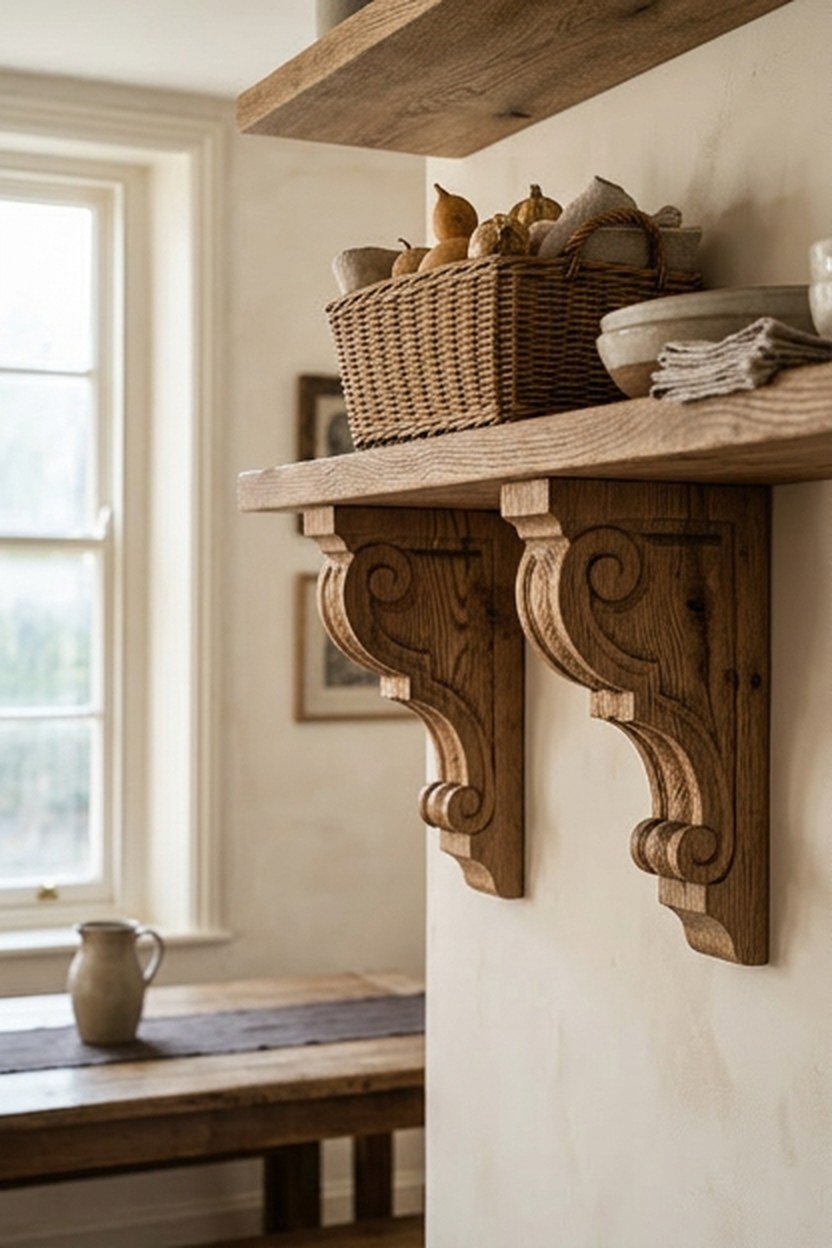
Vintage style wood corbels or brackets, installed as decorative supports beneath open shelving or along a room’s transition points, add small but genuine architectural detail that suits a farmhouse dining room’s overall character. Expect to pay 20 to 60 dollars per corbel depending on size and carving detail. This is one of the more affordable ways to add authentic detail to an otherwise simple room.
Position corbels at genuinely functional support points, like beneath open shelving, rather than as purely decorative additions with no structural role, since a corbel that appears to support nothing can look confusing rather than intentional. Even a lightly functional corbel that provides real, if modest, support reads as more architecturally honest. This detail matters more to a discerning eye than most casual observers might notice consciously.
The corbel’s wood surface will show a visible natural grain pattern becoming more pronounced as the carved details weather and the finish settles into the recessed areas over time. This gradual textured change in the carved detail is normal for wood corbels under typical indoor conditions and adds to their aged, authentic character. A light dusting during regular cleaning keeps the detail work looking its best.
Matching Corbel Style To Your Existing Trim
Choose a corbel carving style that echoes any existing decorative trim elsewhere in your dining room or adjacent rooms, since a corbel style that clashes with your home’s existing millwork can look randomly selected rather than intentionally coordinated. Bring a photo of your existing trim when shopping for corbels to help with this matching process. This small coordination step improves the finished look considerably.
Confirm corbel spacing is even and symmetrical when installing multiple pieces along a single shelf or wall section, since uneven spacing draws more attention to the corbels than their actual design does. Measure and mark spacing on the wall before drilling any holes. This small planning step prevents a visibly uneven result.
9. Galvanized Metal Pendant Or Table Accents
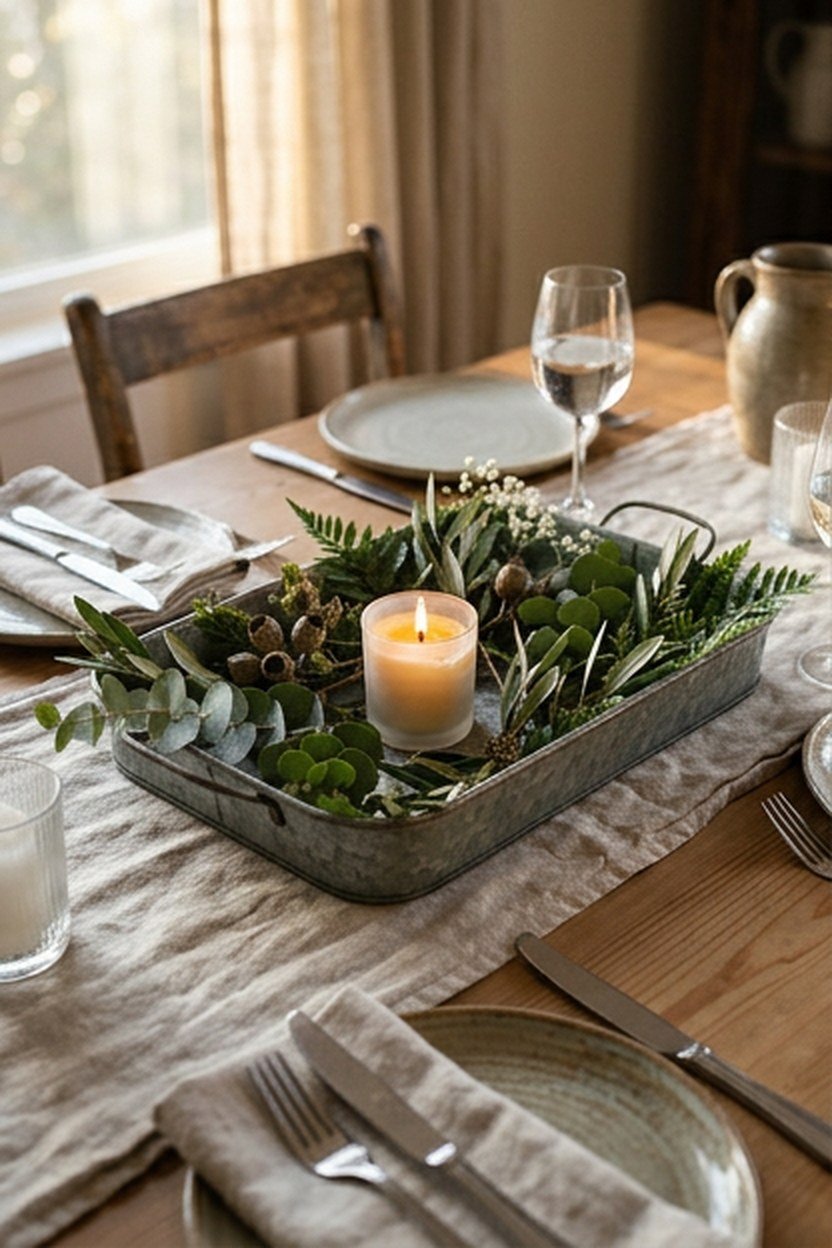
Galvanized metal accents, whether a pendant light fixture, a set of napkin rings, or a centerpiece container, add an industrial farmhouse texture that pairs naturally with wood furniture and warm lighting. These accents typically cost far less than larger structural features, usually 15 to 50 dollars per piece depending on size. This makes galvanized metal one of the easiest entry points into farmhouse style for a limited budget.
Mix galvanized pieces with warmer wood tones and brass or black hardware rather than using galvanized metal throughout the entire room, since an entirely metal palette reads as more industrial than warmly farmhouse. Use galvanized pieces as accents within a warmer overall scheme rather than the room’s dominant material. This balance keeps the room feeling inviting rather than cold.
The galvanized coating will develop a soft natural sheen change across its surface within the first year or two of regular handling and exposure to kitchen adjacent humidity. This gradual textured change in the coating is completely normal and is part of the material’s expected character over time. Genuine galvanized finishes are chosen specifically because they age this way rather than looking simply worn out.
Where Galvanized Metal Fits Best In A Dining Room
Galvanized metal suits functional, smaller scale pieces like a centerpiece tray or table accents better than it suits large furniture pieces like the table itself. Reserve galvanized metal for these accent roles rather than building the entire room’s material palette around it. A little goes a long way toward achieving genuine farmhouse industrial character without tipping into a cold, workshop feeling space.
Pair a galvanized centerpiece specifically with warm candles or fresh greenery, since the combination softens the metal’s inherently cooler visual temperature. This small pairing keeps the accent from feeling cold or overly industrial. Most farmhouse tables benefit from this warm and cool contrast.
10. Vintage Cabinet Or Hutch For Dish Storage
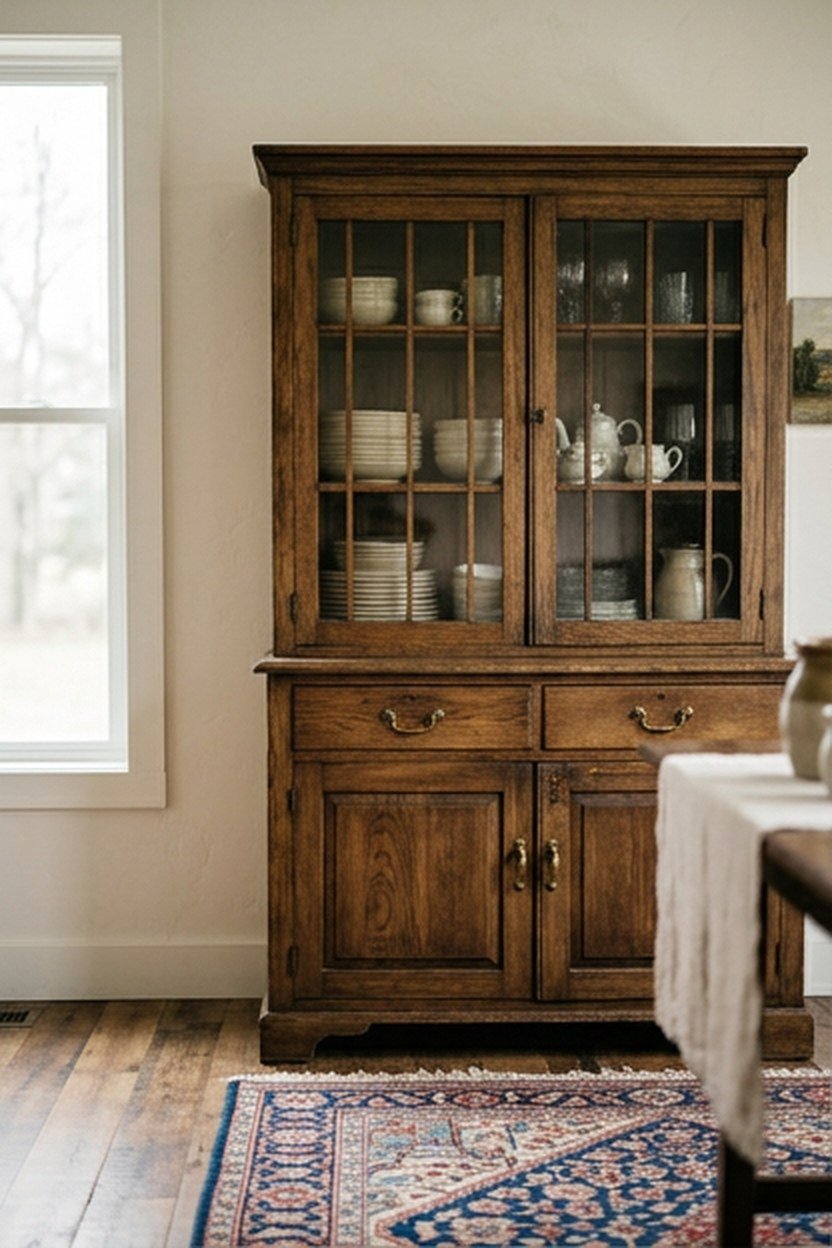
A vintage or vintage style wood cabinet or hutch provides genuine storage for dishware and linens while adding a substantial farmhouse focal point along one dining room wall. Expect to pay 400 to 1200 dollars for a quality piece depending on size and whether it is a genuine antique or a new piece built in a similar style. This piece often becomes the room’s second major furniture investment after the table itself.
Measure the cabinet’s full footprint, including any door swing clearance, against your room’s actual available wall space before committing to a specific piece. A beautiful hutch that blocks a doorway or crowds the table’s chair clearance creates daily friction regardless of how well it matches your style. Bring exact measurements when shopping rather than estimating by eye.
The cabinet’s wood surface will show a visible natural grain pattern becoming more pronounced over years of use, particularly around handles and any surface where items are regularly set down or slid across. This gradual textured change is a normal characteristic of wood furniture under sustained household use and adds genuine character to a piece meant to last generations. Regular waxing or oiling maintains the wood’s protective finish despite this natural change.
Antique Versus New Reproduction Cabinets
A genuine antique cabinet carries real history and often superior original construction, but can come with structural quirks or repairs that a new reproduction piece would not have. A new reproduction piece built in a similar style offers more predictable structural reliability at a often lower price point than a comparable antique. Weigh authenticity against practical reliability honestly based on your own priorities for this piece.
Inspect any antique cabinet closely for structural stability, particularly at joints and hinges, before purchasing, since decades of use can weaken original hardware even on an otherwise beautiful piece. Open and close every door and drawer before committing to the purchase. A piece with loose joints may still be worth buying, but the price should reflect the needed repair.
11. Woven Rattan Or Cane Chair Accents
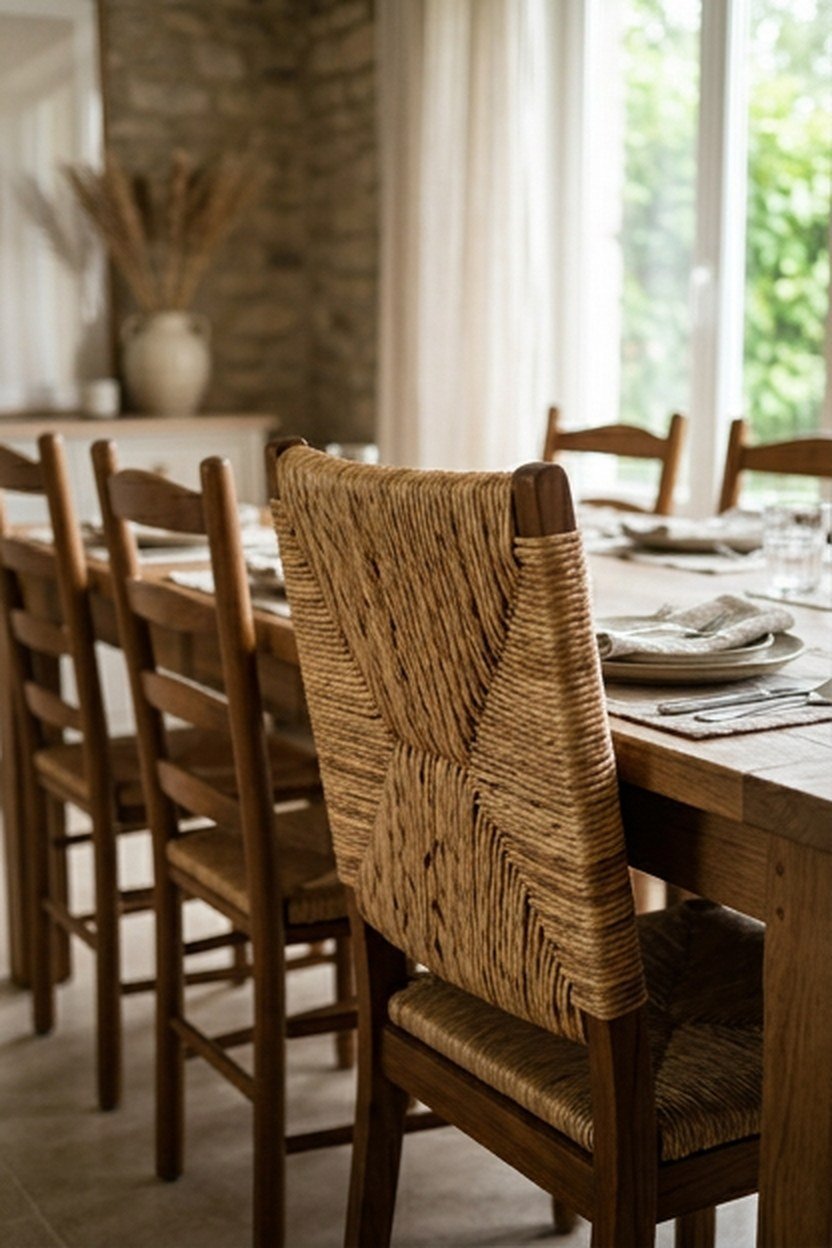
Incorporating one or two woven rattan or cane back chairs into an otherwise wood dining set adds textural variety that pure wood seating cannot achieve on its own. Expect to pay 100 to 220 dollars per rattan chair, typically used at the table’s head positions rather than throughout the full set. This mixing approach works particularly well for a farmhouse room wanting a slightly more relaxed, collected over time feeling.
Position rattan chairs at the table ends specifically, both for practical reasons since these seats often see less frequent daily use, and for visual reasons since this placement reads as intentional rather than randomly mismatched. This positioning convention is worth following even if you personally prefer the rattan chairs’ comfort for regular use. A slight departure from this convention still works as long as the overall effect reads as deliberate.
The woven rattan will develop a soft natural fiber texture becoming more visible as the material ages and the weave settles slightly with regular use. This gradual textured change is completely normal for natural woven materials and actually adds to the authentic farmhouse character many people specifically want. A humidity controlled environment slows this change if you want to preserve a crisper original appearance longer.
Rattan Chair Durability For Daily Dining Use
Genuine rattan holds up well to years of regular seating use when kept in a stable indoor environment away from direct heat sources or excessive humidity swings. Check any rattan chair’s joints and weave for visible looseness before purchasing, particularly on a secondhand or vintage piece where prior wear may already be present. A well made rattan chair genuinely lasts for many years of regular family meals.
Avoid placing a rattan chair directly beside a heating vent or in direct strong sunlight, since both conditions accelerate the material’s drying and potential cracking over time. Choose a spot with more moderate, indirect exposure whenever your layout allows it. This small placement choice noticeably extends the chair’s usable life.
12. Farmhouse Style Beadboard Ceiling
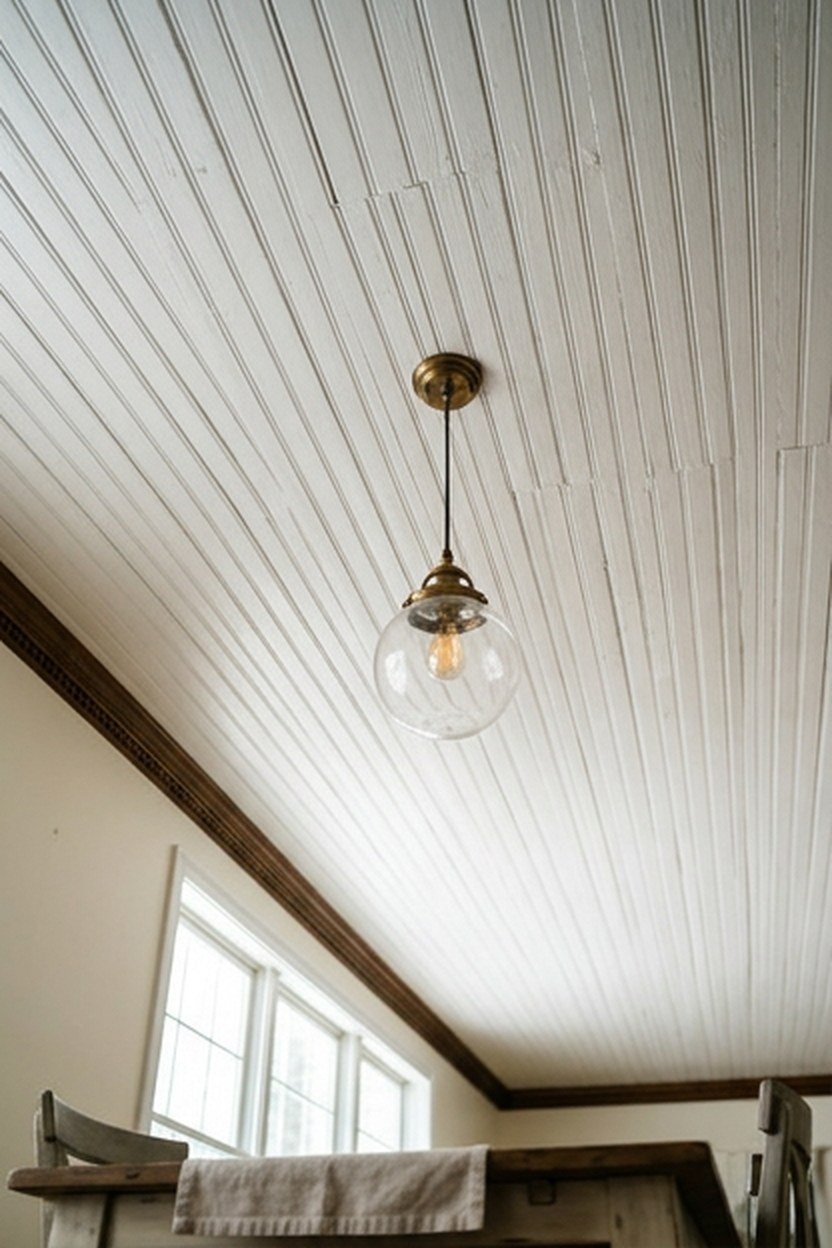
A beadboard ceiling treatment, applied across the entire dining room ceiling rather than just the walls, brings a classic farmhouse texture that most rooms overlook entirely. Expect to pay 400 to 900 dollars in materials for a standard sized dining room ceiling, with installation cost climbing further if hired out. This treatment works especially well in a room with otherwise plain, featureless ceiling space.
Paint beadboard ceiling in a soft white or a very pale complementary tone rather than a stark bright white, since a slightly warmer white reads as more cohesively farmhouse against wood furniture below. A ceiling this close to eye level in a dining room deserves the same finish consideration as a wall would receive. Test your chosen paint color on an actual ceiling sample before committing to the full installation.
The painted beadboard will show a soft matte texture developing in the grooved detail between boards as dust and normal household use settle into these recessed areas over time. This gradual textured change is completely normal for beadboard under regular conditions and cleaning does not remove the underlying grooved texture entirely. Occasional dusting with a soft brush attachment keeps the ceiling looking its best between deeper cleanings.
Lighting Considerations With A Beadboard Ceiling
Confirm any existing or planned ceiling light fixtures can be properly cut into or mounted onto beadboard paneling before installation, since retrofitting an installed beadboard ceiling for new electrical work is considerably more difficult than planning for it upfront. Coordinate your electrician and your beadboard installer’s timelines if both trades are involved in the project. This coordination prevents a costly rework after the ceiling is already finished.
Consider whether a beadboard ceiling’s grooved texture will show shadow lines differently under your planned light fixture compared to a flat ceiling, since this subtle effect is worth seeing in person before committing to a specific fixture style. A temporary bulb test before final installation reveals this effect cheaply. Most people find the added shadow texture adds rather than detracts from the room.
13. Distressed Wood Buffet Or Sideboard
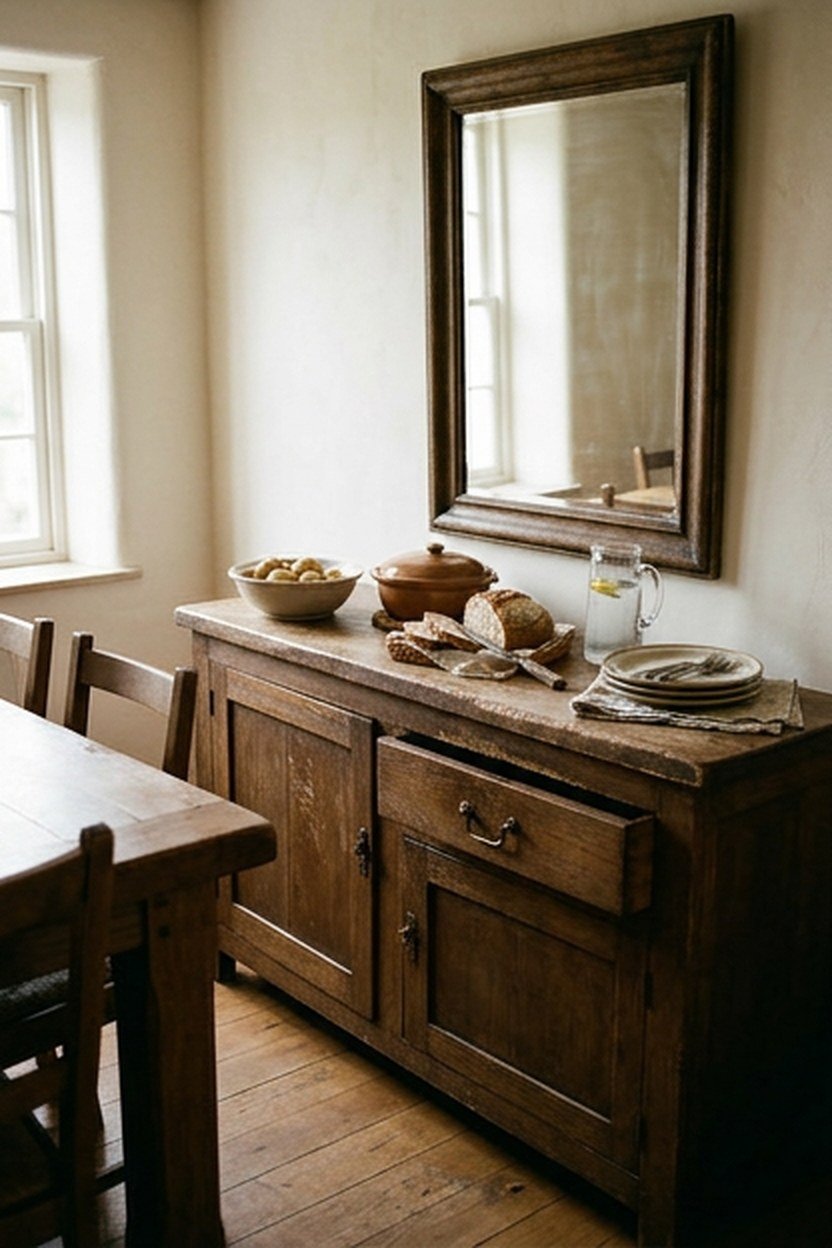
A distressed wood buffet or sideboard positioned along one dining room wall provides serving surface and storage for a formal meal while adding genuine farmhouse character through its worn, characterful finish. Expect to pay 350 to 900 dollars depending on size and construction quality. This piece works especially well positioned opposite the table, giving the room a natural secondary focal point.
Choose a buffet with genuine solid wood construction rather than a veneer over particleboard, since a piece meant to display this much visible surface texture benefits from material that ages authentically rather than peeling or chipping at a veneer edge. Ask specifically about construction material when shopping, since this detail is not always obvious from a photo alone. This distinction matters more for a piece with an intentionally distressed finish than for a smoothly painted one.
The buffet’s surface will show its natural grain pattern becoming more pronounced at the top surface where dishes and serving pieces are regularly set down and slid across during use. This gradual textured change adds to rather than detracts from a piece specifically chosen for its distressed, lived in character. Regular waxing protects the surface while allowing this natural aging to continue.
Sizing A Buffet For Your Dining Room Layout
Measure the wall space where you intend to place a buffet, including clearance for any nearby doorways or the table’s own chair clearance when pulled out, before ordering a specific size. A buffet that crowds the table’s usable seating clearance creates daily friction regardless of how well it matches your style. Bring exact wall measurements when shopping rather than estimating.
Consider a buffet with adjustable interior shelving if you plan to store items of varying heights, since fixed shelving sometimes wastes vertical space that adjustable shelves could use more efficiently. Check this feature specifically if you plan to store tall serving pieces or platters. This small spec detail affects daily usability more than the buffet’s outward style.
14. Woven Textile Table Runner And Napkins
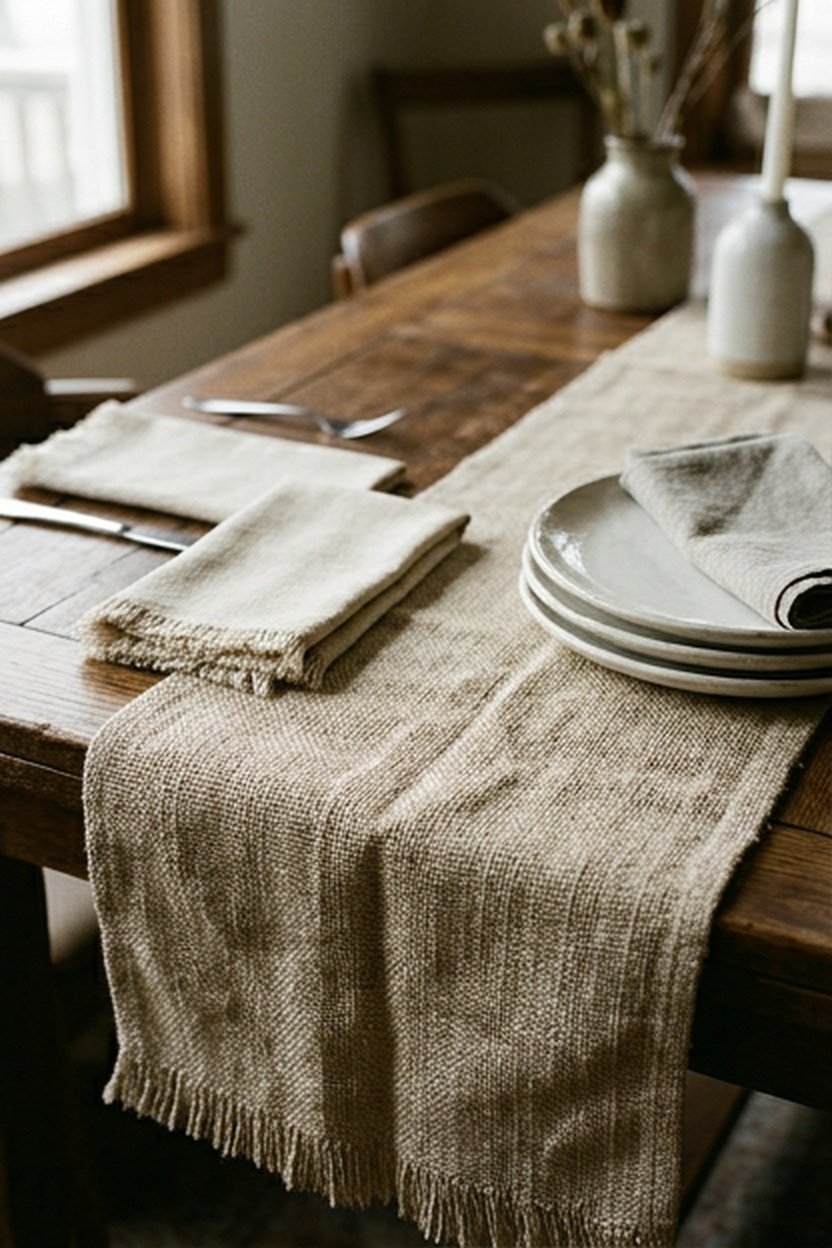
A woven textile table runner paired with matching or coordinating cloth napkins adds soft texture to the table’s hard wood surface and elevates even an everyday meal with a small styling touch. Expect to pay 20 to 50 dollars for a quality table runner and a set of six to eight cloth napkins. This is one of the lowest cost ideas on this entire list and one of the easiest to update seasonally.
Choose a natural fiber like linen or a cotton blend rather than a synthetic fabric, since natural fibers develop a softer hand and more authentic drape over repeated washing that suits the farmhouse aesthetic particularly well. I have a small rotation of runners in different seasonal colors that I swap throughout the year, which keeps the table feeling fresh without needing much storage space. This rotation approach works on almost any budget level.
The linen fabric will develop a soft natural fiber texture becoming more pronounced after repeated washing, the fibers softening and the weave relaxing slightly with each wash cycle. This gradual textured change is completely normal for linen and cotton blends and many people specifically prefer this softened texture over a crisp, unwashed feel. Proper laundering according to the fabric’s care label maintains both the color and the texture over many years of use.
Building A Seasonal Table Linen Rotation
Store off season table linens folded flat in a drawer or a dedicated linen closet shelf rather than crumpled in storage, since deep creasing from improper storage takes longer to smooth out than the fabric’s natural gradual softening does. A few minutes of proper folding extends how fresh each piece looks when it returns to regular use. This small habit keeps a linen rotation looking intentional rather than tired.
Buy napkins in a slightly larger size than the bare minimum if you entertain often, since a genuinely functional napkin size gets used and appreciated more than an overly small decorative one. Guests notice and appreciate this small practical upgrade more than a purely decorative choice. A slightly larger napkin costs little extra but sees more actual use.
15. Fresh Greenery Or A Simple Herb Centerpiece
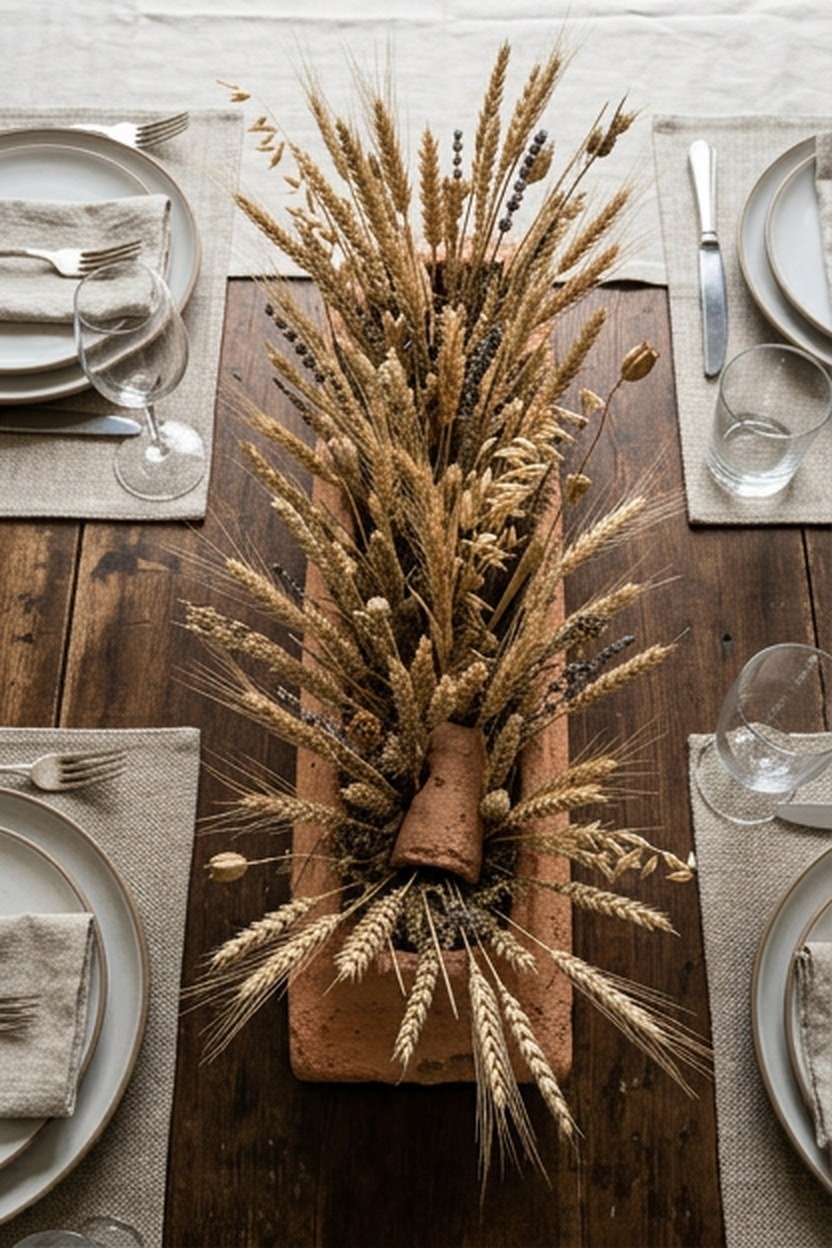
A simple centerpiece of fresh greenery, dried wheat stalks, or a small potted herb brings a genuinely lived in, welcoming touch to the table that a purely decorative object cannot match. This is the lowest cost idea on the entire list, often just the price of a small bundle of greenery or a modest herb plant. The detail makes a noticeable difference in how inviting the table feels for both everyday meals and guests.
Choose a centerpiece height that does not block sightlines across the table when everyone is seated, since a tall arrangement can make conversation feel obstructed regardless of how nice it looks standing alone. A low, spreading arrangement or a few smaller matched containers spaced along the table’s length usually works better than one tall central piece. This practical consideration matters more than the centerpiece’s specific style.
The ceramic or terra cotta container holding a centerpiece will develop a natural fiber texture on its surface from regular watering and ambient household humidity over time. This textured surface change is a normal characteristic of unglazed ceramic and terra cotta under consistent moisture exposure and many people consider it an attractive, well loved appearance. A glazed container shows less of this specific change if you prefer a more consistent surface look.
Rotating A Seasonal Centerpiece Through The Year
Keep a small rotation of centerpiece elements suited to different seasons, fresh flowers in spring and summer, dried wheat or gourds in fall, greenery in winter, rather than committing to one fixed arrangement year round. This rotation keeps the table feeling current without needing an entirely new set of dining decor each season. A small storage box for off season centerpiece elements keeps this rotation manageable.
Water any living centerpiece plant according to its specific care needs rather than a generic schedule, since overwatering on a dining table without proper drainage is a common and avoidable cause of a shortened plant lifespan. Check the soil with a finger before watering rather than following a fixed routine. This small habit noticeably extends how long a centerpiece plant stays healthy.
What A Rustic Farmhouse Dining Room Actually Costs
A complete rustic farmhouse dining room can range from under 1500 dollars for a modest table, chair set, and a few accent pieces to 4000 dollars or more including a hutch, custom lighting, and ceiling treatments. Most homeowners land somewhere in the middle, prioritizing the table and seating first before adding architectural and accent features over time. Prioritize the features that address your room’s specific gaps rather than following this list in strict order.
Spread larger investments like a hutch or ceiling treatment across a longer timeline if the full cost feels like a stretch, starting with the table, chairs, and lighting for the most immediate functional and visual impact. I built my own dining room this way, starting with table and chairs before adding the beadboard ceiling and hutch over the following two years. This phased approach let the room improve steadily without one overwhelming expense.
The table below breaks down rough cost tiers for a rustic farmhouse dining room project, acknowledging that regional material and labor costs shift these numbers somewhat. Treat it as a planning starting point rather than a firm quote for your specific project. Most homeowners land in the middle tier once seating and lighting are both included.
| Budget tier | What it covers | Approach |
|---|---|---|
| Under $1500 | Table, chairs, lighting, small accents | Core furniture and fixtures |
| $1500 to $3000 | Rug, shelving, wall treatment | Adds architectural detail |
| $3000 and up | Hutch, ceiling treatment, custom pieces | Full room transformation |
Common Mistakes When Designing A Rustic Farmhouse Dining Room
Combining too many rustic features at once, distressed wood, galvanized metal, exposed beams, and a heavily patterned rug all in one modest room, is the most common mistake and the one that tips a genuine farmhouse look into looking cluttered rather than warm. A restrained approach using two or three strong features paired with simpler supporting choices almost always reads as more intentional. Pick your strongest features and let them stand out.
Prioritizing rustic looks over genuine seating comfort is the second frequent mistake, since a dining room ultimately needs to host real meals lasting an hour or more. Test chair comfort before committing to a full set rather than choosing purely on visual appeal. A beautiful but genuinely uncomfortable chair undermines the room’s actual function regardless of how well it photographs.
Underestimating how much daily wear a dining room’s finishes will see compared to a purely decorative room is the third mistake, leading people to choose delicate finishes poorly suited to regular spills and heavy use. This room handles food, drink, and constant furniture movement, so prioritize durability alongside style in every material decision. A gorgeous finish that cannot handle daily dining conditions will not stay gorgeous for long.
Testing A Full Room Layout Before Committing
Arrange furniture with painter’s tape marking key footprints on the floor before any large purchase arrives, confirming chairs pull out fully and traffic paths around the table stay clear. This simple test catches a spacing problem while it is still cheap to correct rather than after delivery. A few minutes with tape and a tape measure prevents a costly furniture return.
Live with a partial room setup for a week or two before finalizing smaller accent purchases, since seeing the major furniture pieces in place first often clarifies what the room genuinely still needs. This patience often saves money on accents that would not have suited the finished room. A slower approach usually produces a more cohesive final result.
Conclusion
Building a rustic farmhouse dining room comes down to choosing durable, characterful materials and applying them with restraint, prioritizing the table, seating, and lighting before layering in smaller accent features. Start with the features that address your room’s specific gaps, whether that is storage, seating comfort, or visual warmth, and build outward as budget allows. The fifteen features covered here scale from an affordable core setup up to a fully finished, multi element room.
Prioritize genuine comfort and durability alongside style in every decision, since a dining room’s daily use will test every choice you make over the years. A well planned rustic farmhouse dining room rewards a family with a genuinely warm gathering space for decades of meals to come. Get the fundamentals right, and the room will keep earning its place at the center of family life.
Frequently Asked Questions
How much does a full rustic farmhouse dining room typically cost? A modest setup with a table, chairs, and lighting can come together for under 1500 dollars. A more complete room including a hutch and ceiling treatment can run 3000 to 4000 dollars or more.
What is the single most important feature to prioritize first? The dining table is almost always worth prioritizing first, since it anchors the room both visually and functionally. Chairs and lighting come next in most budgets.
Can I achieve a farmhouse look with furniture I already own? Yes, adding a few key features like a woven rug, updated lighting, or open shelving can shift an existing room toward farmhouse character without replacing every piece of furniture. Focus on the features that create the most visual impact for your specific starting point.
Is reclaimed wood significantly more expensive than new wood furniture? Genuine reclaimed wood typically costs somewhat more than comparable new wood furniture due to the sourcing and preparation involved. Many people consider the added character worth this premium, though a well made new piece in a similar style achieves a similar look at a lower cost.
How do I keep a farmhouse dining room from looking cluttered? Choose two or three strong rustic features rather than combining every idea from this list at once. A restrained, curated approach consistently reads as more intentional than a room packed with competing details.
What is the most budget friendly way to start a farmhouse dining room refresh? A table runner, cloth napkins, and a simple greenery centerpiece deliver real visual impact for under fifty dollars combined. This is a genuine starting point before committing to larger furniture investments.