
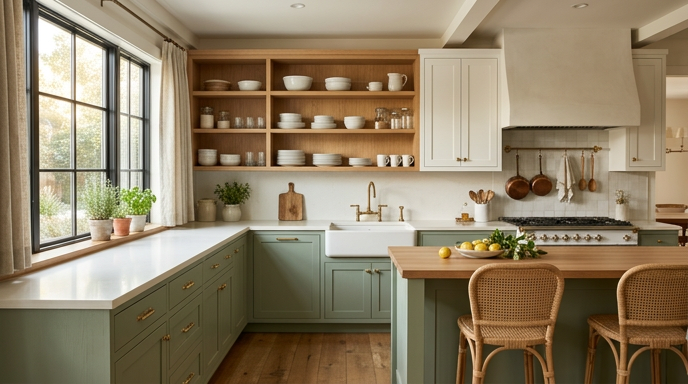
Sage green is replacing all white as the default modern farmhouse kitchen color, and the shift makes real sense once you see it in a finished room. The muted, grayed green reads as warm and lived in rather than clinical, while still keeping the light, airy feeling that made all white farmhouse kitchens popular. I have specced sage green kitchens for two clients who both started convinced they wanted white, and both ended up thanking me for pushing the color instead.
This guide covers fifteen specific ways sage green shows up in a modern farmhouse kitchen, what each one actually costs, and where the color choice can go wrong if paired badly. Expect honest notes about lighting, material pairing, and the small details that separate a genuinely considered sage green kitchen from one that reads as trend chasing. By the end you will have a real plan for using this color well in your own space.
Sage green is forgiving but not foolproof, and the wrong undertone or the wrong pairing can push it toward looking dated or muddy rather than fresh. I will flag these pairing risks directly throughout this guide. The best sage green kitchens treat the color as a considered choice, not a trend applied without thought.
Why Sage Green Is Replacing All White In Farmhouse Kitchens
All white farmhouse kitchens dominated for years because white reads as clean and timeless, but an entirely white kitchen can also feel cold and clinical in the wrong light, and it shows every mark and scuff immediately. Sage green solves both problems at once, since the muted green tone still feels light and fresh while hiding daily wear far better than a stark white surface would. This practical advantage is a real driver behind the color’s rising popularity, not just aesthetic preference alone.
The color also pairs more naturally with the wood tones and natural materials that define modern farmhouse style than pure white does, since sage green sits closer to wood on the color wheel and creates a more harmonious palette overall. This natural pairing is why sage green cabinets or walls often look like they belong in a farmhouse kitchen in a way white sometimes has to work harder to achieve. Few colors bridge the gap between clean and warm as effectively.
The table below compares sage green against all white and a warm cream palette on the factors that matter most for a modern farmhouse kitchen specifically. None of the three is objectively better, since the right pick depends on your lighting and existing materials. Use it as a starting point before reading the planning section that follows.
| Factor | Sage green | All white | Warm cream |
|---|---|---|---|
| Hides daily marks and scuffs | Strong | Weak, shows every mark | Moderate |
| Pairs naturally with wood tones | Strong | Moderate | Strong |
| Feels current rather than dated | Strong right now | Timeless but can feel cold | Timeless, warm |
Planning A Sage Green Kitchen Before You Commit
Test your specific sage green paint or cabinet sample in your actual kitchen’s lighting at different times of day, since this color shifts noticeably between warm morning light and cooler evening light in a way some other colors do not. A sage green that looks perfectly balanced at noon can read more gray or more yellow at other times of day. I always bring at least three different sage green swatches into a client’s actual kitchen before finalizing one.
Consider your kitchen’s existing countertop and flooring materials before committing to sage green cabinets or walls, since the color needs to coordinate with whatever permanent surfaces are already in place. A sage green that clashes with an existing warm wood floor or a cool gray countertop creates an unintentional color conflict. Bring your actual material samples together in the room before finalizing a specific sage green shade.
Set a realistic budget and timeline for how much of the kitchen will actually change color, since sage green can be introduced through a full cabinet repaint or through smaller accents like a backsplash tile or an island alone. Both approaches achieve genuine sage green character, so match your plan to what you can actually spend and how permanent a change you want. The ideas below are ordered roughly from smaller accents to larger commitments.
1. Sage Green Painted Lower Cabinets With White Uppers
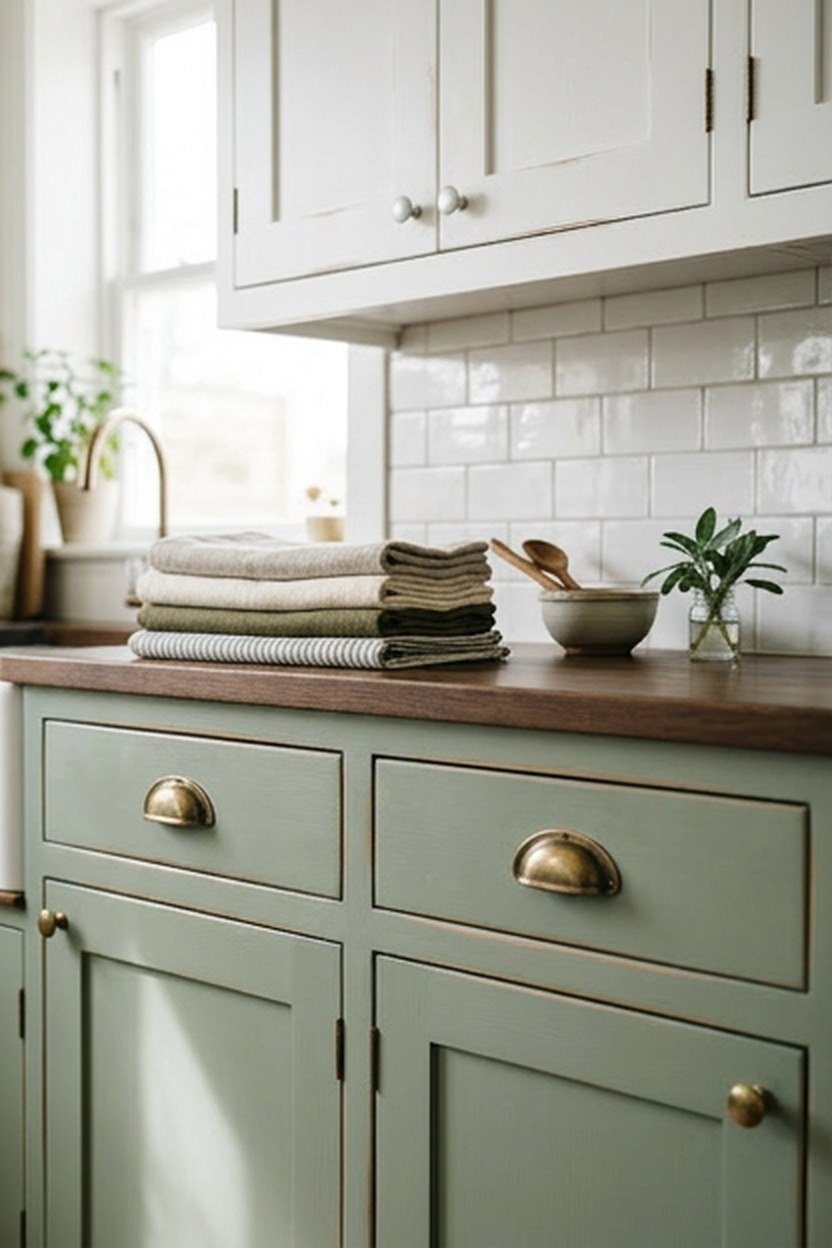
Painting only the lower cabinets in sage green while keeping upper cabinets white is one of the most popular and most balanced ways to introduce the color without committing to an entirely green kitchen. Expect to pay 800 to 2000 dollars for a professional cabinet repaint of this scope, or considerably less if painting the lowers yourself. This two tone approach keeps the kitchen feeling light while still delivering genuine sage green character.
Choose a slightly deeper sage shade for lower cabinets than you might use on walls, since lower cabinets see more visual weight and benefit from a richer tone to properly ground the room. Keep upper cabinets in a crisp white or off white to maintain the airy, open feeling that makes this two tone approach work so well. This contrast between upper and lower cabinet tones is what gives the kitchen its balanced, considered look.
The painted sage cabinets will develop a soft matte texture across the surface within the first year or two of normal kitchen use and cleaning. This gradual textured change in the paint’s original sheen is expected for painted cabinetry in a kitchen environment and does not affect the cabinets’ structural integrity. A durable cabinet grade paint specifically formulated for kitchen use slows this change considerably compared to a standard wall paint.
Choosing Paint Finish For Kitchen Cabinets
A satin or semi gloss finish handles the grease, moisture, and frequent cleaning a kitchen cabinet surface experiences far better than a flat or matte paint finish would. Ask specifically for a cabinet grade or enamel paint rather than standard wall paint when repainting kitchen cabinetry. This distinction in paint type matters considerably for how well the finish holds up to years of daily kitchen use.
Test your chosen sage shade on an actual cabinet door, not just a wall sample, before committing to the full kitchen, since cabinet surfaces reflect light differently than a flat wall does. Paint a full sample door if your supplier offers this service. This small step prevents an expensive mismatch once the full kitchen is repainted.
2. Sage Green Kitchen Island As A Statement Piece
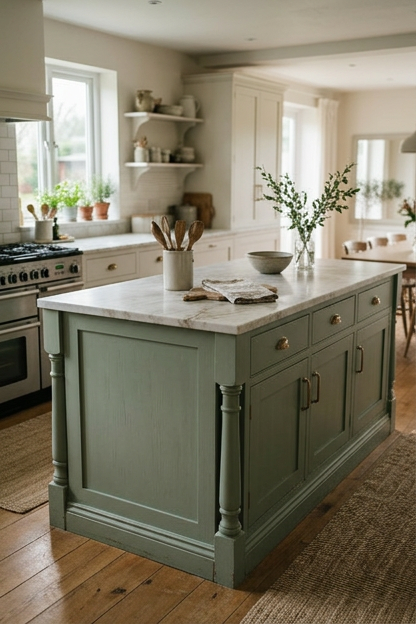
Painting just the kitchen island in sage green while keeping surrounding cabinetry in a neutral tone creates a genuine focal point without repainting the entire kitchen. Expect to pay 300 to 700 dollars for a professional island repaint, making this one of the more affordable ways to introduce the color as a real statement. This approach works particularly well in a kitchen where the island already serves as the room’s natural gathering point.
Choose a sage shade for the island that has enough contrast against surrounding cabinetry to read as an intentional statement rather than a slight, ambiguous color variation. A more saturated or slightly deeper sage tone on the island typically achieves this contrast better than a very pale, close to neutral sage would. Bring your surrounding cabinet color sample when choosing the specific island shade to confirm adequate contrast.
The island’s painted surface will show a soft matte texture developing at the edges and corners where hands and hips make regular contact during cooking and gathering. This gradual textured change at these specific high contact points is normal for painted kitchen furniture under sustained daily use. A durable paint finish and occasional touch ups keep the island looking fresh despite this natural wear pattern.
Coordinating Island Hardware With Sage Green
Brass or aged brass hardware pairs particularly well with sage green, since the warm metal tone complements the color’s muted, slightly warm undertone better than a cool chrome or stainless finish would. Consider swapping island hardware specifically when repainting, even if the rest of the kitchen keeps its existing hardware finish. This small coordination detail elevates the island’s overall impact considerably.
Choose hardware with some texture or a slightly aged character rather than perfectly smooth polished brass, since this pairs more naturally with the rustic, collected over time farmhouse aesthetic. Look for a hammered or brushed finish specifically when shopping for island hardware. This small detail ties the piece more convincingly into the overall farmhouse look.
3. Sage Green Subway Tile Backsplash
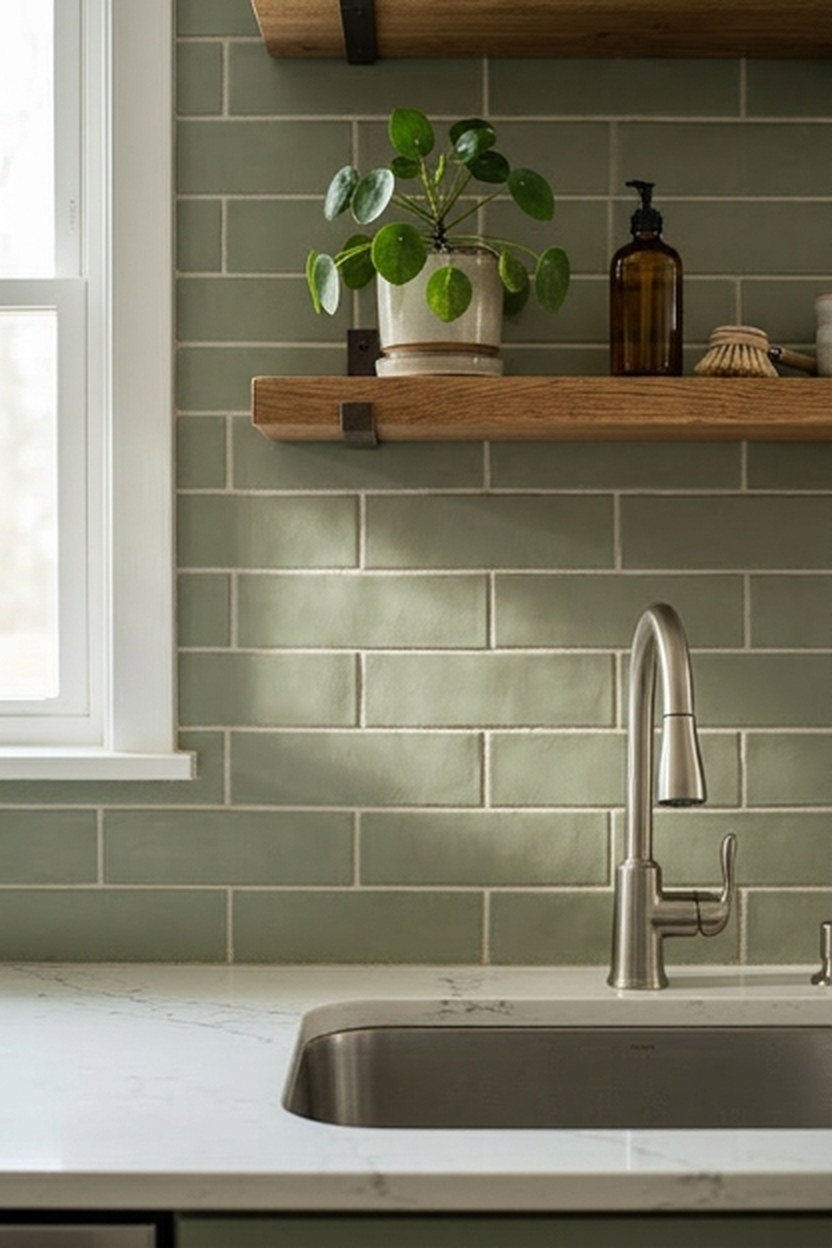
A sage green subway tile backsplash brings the color into the kitchen at eye level, where it gets noticed constantly during actual daily use at the sink and stove. Expect to pay 500 to 1200 dollars for a quality sage green subway tile installation covering a standard kitchen backsplash area. This addition works well whether your cabinets stay white or already carry some sage green elsewhere.
Choose a tile with a slight variation in shade from piece to piece rather than a perfectly uniform color, since this subtle variation reads as more handmade and authentically farmhouse than a flawlessly consistent manufactured tile. Many quality subway tile lines specifically offer this natural variation as a feature. This detail matters more to the finished look than people initially expect from a relatively simple tile pattern.
The tile’s grout lines will develop a soft even darkening in the areas nearest the sink and stove after a couple years of regular cooking splatter and cleaning. This gradual change from cooking residue and cleaning product contact is normal for kitchen grout under sustained use and does not indicate an installation problem. Resealing the grout annually slows this darkening if you want to maintain a fresher look longer.
Choosing Tile Layout Pattern For Sage Green Subway Tile
A classic horizontal running bond pattern suits most farmhouse kitchens and lets the sage green color itself be the visual interest rather than a busy layout pattern competing with it. A herringbone or vertical stack pattern adds more visual complexity if you want the tile layout itself to be a feature. Choose based on whether you want the backsplash to read as a bold statement or a supporting element to other kitchen features.
Confirm your tile installer has experience with your specific chosen layout pattern, since herringbone especially requires more precise cutting and planning than a standard running bond installation. Ask to see photos of a similar completed project before hiring. This small check prevents a disappointing result on a pattern that is harder to execute well.
4. Sage Green Open Shelving With White Dishware
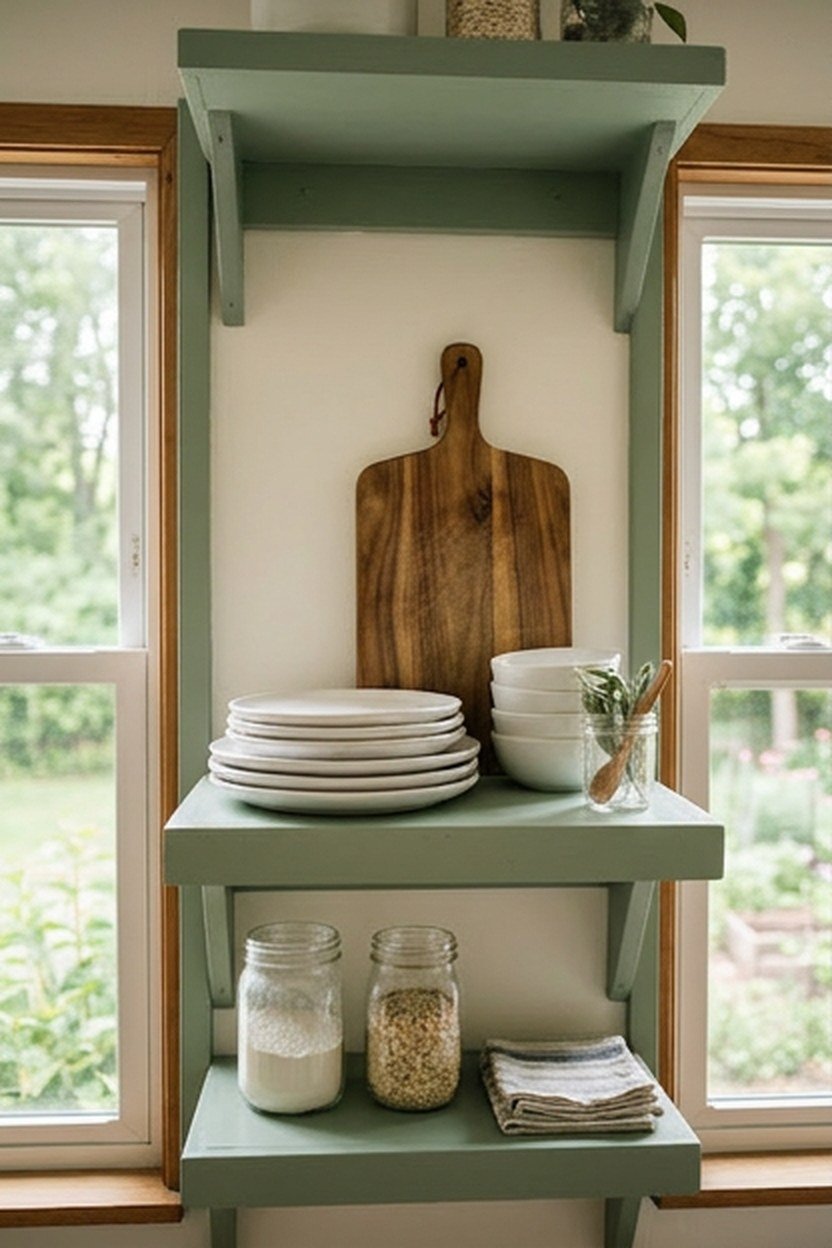
Open shelving painted or built in sage green, displaying white and cream dishware against the colored background, creates a striking but genuinely farmhouse appropriate contrast. Expect to pay 150 to 400 dollars for quality shelving brackets and boards in a sage green finish. This approach also makes everyday dishware feel more curated and intentional rather than simply stored away.
Style shelves with white or cream dishware specifically, since this color contrast against the sage green background is what makes this idea work visually. Add a few wood cutting boards or woven baskets for texture variation without disrupting the core white on sage color contrast. This styling principle matters more than the specific dishware pieces you choose to display.
The sage green shelving will develop a soft matte texture across the surface from dust settling and regular handling of displayed dishware over months of normal use. This gradual textured change is a normal characteristic of painted open shelving under regular use and does not affect its structural function. Regular dusting keeps the display looking intentional rather than neglected.
Weight Considerations For Painted Wood Shelving
Check the weight rating on any shelf bracket before loading it with a genuine stack of dishware, since dishware adds up in weight faster than people expect from looking at it alone. A bracket rated for light decorative use will sag under a fully loaded shelf of stoneware over time. Choose brackets rated at least twice your expected load for a real safety margin.
Anchor shelving brackets into wall studs rather than drywall anchors alone whenever possible, since a kitchen shelf holding genuine dishware carries more sustained weight than a purely decorative shelf elsewhere in the home. A stud finder costs little and removes the guesswork from this step. Skipping it is the most common reason a loaded shelf eventually pulls away from the wall.
5. Sage Green Kitchen Curtains Or Cafe Curtains
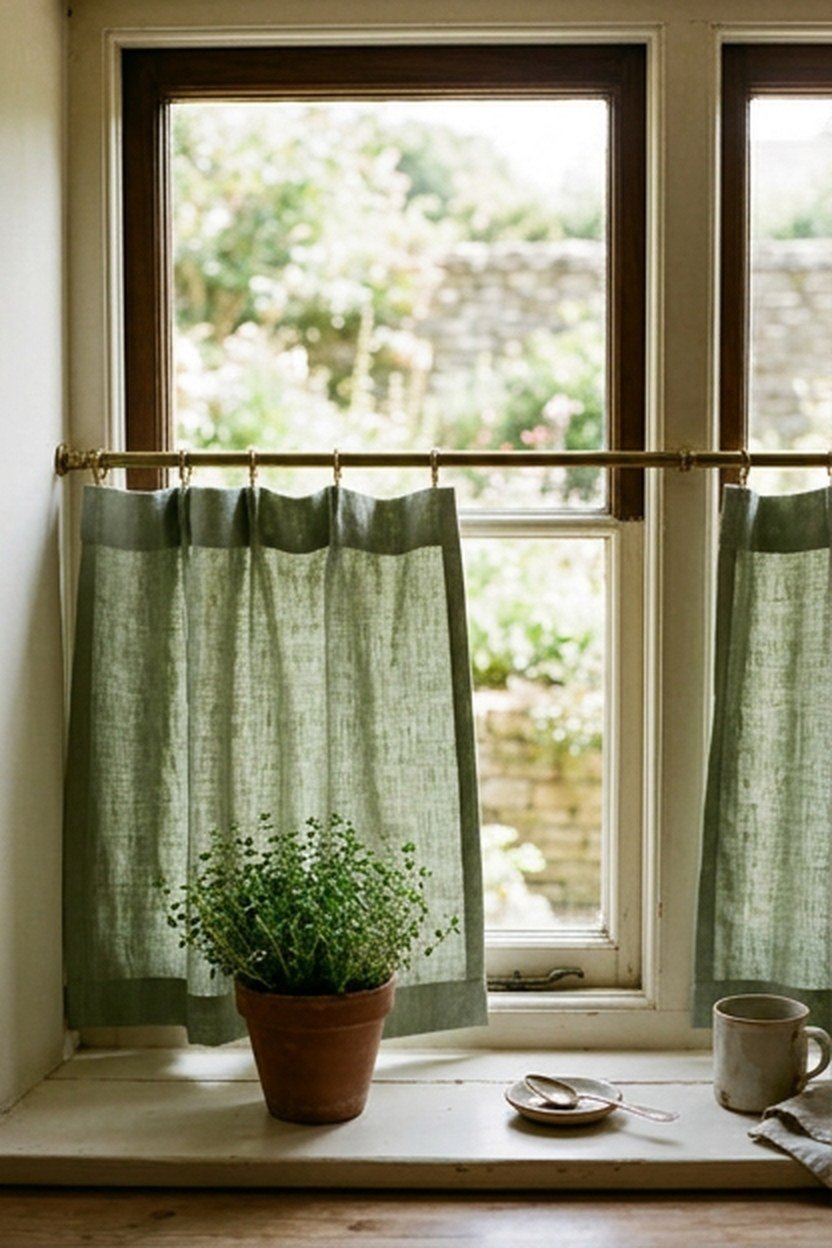
Simple sage green cafe curtains or full length kitchen curtains introduce the color through soft, easily changed textiles rather than a permanent surface commitment. Expect to pay 40 to 100 dollars for quality sage green curtain panels sized for a standard kitchen window. This is one of the lowest cost and most easily reversible ways to test sage green in your kitchen before committing to anything permanent.
Choose a natural fiber like linen or a cotton blend for kitchen curtains specifically, since these materials handle the humidity and occasional grease exposure a kitchen presents better than a delicate synthetic fabric. A slightly textured linen also suits the farmhouse aesthetic better than a smooth, flat fabric would. This material choice matters more in a kitchen than in almost any other room’s window treatments.
The linen fabric will develop a soft natural fiber texture becoming more pronounced after repeated washing, the fibers softening and the weave relaxing slightly with each wash cycle. This gradual textured change is completely normal for linen and many people specifically prefer this softened texture over a crisp, unwashed feel. Regular laundering according to the fabric’s care label maintains both the color and this desirable texture over time.
Choosing Curtain Length For A Kitchen Window
Cafe curtains covering only the lower half of a kitchen window work well above a sink, providing some privacy while still allowing light in from the upper portion of the window. Full length curtains suit a kitchen window without a sink directly beneath it, where the full window can be covered without interfering with daily tasks. Choose based on your specific window’s function within the kitchen layout.
Measure your specific window dimensions carefully before ordering, since a mismatched curtain length looks unintentional regardless of how well the color itself works in the space. Measure twice from the actual rod placement rather than the window frame alone. This small step prevents an awkward, ill fitting final result.
6. Sage Green Range Hood As A Focal Point
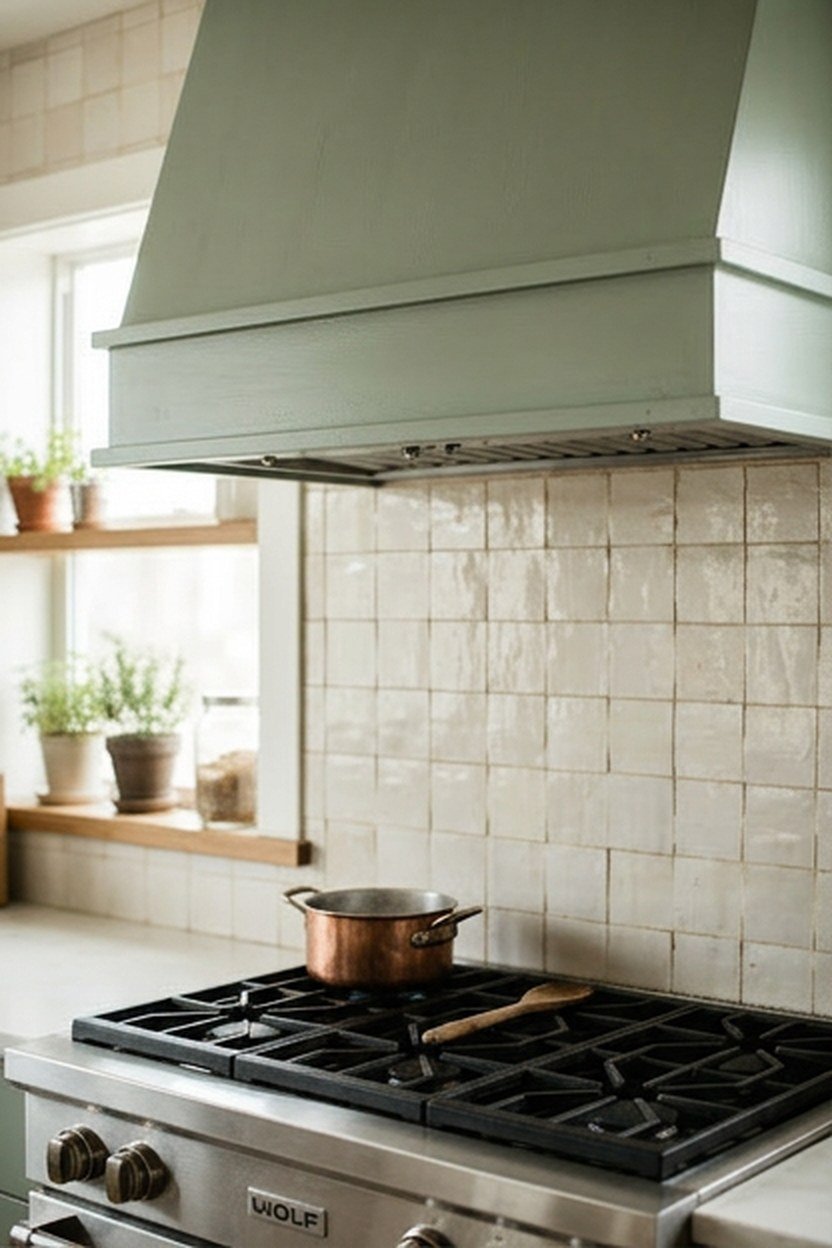
A sage green painted or powder coated range hood turns a typically overlooked kitchen appliance into a genuine design feature. Expect to pay 400 to 900 dollars for a custom painted or powder coated range hood in sage green. This feature works especially well in a kitchen where the range and hood already sit at a natural visual center of the room.
Choose a range hood shape and size proportional to your range and surrounding cabinetry, since a range hood that stands out too much in scale can look disconnected from the rest of the kitchen regardless of how well the color itself works. Confirm the hood’s ventilation capacity meets your actual cooking needs before choosing based on color and style alone. This practical function matters as much as the visual statement the hood makes.
The powder coated or painted surface will develop a soft matte texture change near the edges and corners from heat exposure and regular cleaning over years of use. This gradual textured change is normal for a range hood surface under sustained heat and cleaning exposure and does not affect its ventilation function. A quality finish continues performing its practical role despite this cosmetic surface change.
Heat Resistance For A Painted Range Hood Finish
Confirm any paint or powder coating used on a range hood is specifically rated for the heat exposure a stove generates, since a standard decorative paint not rated for this application can discolor or degrade faster than expected. Ask your fabricator or painter directly about heat rating for this specific application. This detail matters considerably more for a range hood than for almost any other painted kitchen surface.
Consider professional powder coating over hand painting for a range hood specifically, since powder coating typically offers better heat and wear resistance for this demanding application. Ask a local metal fabricator about powder coating services if your hood is metal. This upgrade costs more but pays off in years of added durability.
7. Sage Green Ceramic Or Terra Cotta Accents
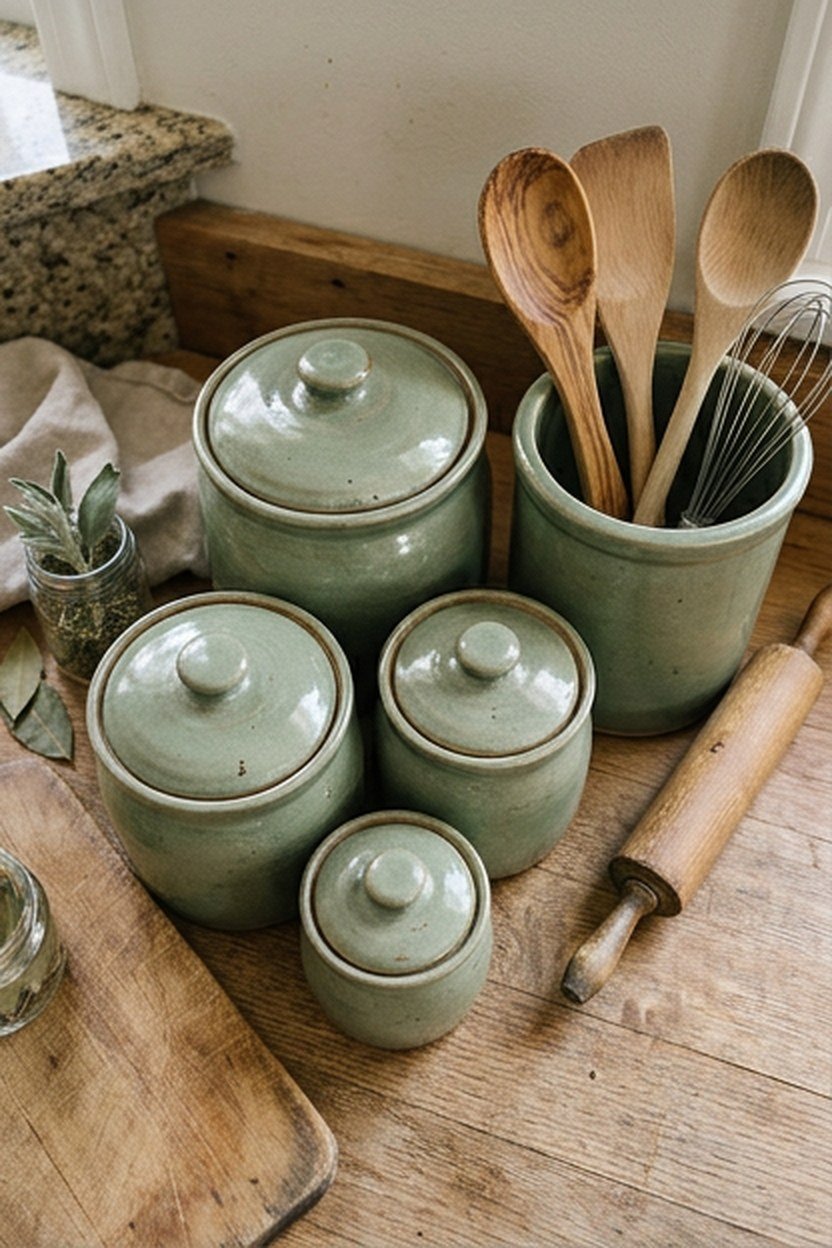
Small sage green ceramic accents, like a utensil crock, a set of canisters, or decorative bowls, introduce the color in an easily changed, low commitment way. Expect to pay 15 to 50 dollars per piece for quality sage green ceramic accents. This approach works well for testing whether you like sage green in your kitchen before committing to a larger, more permanent change.
Group a few sage green ceramic pieces together on a counter or open shelf rather than scattering single pieces throughout the kitchen, since this grouping creates more visual impact than isolated accents would. Mix in a few white or wood toned pieces alongside the sage green ones for the same color contrast principle that works well with open shelving. This grouping approach applies regardless of your total accent budget.
The ceramic surface will develop a soft natural sheen change or a light mineral bloom depending on the specific glaze, from regular handling and any water contact over months of kitchen use. This gradual textured change is a normal characteristic of ceramic accents under regular kitchen use and does not affect their function. Gentle regular cleaning keeps these pieces looking their best.
Building A Sage Green Accent Collection Gradually
Start with two or three sage green accent pieces rather than buying an entire matching set at once, adding more gradually as you confirm the color genuinely works well in your specific kitchen. This gradual approach also naturally creates the collected over time look that suits farmhouse style well. Most people find their accent collection evolves naturally over a year or two of living with the initial pieces.
Mix pieces from different sources rather than buying an entire matching set from one retailer, since slight variation in shade and style among genuinely sage green pieces reads as more authentically collected than a uniform matched set. Shop secondhand or vintage sources alongside new retail pieces for this effect. This mixing approach also tends to be gentler on the overall budget.
8. Sage Green Farmhouse Sink Surround
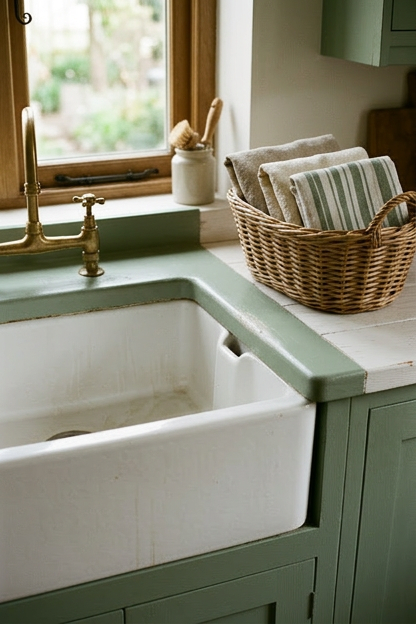
Painting or tiling the surround area directly around a farmhouse apron front sink in sage green creates a framed, intentional look for what is often the kitchen’s visual centerpiece. Expect to pay 200 to 500 dollars for this surround treatment depending on whether you choose paint or tile. This detail works especially well since farmhouse sinks are already a defining feature of the style, making this a natural place to introduce the color.
Choose a treatment that coordinates with your countertop material, since the surround sits in close proximity to this surface and any color clash becomes immediately obvious in this specific location. Bring your countertop sample when choosing the sage green shade for this surround area. This coordination matters more here than for a sage green element positioned further from other fixed materials.
The surround’s painted or tiled surface will develop a soft matte texture change near the sink edge from regular water exposure and cleaning over time. This gradual textured change at this specific high moisture area is normal for a sink surround under sustained daily use and does not indicate a material failure. Proper sealing, if painted, or grout maintenance, if tiled, slows this change considerably.
Waterproofing Considerations Near A Farmhouse Sink
Choose a genuinely water resistant paint or a properly sealed tile installation for a sink surround specifically, since this area experiences more direct water exposure than almost any other painted or tiled surface in the kitchen. Ask specifically about water resistance ratings when selecting materials for this application. This detail matters considerably more here than for a sage green element elsewhere in the kitchen.
Reseal grout or touch up paint in this specific area more frequently than elsewhere in the kitchen, given the concentrated moisture exposure this zone experiences daily. Set a reminder every six months specifically for this maintenance task. This small habit protects the surround from the sink’s daily water exposure.
9. Sage Green Kitchen Table And Chairs
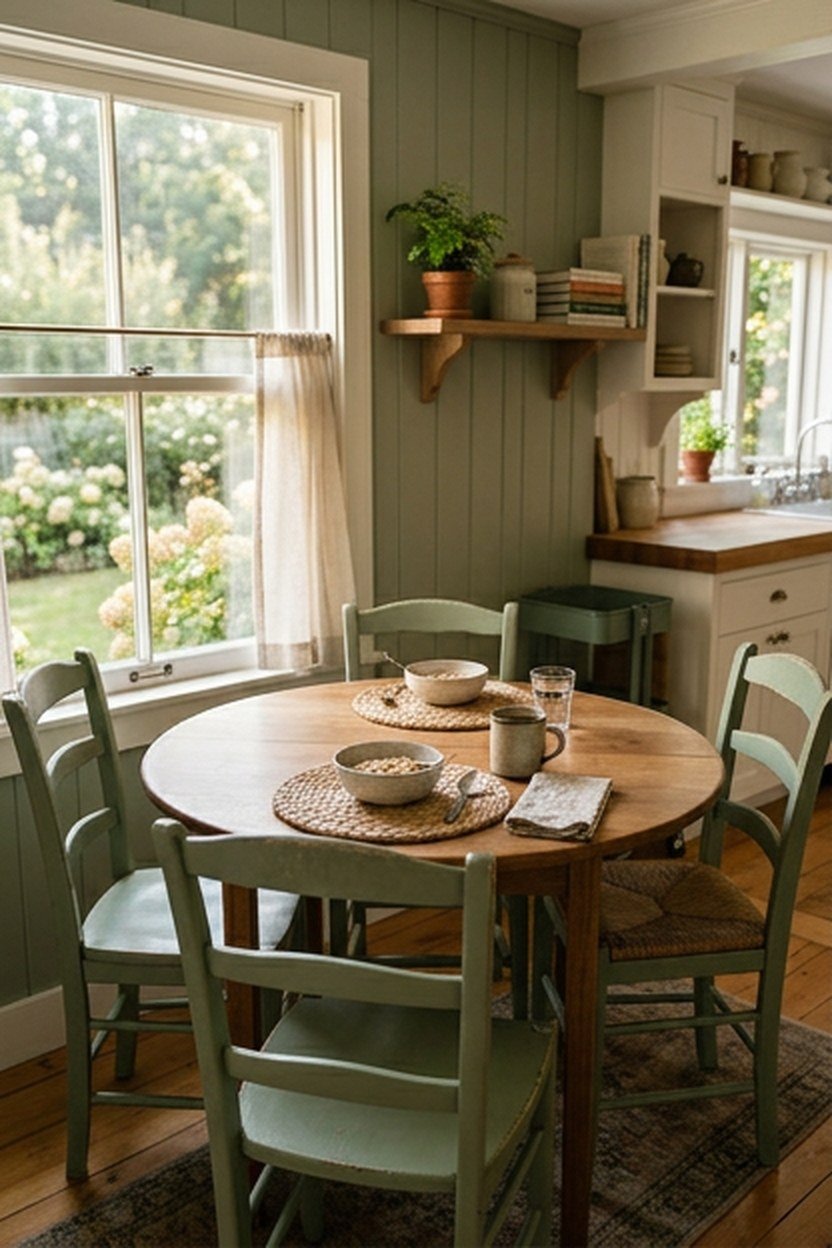
A sage green painted kitchen table, chairs, or both brings the color into an eat-in kitchen’s dining area, extending the palette beyond just cabinetry and surfaces. Expect to pay 300 to 800 dollars for a quality sage green painted table and chair set, or considerably less if repainting furniture you already own. This addition works especially well in a kitchen with a dedicated eating nook or breakfast area.
Choose a slightly different sage shade for furniture than your cabinetry, rather than an exact match, since this variation reads as more intentionally layered and collected than an overly matched, showroom coordinated look. Consider painting just the chairs while leaving a wood table top, or vice versa, for a mixed material approach that suits farmhouse style particularly well. This mixing principle applies to furniture just as it does to smaller accents.
The painted furniture will develop a soft matte texture at the highest contact points, like chair seat edges and table corners, from years of regular daily use. This gradual textured change at these specific contact points is normal for painted furniture under sustained use and does not affect structural integrity. Touch up paint matched to your specific shade keeps high contact areas looking fresh between full repaints.
Choosing Paint Durability For Dining Furniture
A dining table and chairs see more direct contact and potential spills than most other painted kitchen surfaces, so choose a genuinely durable furniture grade paint rather than a standard decorative paint not rated for this heavy use. Ask specifically about durability ratings when choosing paint for furniture that will see daily dining use. This detail matters considerably for how well the furniture holds up over years of family meals.
Apply a clear protective topcoat over painted dining furniture specifically, since this additional layer of protection extends the paint’s life considerably against the spills and scrubbing dining furniture regularly experiences. Choose a food safe topcoat rated for tabletop use. This extra step is worth the modest added cost for furniture in daily use.
10. Sage Green Pendant Lights Over The Island
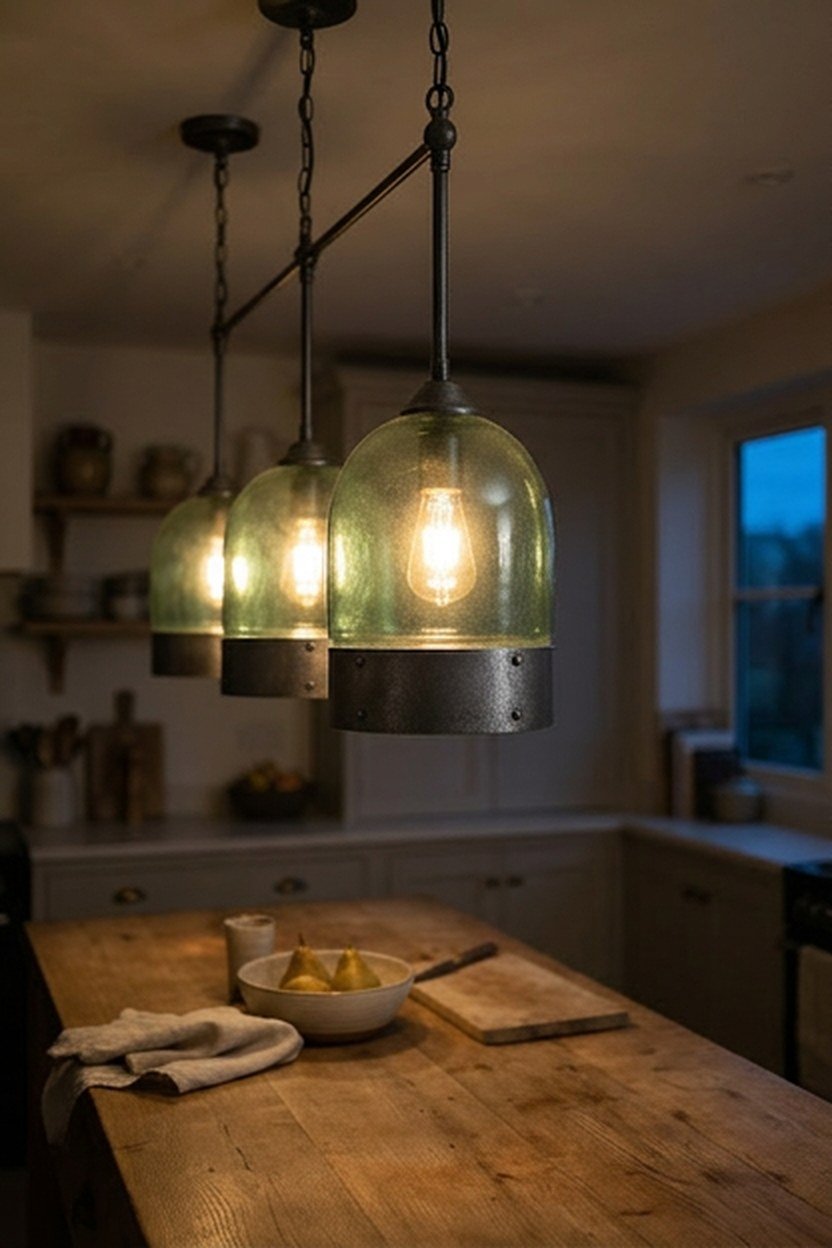
Pendant lights with sage green glass shades or sage green painted metal housings hanging over a kitchen island bring the color to the room’s ceiling level, an area most sage green kitchen ideas overlook. Expect to pay 100 to 250 dollars per pendant for quality sage green lighting fixtures. This detail adds color at a height that draws the eye upward, giving the kitchen a more complete, considered feeling.
Choose pendant sizing and spacing appropriate to your island’s length, typically hanging two or three pendants evenly spaced for a standard sized island. Confirm the specific hanging height allows comfortable movement and visibility across the island without the fixtures interfering with sightlines. This practical sizing consideration matters as much as the color choice itself.
The pendant’s painted metal housing, if applicable, will develop a soft matte texture change near the fixture’s base from heat exposure to the bulb inside over years of regular use. This gradual textured change is normal for painted light fixtures under sustained heat exposure and does not affect the fixture’s electrical function. Regular gentle cleaning keeps the fixture looking its best despite this natural change.
Choosing Glass Versus Painted Metal Pendant Shades
A sage green glass shade lets light diffuse through the colored glass itself, creating a soft, atmospheric glow when illuminated that a painted metal shade cannot replicate. A painted metal shade offers a more solid, defined color statement during daytime when the fixture is not illuminated. Consider how the fixture looks both lit and unlit before choosing between these two material approaches.
Confirm the specific glass or metal shade you choose is rated for your intended bulb wattage, since some decorative glass shades have lower heat tolerance than a standard metal fixture housing. Check the fixture’s specification sheet before choosing a bulb wattage. This small check avoids a shade that discolors or cracks from excess heat.
11. Sage Green Kitchen Runner Rug
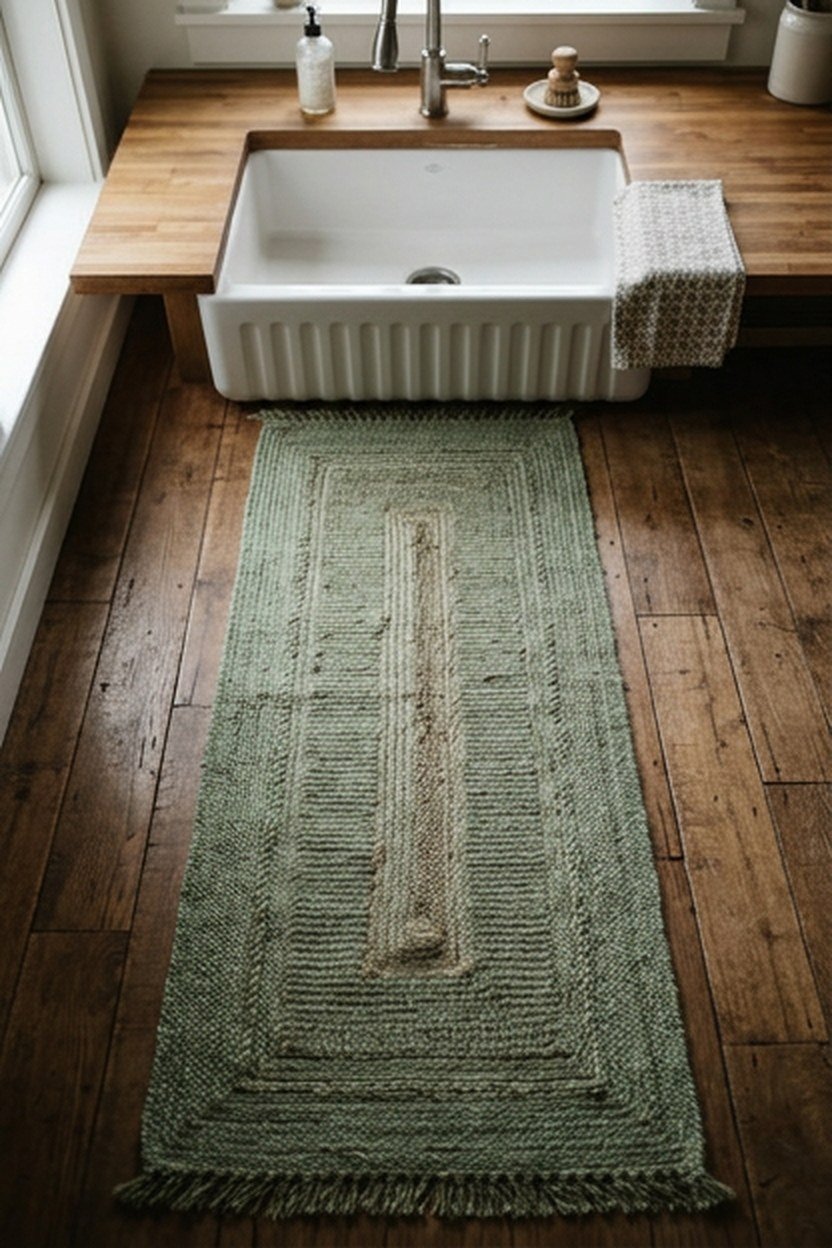
A sage green runner rug positioned in front of the sink or stove adds both color and genuine cushioning comfort for the standing work these areas require. Expect to pay 60 to 150 dollars for a quality sage green kitchen runner in a durable, washable material. This addition also protects flooring from the concentrated wear these high traffic work zones experience.
Choose a washable, low pile runner specifically for kitchen use, since this material handles spills and regular cleaning far better than a plush or delicate rug material would in this specific application. Many quality kitchen runners now come in machine washable materials specifically designed for this demanding use case. This practical material choice matters more here than in almost any other room’s rug selection.
The runner’s fibers will develop a soft natural fiber texture becoming more pronounced as the material compresses slightly from concentrated standing traffic in front of the sink or stove. This gradual textured change is completely normal for kitchen runners under sustained use and does not indicate a defect. Rotating the runner periodically, if long enough, evens out this wear across more of the surface.
Choosing Runner Length For Your Kitchen Layout
Measure your specific work zone length, typically the counter run in front of your sink or stove, before ordering a runner sized to match this area precisely. A runner too short leaves gaps in coverage, while one too long can bunch awkwardly at the ends. Confirm this measurement rather than guessing at a standard length.
Choose a runner with a non-slip backing specifically for kitchen use, since a shifting rug in a kitchen work zone presents a genuine trip hazard during regular cooking tasks. Test the backing’s grip on your specific floor type before relying on it daily. This small check matters more in a kitchen than almost any other room.
12. Sage Green Painted Kitchen Door
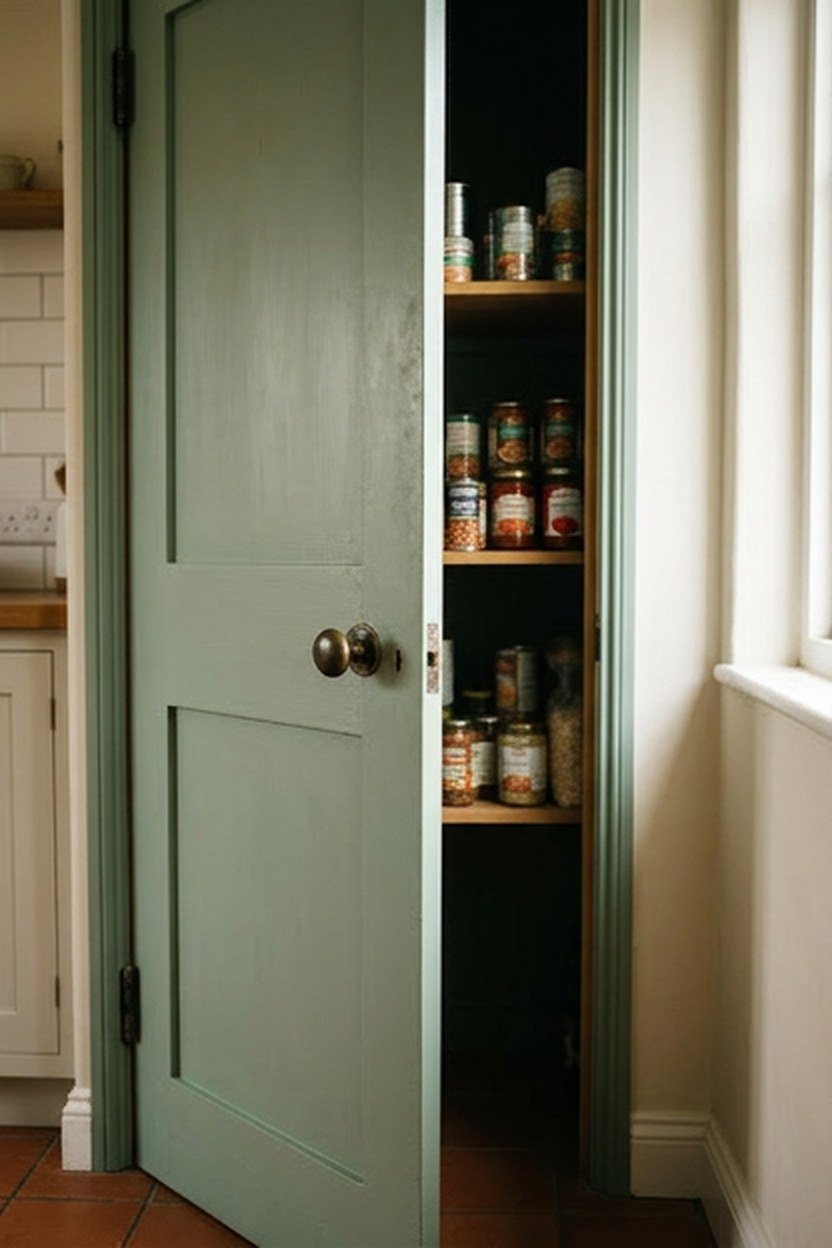
Painting a kitchen’s entry door, whether leading to a pantry, mudroom, or the exterior, in sage green extends the color to an architectural element most kitchens overlook. Expect to pay 40 to 100 dollars for quality door paint and supplies for a single door. This is one of the more affordable ways to add a meaningful pop of color to the room.
Choose a durable, washable paint finish for a kitchen door specifically, since this surface experiences regular hand contact and occasional splashes from nearby cooking activity. A satin or semi gloss finish handles this better than a flat paint would. This practical finish choice matters more for a kitchen door than for a door elsewhere in the home.
The painted door will develop a soft matte texture in the highest contact areas near the handle and kickplate after a year or two of regular use. This gradual textured change from repeated hand and foot contact is completely normal for a painted door and does not indicate a paint quality problem. A touch up kit matched to your paint color keeps these high contact areas looking fresh.
Choosing Which Door To Paint For Maximum Impact
A pantry door or a door leading to a mudroom, positioned somewhere visible from the main kitchen work area, delivers more visual impact than a door tucked into a rarely seen corner. Consider which door in your specific kitchen gets the most visual traffic before choosing where to apply this relatively affordable color update. This placement consideration matters more than the paint choice itself for maximizing the feature’s impact.
Confirm the door’s material is suitable for paint, since some hollow core doors hold paint differently than a solid wood door would, affecting both application and long term durability. Ask a paint supplier for a formulation suited to your specific door material. This small check prevents an uneven or short lived finish.
13. Sage Green And Brass Mixed Metal Accents
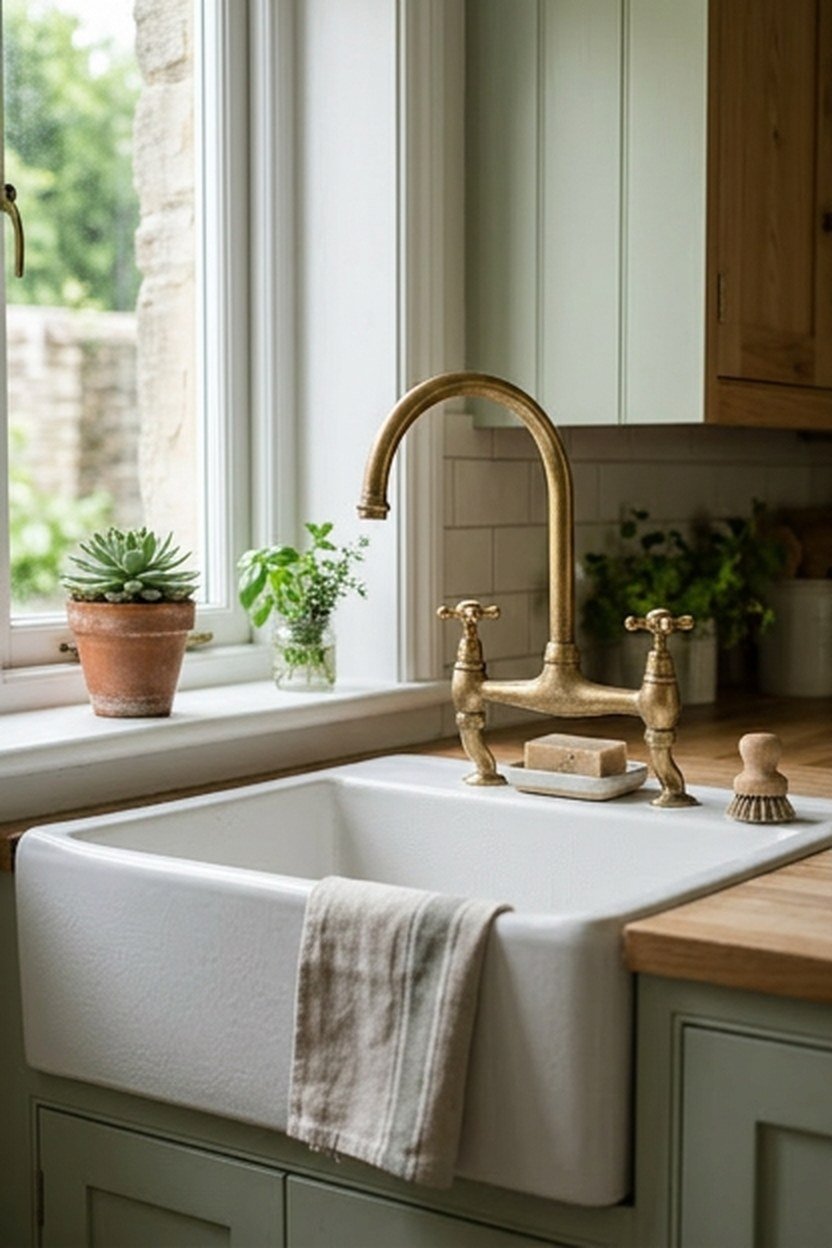
Pairing sage green surfaces with brass hardware, faucets, and light fixtures throughout the kitchen creates a warm, cohesive metal palette that suits the color’s own warm undertone particularly well. Expect to pay 200 to 600 dollars total to update hardware and fixtures to a coordinated brass finish throughout a standard kitchen. This detail ties together sage green elements that might otherwise feel scattered throughout the room.
Choose an unlacquered or aged brass finish rather than a bright, highly polished brass for the most authentic farmhouse pairing with sage green. This slightly more matte, warmer brass tone complements the muted quality of sage green better than a shiny, reflective finish would. Consistency across all brass elements in the kitchen, from cabinet hardware to faucets, creates the most cohesive overall look.
The brass hardware will develop a soft natural sheen change over years of regular handling and kitchen humidity exposure, deepening from its original tone to a warmer, more antique character. This gradual textured change is expected for unlacquered brass specifically and many people choose this finish anticipating this natural aging process. A lacquered finish resists this change if you prefer more visual consistency over time.
Budgeting A Full Hardware Update Across A Kitchen
Count your total hardware pieces, cabinet pulls, knobs, faucet, and any exposed fixture hardware, before budgeting for a full brass update, since this total often runs higher than people initially estimate from focusing on just the most visible pieces. Prioritize the most visible pieces, like the faucet and island hardware, if budget requires phasing this update over time. This phased approach still achieves a cohesive look once completed.
Keep one hardware sample on hand when shopping for additional pieces over time, since brass finishes can vary meaningfully between manufacturers even within similarly named finish categories. Bring this sample into the store rather than relying on memory for color matching. This small habit avoids an obvious mismatch between old and new pieces.
14. Sage Green Botanical Wallpaper Accent
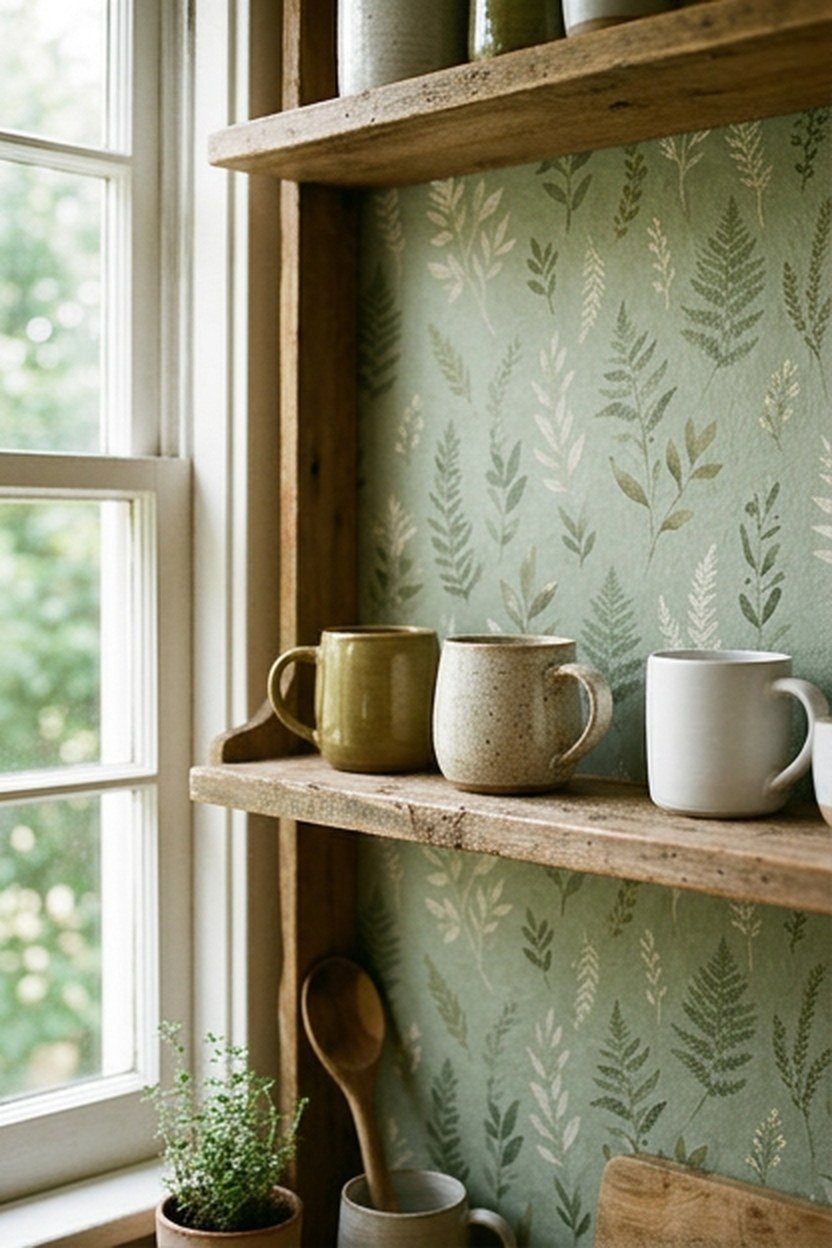
A botanical print wallpaper featuring sage green tones, applied to a single accent wall or the interior of open shelving, brings pattern and depth that a solid paint color alone cannot achieve. Expect to pay 100 to 300 dollars for quality wallpaper covering a standard accent wall or shelving backing. This detail suits a kitchen wanting more visual interest than solid sage green surfaces alone provide.
Choose a wallpaper specifically rated for kitchen humidity, typically a vinyl coated or scrubbable option, rather than a standard paper wallpaper not built for this environment. This distinction matters more for a kitchen application than for wallpaper used in a drier room like a bedroom. Confirm this rating specifically when selecting a pattern for kitchen use.
The wallpaper’s pattern can show a very faint, even fading nearest any window receiving direct sun exposure over several years of use. This gradual, cosmetic change affects the whole exposed section evenly rather than in a blotchy or uneven way and is normal for wallpaper under sustained light exposure. Choosing a UV resistant wallpaper formulation slows this fading if the wall gets substantial direct light.
Applying Wallpaper To A Small Kitchen Accent Area
Consider applying botanical wallpaper to just the back panel of open shelving rather than a full wall if you want to test the pattern in a lower commitment, more easily changed application. This smaller scale application still delivers real visual impact while remaining simple to update later if your taste changes. Many people start with this smaller application before committing to a full wall treatment.
Hire a professional installer for a full wall wallpaper application specifically, since a botanical pattern with a clear repeat requires more precise alignment than a solid color paint job to look genuinely professional. Ask to see examples of a similar patterned installation before hiring. This small check protects the investment in quality wallpaper.
15. Sage Green Kitchen Stools
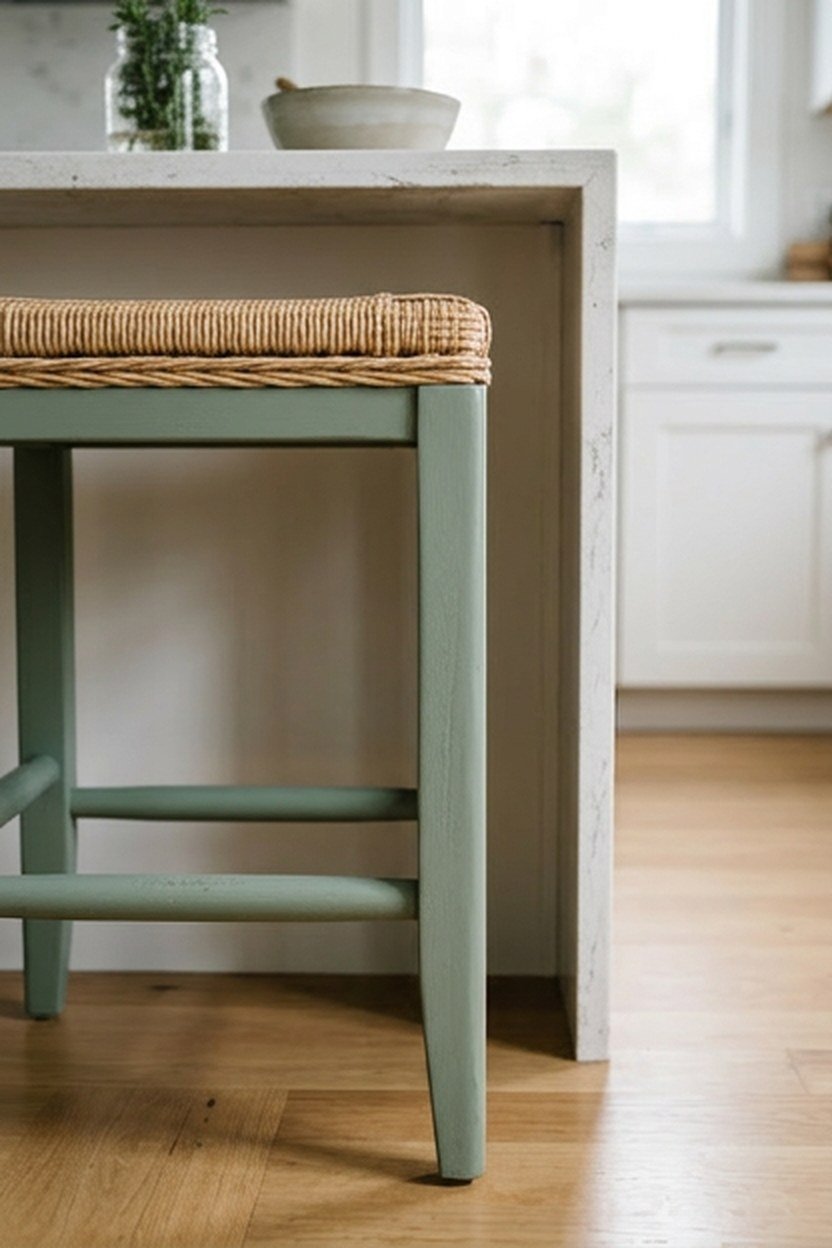
A set of sage green painted or upholstered counter stools at a kitchen island introduces the color at seating level, completing the room’s palette from countertop to floor. Expect to pay 80 to 180 dollars per stool for a quality sage green option. This addition works especially well paired with a sage green island, creating a cohesive color moment at the room’s natural gathering point.
Measure your specific counter or island height before ordering stools, since a mismatched stool height creates an uncomfortable seating experience regardless of how well the stools match your color scheme. Standard counter height typically needs a stool with a seat height around 24 to 26 inches, though this varies by specific counter. Confirm this measurement rather than assuming a standard stool size will fit.
The stool’s painted or upholstered surface will develop a soft matte texture change at the seat edge and footrest from years of regular use and foot contact. This gradual textured change at these specific contact points is normal for kitchen stools under sustained daily use and does not affect structural stability. Regular cleaning maintains the finish’s appearance despite this natural wear pattern.
Mixing Stool Materials For Visual Interest
Consider a wood seat with sage green painted legs, or an upholstered seat in a complementary neutral fabric with a sage green frame, rather than a single material fully painted sage green throughout. This mixing approach adds textural variety that a fully monochromatic stool cannot achieve on its own. Both approaches work well, so this choice comes down to your own preference for visual complexity versus simplicity.
Test stool comfort for realistic seating duration before committing to a full set, since a stool that looks charming can still be genuinely uncomfortable for extended sitting during a longer meal or gathering. Sit in a sample stool for several minutes before ordering multiples. This small test prevents an expensive mistake that affects every future meal.
What A Sage Green Farmhouse Kitchen Actually Costs
A complete sage green farmhouse kitchen update can range from under 200 dollars for a few accents to 3000 dollars or more for a full cabinet repaint and coordinated hardware. Most homeowners land somewhere in the middle, choosing a cabinet repaint or an island as the primary statement before adding smaller accents. Prioritize the changes with the most daily visual impact for your specific kitchen layout.
Spread a larger project like a full cabinet repaint across a realistic timeline if the full cost feels like a stretch, starting with smaller accents to test the color before committing to permanent surfaces. I recommend this phased approach for sage green, since living with the color in smaller doses first confirms it genuinely works in your kitchen’s light. This staged confirmation prevents an expensive commitment to a color that does not quite work once fully applied.
The table below breaks down rough cost tiers for a sage green farmhouse kitchen project, acknowledging that specific material and labor costs shift these numbers considerably. Treat it as a planning starting point rather than a firm quote for your specific project. Most homeowners land in the middle tier once an island and a few accents are included.
| Budget tier | What it covers | Approach |
|---|---|---|
| Under $200 | Textiles, ceramic accents, small updates | Low commitment, easily changed |
| $200 to $1000 | Island repaint, backsplash, open shelving | Moderate, semi-permanent commitment |
| $1000 and up | Full cabinet repaint, coordinated hardware | Full kitchen transformation |
Common Mistakes When Using Sage Green In A Farmhouse Kitchen
Choosing a sage green shade based purely on a photo online without testing it in your own kitchen’s actual light is the most common mistake, since this color shifts more than many other paint colors depending on lighting conditions. Always test physical samples in your own space at different times of day before committing to a full kitchen application. A shade that looked perfect in someone else’s photographed kitchen can read completely differently in yours.
Applying sage green without any lighter contrasting element, resulting in a kitchen that feels heavy or monochromatic, is the second frequent mistake. Pair sage green with white, cream, or natural wood tones rather than combining it with other deep or saturated colors throughout the same space. This contrast is what keeps a sage green kitchen feeling fresh rather than heavy.
Choosing a sage green with the wrong undertone for your kitchen’s other fixed materials, like countertops or flooring, is the third mistake, leading to a color clash that undermines an otherwise well executed idea. Bring your existing material samples when choosing a specific sage shade rather than selecting the color in isolation. This coordination step prevents a costly mismatch discovered only after a full repaint or installation.
Testing Sage Green Before A Full Kitchen Commitment
Paint a large sample board, at least two feet square, in your candidate sage green shade and view it against your actual cabinets, countertop, and flooring before committing to a full kitchen application. A small paint chip cannot reveal how a color reads at a larger scale in your specific space. This larger sample test is worth the modest extra effort for a decision this significant.
Live with the sample board in the kitchen for at least a few days, viewing it in different lighting conditions, before finalizing your choice, since first impressions in a single lighting condition can be misleading. Check the sample at morning, midday, and evening before deciding. This patience prevents a costly full kitchen commitment to the wrong shade.
Conclusion
Sage green earns its place as the color replacing all white in modern farmhouse kitchens by offering genuine practical advantages, better wear resistance and more natural pairing with wood tones, alongside its aesthetic appeal. Start with a smaller, lower commitment application like textiles or accents to confirm the color works in your specific kitchen before moving to a larger investment like a full cabinet repaint. The fifteen ideas covered here scale from an affordable accent update up to a complete kitchen transformation.
Prioritize testing your specific sage shade in your own kitchen’s actual light and material context above simply trusting a color trend at face value. A well chosen and properly tested sage green farmhouse kitchen rewards you with a warm, current look that still respects the practical demands of a genuinely used kitchen. Get the testing right, and the color will keep earning its place for years to come.
Frequently Asked Questions
Is sage green a passing trend or a lasting color choice? Sage green’s practical advantages, hiding wear better than white and pairing naturally with wood tones, suggest more staying power than a purely aesthetic trend. Choosing a more muted, less saturated sage shade also helps the color age well over time.
What is the most affordable way to try sage green in my kitchen? Textiles like curtains and a kitchen runner, along with a few ceramic accents, offer the lowest cost and most easily reversible way to test the color. This approach lets you confirm sage green works before any permanent commitment.
Does sage green work with warm or cool kitchen lighting? Sage green generally performs better under warm lighting, which complements its slightly warm undertone, though it can work under cooler lighting with careful shade selection. Test your specific paint sample under your actual kitchen lighting before committing.
Can I pair sage green with materials other than wood and white? Yes, sage green also pairs well with black metal accents, brass hardware, and natural stone materials like marble. Avoid pairing it with other highly saturated colors, which can compete rather than complement the muted sage tone.
How do I know if a sage green will clash with my existing countertop? Bring your actual countertop material or a sample into consideration when choosing a specific sage shade, testing the two together in your kitchen’s actual lighting before committing. A countertop with strong warm or cool undertones needs a correspondingly coordinated sage shade.
What is the biggest risk of choosing sage green for a kitchen? Choosing a shade based on photos alone without testing it in your own kitchen’s specific lighting is the biggest risk, since the color shifts noticeably between lighting conditions. Always test physical samples in your own space before a full commitment.